Chapter 8 Maintenance and troubleshooting
53
OsmoTECH® Single-Sample Micro-Osmometer User Guide
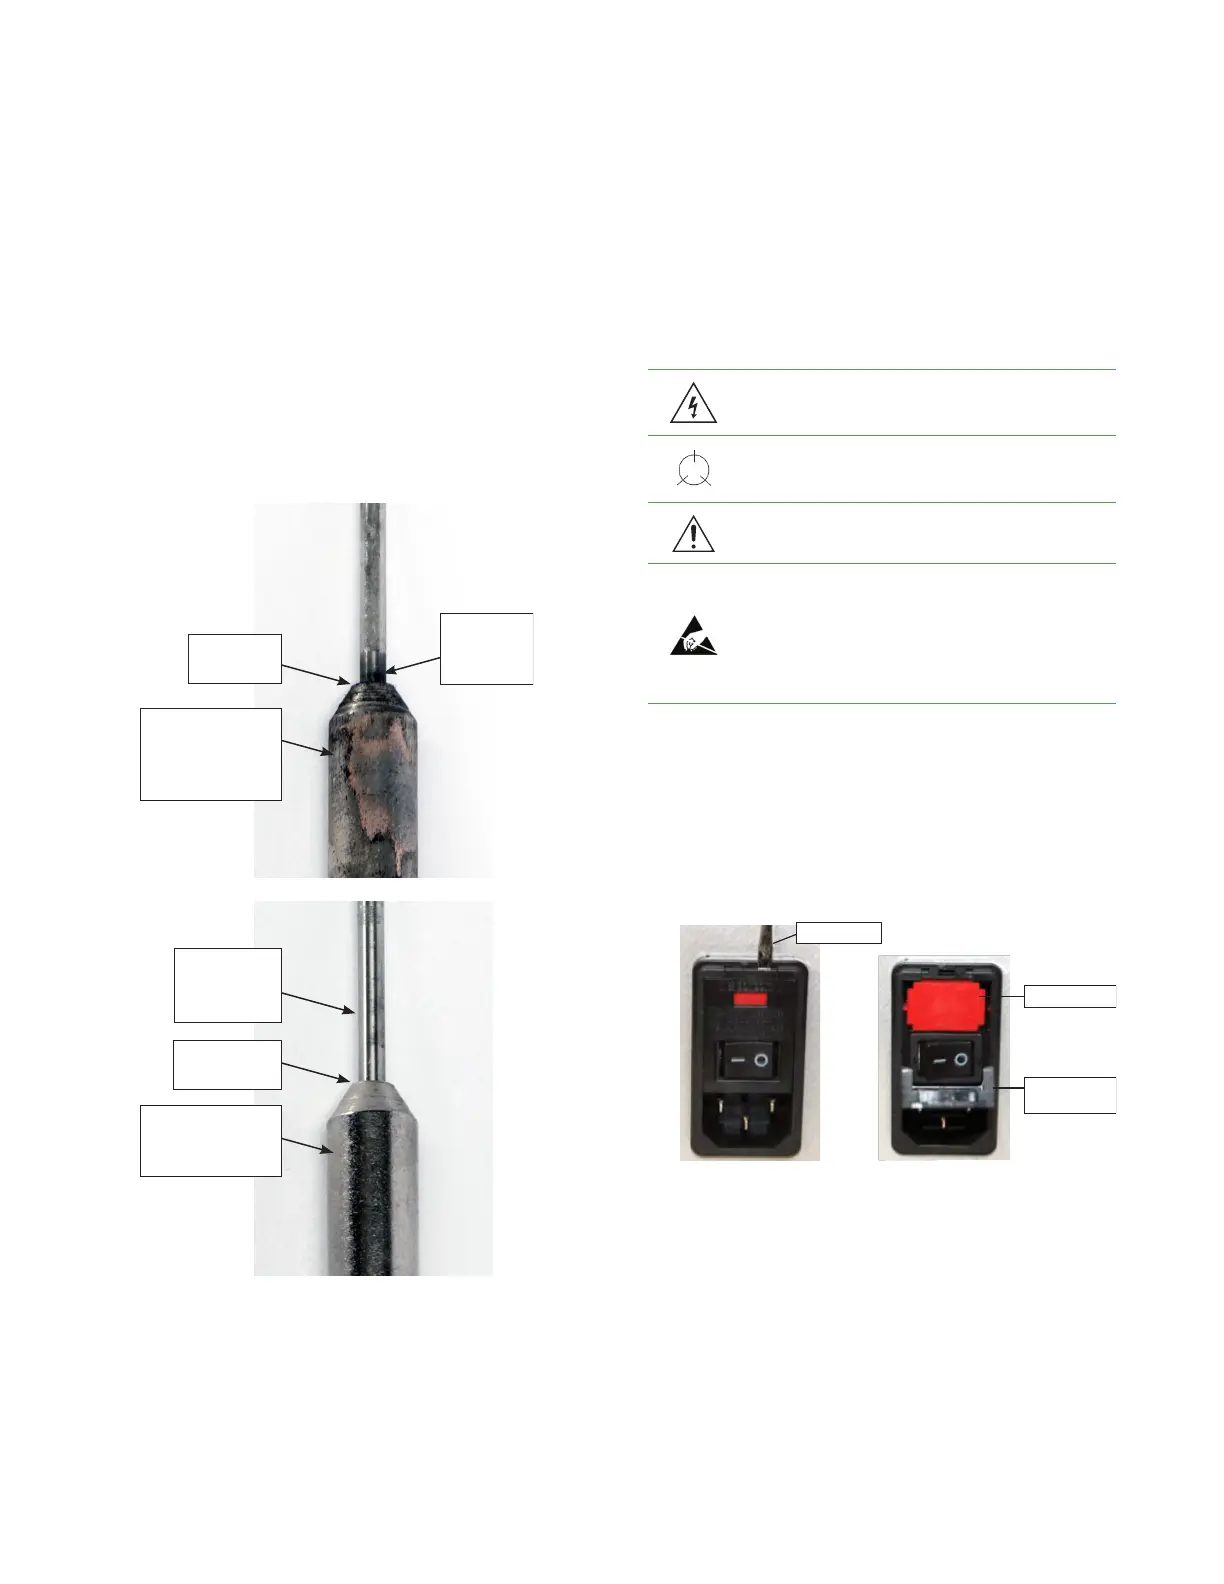
7. Inspect the solenoid plunger for excessive wear and
deposits.
• If the plunger shows signs of fouling (Figure 3),
clean it with a lint-free cloth dampened with
isopropyl alcohol or a cleaning solution for protein
removal. (Thermo Scientific Orion Cleaning
Solution, part number 900021 is recommended.)
• If the plunger does not show signs of wear,
continue to step8.
Black
deposits
on shaft
Filings
present
Plating is
uneven, with a
dull, hammered
appearance
No black
deposits
on shaft
No filings
present
Plating is
even, bright,
and shiny
8. Return the cleaned solenoid plunger, including
spring, retainer and any washers, to the solenoid
body. Screw in the retainer bracket screws. Replace
the instrument cover, and remove the chamber
cleaner.
9. If necessary, recalibrate the OsmoTECH.
Fuse replacement
Tools required:
• Small flat screwdriver
• Static Grounding Wrist Strap
WARNING: Hazardous Voltage
WARNING: Internal components may be
damaged by static electricity.
CAUTION: Improper connections may cause
damage to the instrument.
CAUTION: A discharge of static electricity from
contact with the human body or other
conductor may damage system boards or static
sensitive devices. NEVER UNPACK, TOUCH OR
HANDLE ANY PCB WITHOUT WEARING A
GROUNDING (EARTHING) STRAP TO MINIMIZE
YOUR STATIC DISCHARGE.
1. Power o the OsmoTECH.
2. Unplug the instrument and remove the power cord
from the instrument.
3. Use a small flat screwdriver to open the Fuse Holder
Door located on the Power Entry Module.
Screwdriver
Fuse Holder
Fuse Holder
Door (open)
4. Remove the Fuse Holder; then remove the two fuses.