Chapter 3 Configuring settings
25
OsmoTECH® Single-Sample Micro-Osmometer User Guide
2. Press the function that you want to run.
3. Log into your account.
NOTE: If you enter an incorrect password five times, your
account becomes locked and an administrator or
supervisor must unlock it.
Default user accounts
• Admin: Reserved for administrative use. If you are
setting up user accounts, use Admin to configure the
accounts. (See Setting up user accounts.)
• Service: For use by qualified service personnel.
NOTE: If your site does not have user accounts, all
operators use the Admin account.
NOTE: The default password for the Admin account is
password1. You can change the Admin password.
See Editing a user.
3.2 Setting the date and time
Your instrument has a built-in real time clock (RTC) to
keep track of the current date and time.
You can use a network time server to synchronize the
time on your instrument to a network server or you can
set the time locally for each instrument.
Synchronizing to a network time server
The Simple Network Time Protocol (SNTP) synchronizes
the clock to a server that is already synchronized to a
source, such as a radio, satellite receiver, or modem. The
server sends a timestamp in Coordinated Universal Time
(UTC), and time zone information is needed to set the
correct local time.
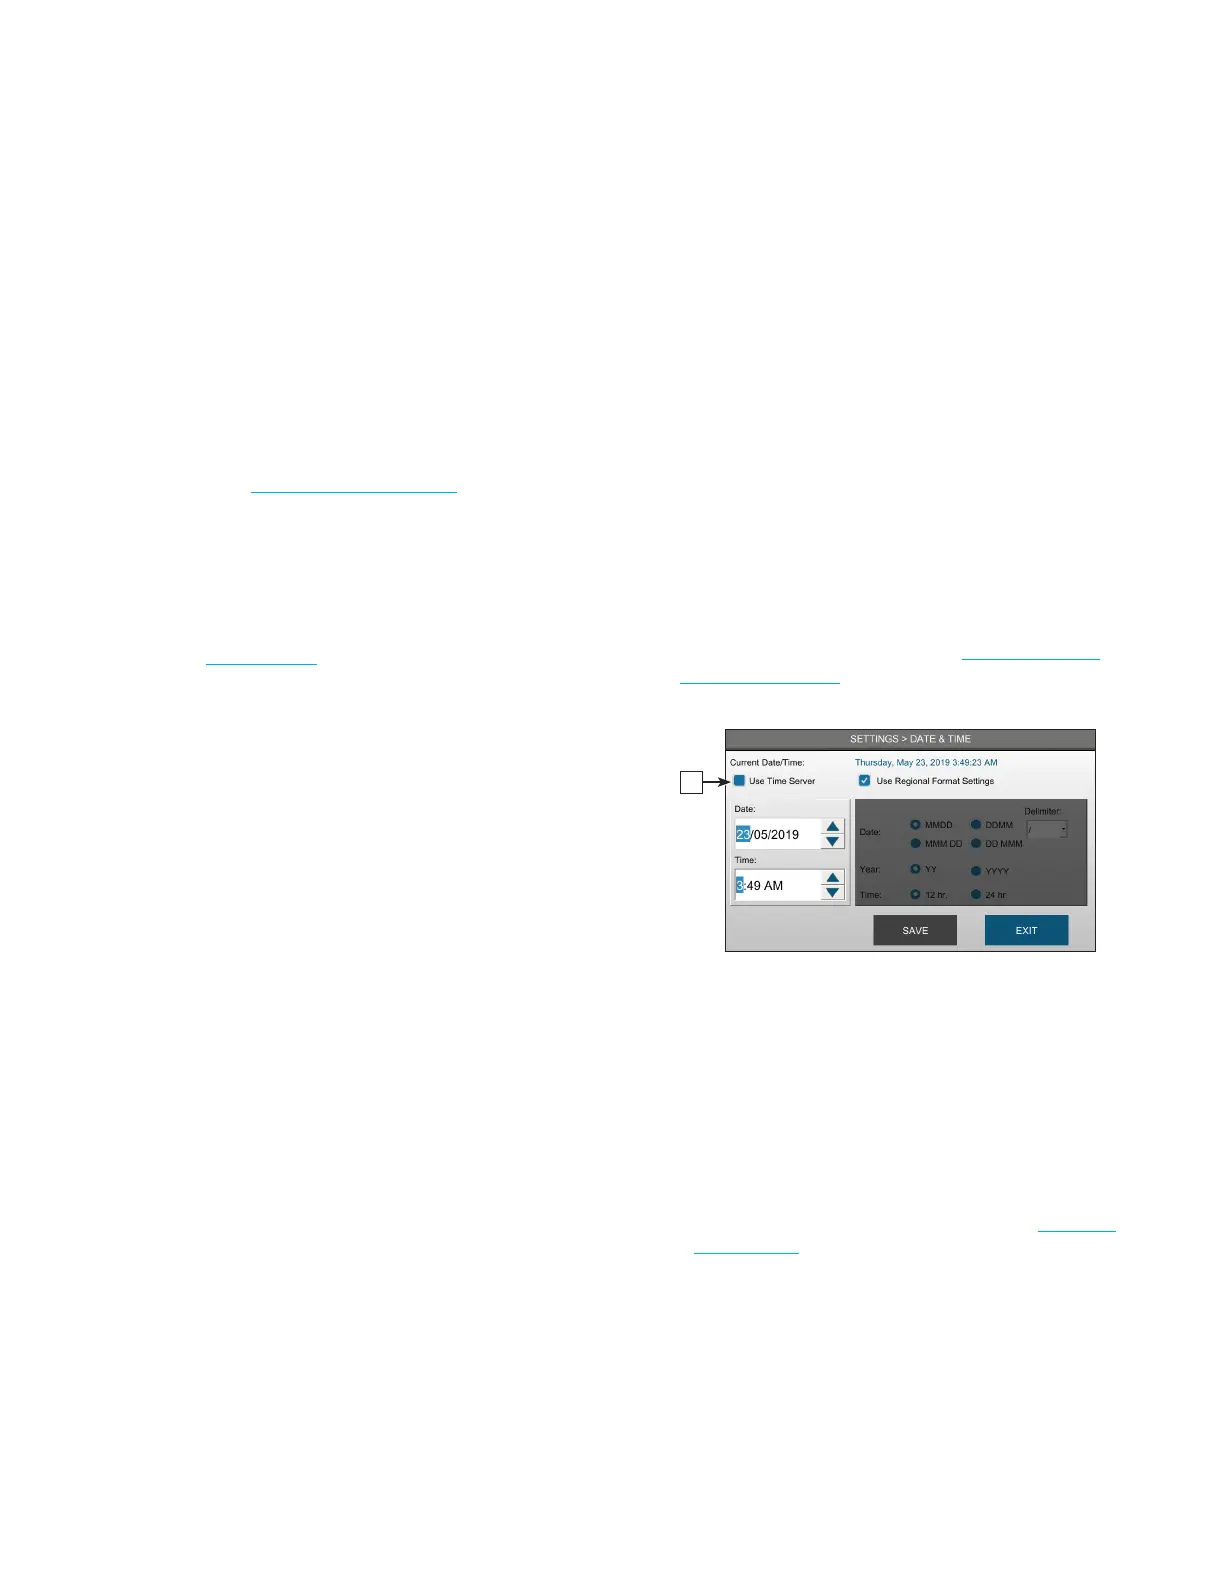
1. Press DATE & TIME and login (see Logging in from
the Settings screen).
A
2. Select the Use Time Server checkbox [A] to
synchronize the instrument time with the server.
3. Enter the SNTP Server Name.
4. Select a Time Zone.
5. Select a date and time format:
• To automatically set the date and time formats
based on the language settings on the instrument,
select Use Regional Format Settings (see Changing
the language).
• Otherwise, change the Date , Year, and Time
formats, and the Delimiter as needed.
6. Press SAV E.