Contact: AIRSYS North America Phone: (855) 874-5380 Page 40 of 112
Email: ASNSupport@air-sys.com Web: http://airsysnorthamerica.com Rev 1.15
Set the Number of Units and Zones
Note: If the PGD was removed from the controller to configure the unit IP addresses and the model and
serial numbers, it must be reconnected before proceeding with the following steps.
1. On the main controller hold the Esc button until the main screen is displayed.
2. From the Main Screen, press Prg and enter the password (0004).
3. Press Down until the cursor is over “Control Config” and press Enter.
4. The cursor should be over “Network”. Press Enter.
5. Press Enter until the cursor is by “Total HVACs”. Use the Up and Down buttons to change the
value until it matches the total number of HVACs connected to the controller. Press Enter to
confirm.
6. Press Enter until the cursor is by “Total Zones”. Use the Up and Down buttons to change the
number of temperature zones. Press Enter to confirm.
Zone Configuration (Optional)
The ASMUC.6 controller can control up to 6 units organized in up to 4 zones. A different temperature
setpoint can be set for each zone. Each zone can have between 1 and 6 units and any unit can be
assigned to any zone. To do so, perform the following steps from the controller:
1. Hold the Esc button until the main screen is displayed.
2. Press the Prg button and enter the password (0004).
3. Press Down until “Control Config” is selected and press Enter.
4. The cursor should be over “Network”. Press Enter.
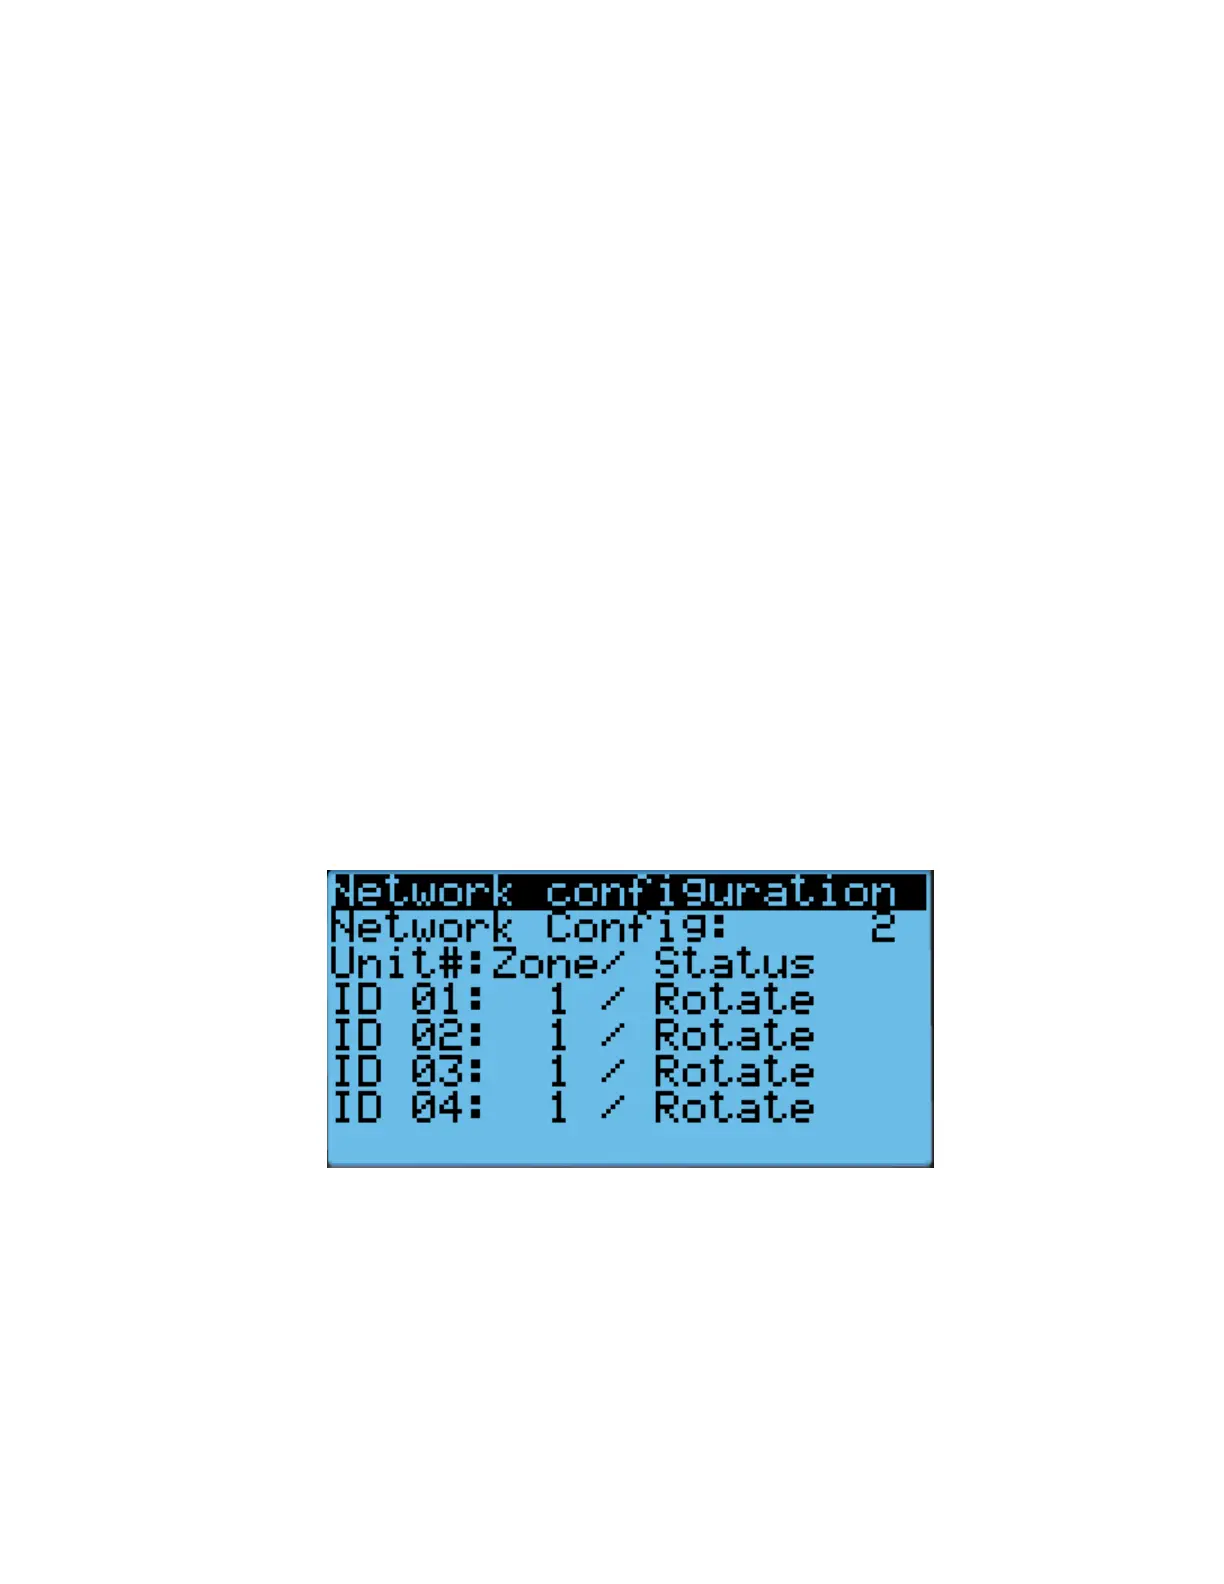
5. Press Down until the screen below is displayed and press Enter.
Figure 18: Zone Configuration Screen
6. Press Enter until the cursor is next to the desired unit and in the “Zone” column.
7. Press Up or Down until the desired zone is selected and press Enter to confirm.
8. Press Enter until the cursor is in the right most column.
9. Press Up or Down to scroll through the unit setting. The settings should generally stay as
“rotate”, even for single unit zones. If the unit is set to standalone, it will stay on unless turned off
from the unit itself.
10. Repeat steps 6-9 for all units.