8
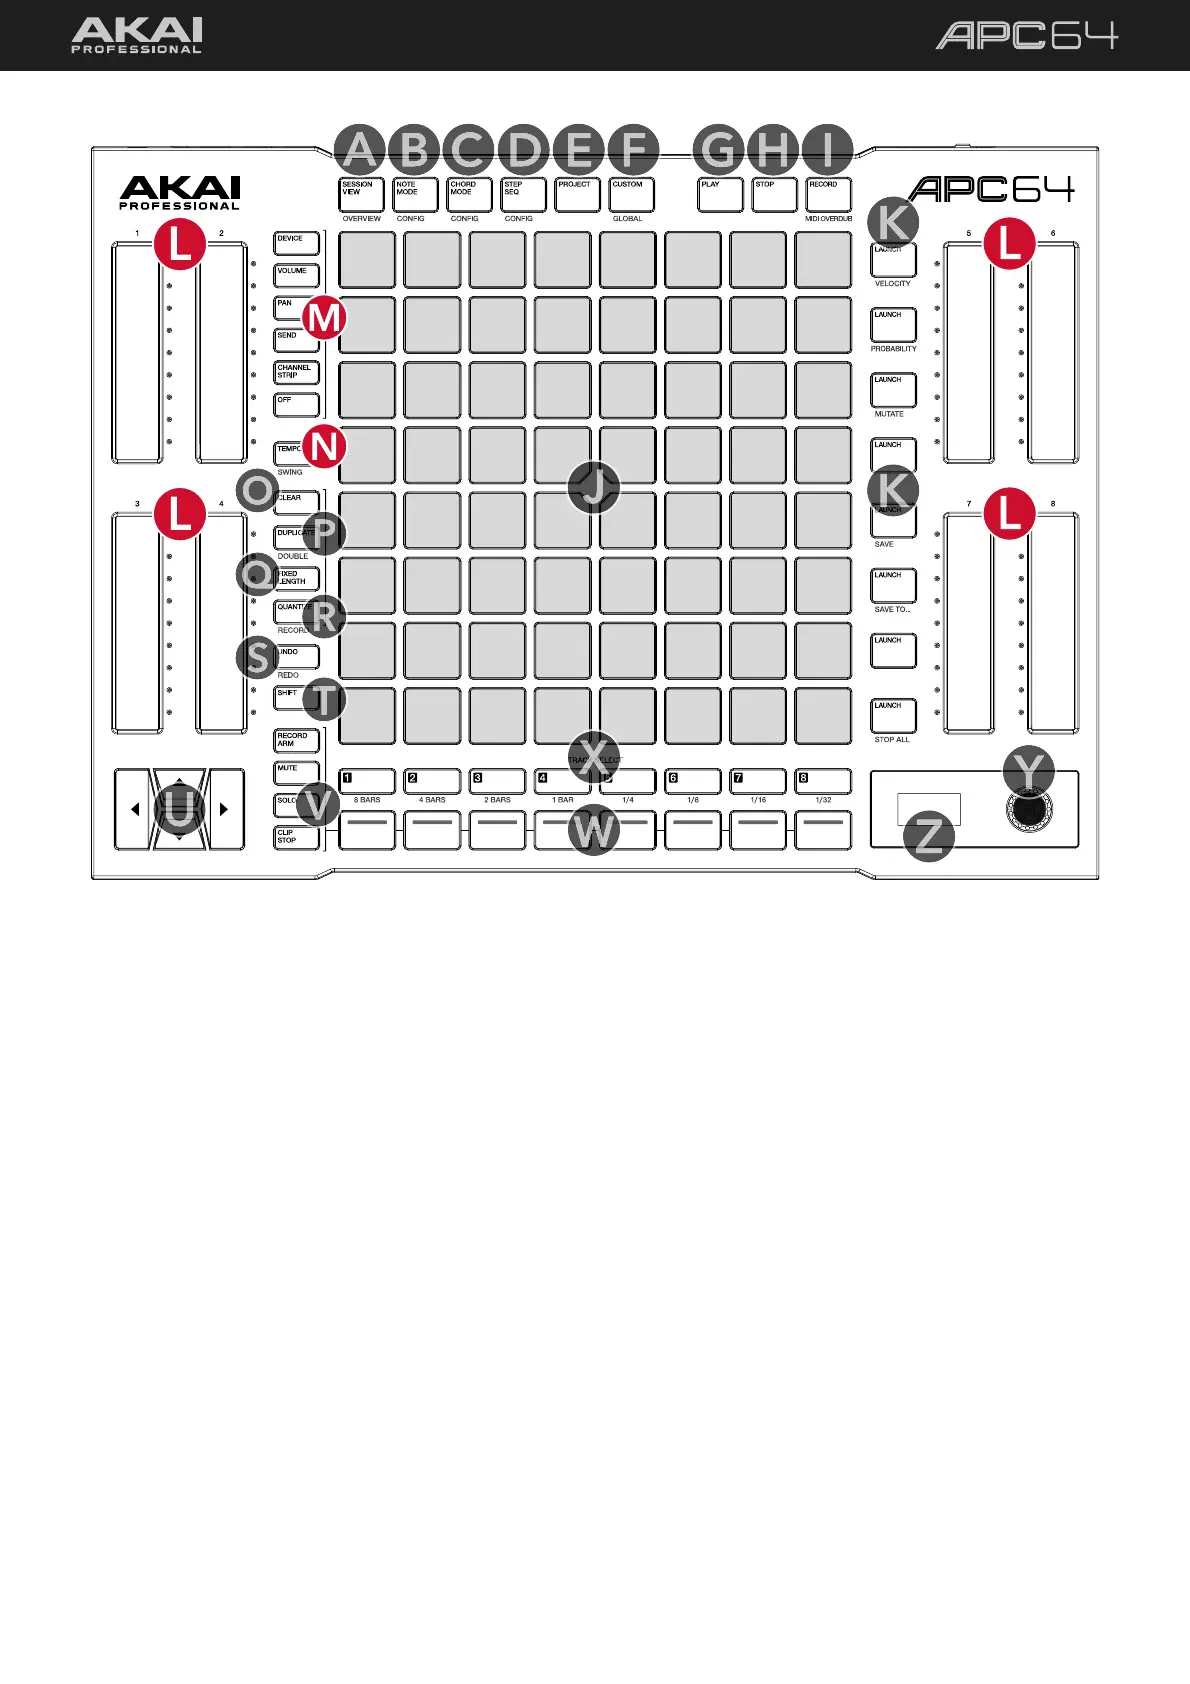
L. Touch Faders: Slide your finger up and down these touch-sensitive strips to control selected session
parameters. Touching a spot on the fader will set the parameter to that level immediately. The current fader
position is represented by a white dot in the LEDs next to each fader. When automation has been recorded
to a touch fader, the white dot will turn red. The remaining LEDs will be lit according to the track color and
the current position of the parameter relative to its default value.
Press and hold SHIFT and touch a fader to finely adjust the selected parameter.
M. Touch Fader Controls: Use these buttons to set the control parameter for the Touch Faders:
DEVICE: Device controls. While holding this button, use the up and down cursors to cycle between
banks of controls in a device. Use the left and right cursors to switch focus between multiple devices on
one track.
VOLUME: Track volume.
PAN: Track stereo panning.
SEND: Track Sends. Press this button again to cycle between Send channels when more than one is in use.
CHANNEL STRIP: Combination of Volume, Pan, and Sends for the selected track.
OFF: Disables the touch faders.
See 5.5 Operation > Touch Faders for more information.
N. TEMPO: Press this button in time with the desired tempo to enter a new tempo.
Press and hold to view session tempo on the display and then use the encoder to adjust it.
Press and hold SHIFT and this button and then use the encoder to adjust the SWING percentage of the
internal Step Sequencer, as shown on the display.