5
Tightly install
the
bracket®
at
the designated paper
template
position with
the
4
self-tapping
screws (M4
x
14mm)@.
../
Self-tapping screw
l
(M4
x
14
mm)
(x4)
T
Bracket
(x4)
i
.....
.........
'§;l
Mount
the
brackets
symmetrically
along
the
paper template.
6
Remove
the
paper
template.
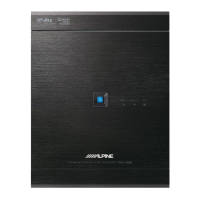
7 Place
the
Base
unit
on
the
bracket®
and
install
the
device
tightly
with
the
4 screws (M3 x 6
mm)
(f).
Base
Unit
..
1
Screw
(M3
x 6 mm)
4-
EN
Mounting the Microphone.
When measuring
Jm
printEQ
or
Auto
TC
R before implementing
Roa
dEQ
automated measurement,
th
e installati
on
pos
it
ion
is
different.
Before ins
ta
lling the micr
ophone
, make sure
to
refer to
"Au
toma
ti
c
Measurement
Fun
ction" in
the
Owner's
Manual-
PC
or
Co
mm
ander
guide
.
For
safe
us
e,
make
sure
of
the
following:
•
location
is
stable
and firm.
•
driver's
view and operations
are
not obstructed.
•
Mount the road noise measurement microphone
on
the sun
visor, dashboard
or
roof
interior.
•
Installation
on
the sun visor is the most common installation
position to measure road noise while driving.
•
Do not install the unit
or
wi
ring in a location that
int
erferes
with driving
or
an air bag.
• The mounting clip can be removed from the microphone base,
as in the illustration below.
If
yo
u mount the microphone using
the ba
se
without the clip, u
se
the supplied adhesi
ve
tape as
needed.
Microphone base
Clip /
-(0
Adhesive
tape