Features
Install the included
Sound
Manager software for
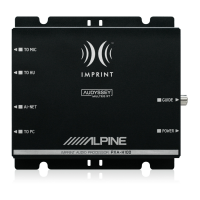
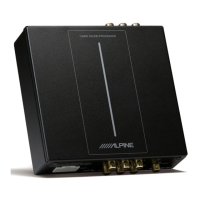
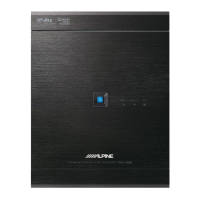
PXA-H800
on a
PC.
This provides the user with access to the all functions/features
of
this
device.
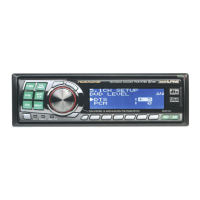
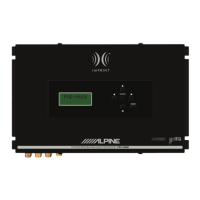
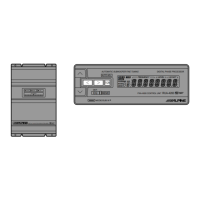
Use the
RUX-C800
(sold separately) to have access to many
of
the
PXA-H800
functions without the need for a
PC.
An
Ai-NET
compatible head unit provides limited functionality through
its controls.
•
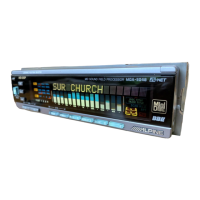
The RUX-C800
Commander
provides
access
to
most
of the
PXA-
H800
functions.
•
To
use all
Automatic
Measurement
and
Audio
Setting/
Adjustment
functions, a
PC
connection
is required.
• Availability
of
operations
Power
ON/OFF
Automatic Audio setup/
adjustment
adjustment
Lc,.
Commander (sold
(Only
some
separately)
0
functions
0
(RUX-C800)
available*
1
)
PC(Sound
Manager for
X
0 0
PXA-H800)
Lc,.
Ai-NET
(Only
some
compatible head
0
X
functions
unit
available*
2
)
*
1
You
cannot run lmprintEQ measurement .
.2
For
details about the functions available on the
Ai
-
NET
compatible
head unit, refer to
"Using
with
Ai-NET
Connections" (page
/0)1
(page 35).
•
When
Sound
Manager for
PXA-H800
is running, the
RUX-C800
Commander becomes disabled.
•
For
details about the functions available on the Commander
and
on
the
PC
,
refer to
"Function list"
(page 5).
The inherent sound quality inside a vehicle varies widely. Numerous
factors, including media used, vehicle type, speakers, etc., contribute to
this inconsistency. This processor is able
to
compensate for many
of
these factors
to
optimize the sound automatically.
lmprintEQ
lmprint
EQ
is a system to obta
in
the optimum acoustic effect at each
seat
ba
sed on the automatically measured acoustic data of the
cabin.
RoadEQ
Ro
ad
EQ
(REAL-TIME
OPTIMIZED ADAPTIVE DRIVING
EQ) is
a
function to automatically adjust the
EQ
properties
in
accordance with
the
ro
ad noise while driving.
TCR (Time Correction
)I
Auto TCR (Automatic Time Correction)
In
a vehicle, it is not possible to change the listening
po
sitions of the
user. Using Time Co
rr
ec
ti
on, an optimized
li
stening pos
iti
on is
created no matter whe
re
the user is seated.
Thi
s automated
adjustment is able
to
focus the auditory image as
well
as expand the
sound
fi
eld making for a more natural sound.
"TCR"
digitally delays the sound output from each speaker
in
order to
align the timing of
th
e sound reaching the
li
stener.
B-EN
MXPius
MX
(Media Xpander)
Plus
enhances the vocal and instrumental
sounds for each music source.
MX
Plus
generates harmonics and
compensates high frequency info
rm
ation. This helps improve music
clarity even
in
a cabin with loud road noise.
Graphic Equalizer
The Graphic
EQ
divides the audio band into
31
individual bands.
Each band is individually
controlled
to balance the sound and
enhance detai
l.
Parametric Equalizer
The Parametric
EQ
has fewer bands but gives more control over
where the band is located in the audio spectrum. The user can also
control how much overlap with adjacent frequencies (Q). This
provides
you
with a sound control feature of professional-level, which
allows you to adjust an extremely narrow range in pin-point fashion
without affecting the neighboring sound region
s.
X-Over
The
X-Over allows this processor to output audio within a specific
band. These specific bands are sent to drive speakers optimized to
reproduce those bands. Use the integrated
HPF
(High
Pass Filter)
or
LPF
(Low
Pass Filter)
to
create a specified output for each channel.
The
Slope
and Level of each channel
is
also adjustable.
5. 1 ch theater surround compatible
Get tru
e,
5.1 "Theater
Surround."
Create a concert
hall
experience in
your vehicle.
EUPHONY
EUPHONY
is
an innovative sound field reproduction method which
DiMAGIC has created with the
la
test acoustic technology based on
the core concept of "enjoying
beautiful sound."
Taking maximum
advantage
of
minute differences of sound between
th
e right and left
stereo signal
s,
reverberation, and acoustics, with adaptive filte
rs
, the
realistic sensation of sound field
is
created. The system features
sound quality that
is
pleasant even after long listening, which is the
optimum sound for long distance driving.
Before
You
First
Use
the
Unit
When you first use the unit, set the following:
Turning Power
On
(page 10)/(page 35)
Setting the Speaker System (page 13)/(page 37)
Setting the AUX
Input
System (page 14)/(page 39)