154
When the print result is faint or white lines or black lines are printed
Follow the steps below to clear the problem efficiently.
Check if the paper is
loaded correctly.
For roll paper:
Open the roll paper cover, and load the paper again.
For details, see "Replacing Fanfold Paper with Roll Paper" on page 75.
For fanfold paper:
Place the stack of fanfold paper straight at least 40 mm {1.57"} away
from the back of the printer.
For details, see
"Replacing Roll Paper with Fanfold Paper" on page 66.
Check if the print nozzles
are clogged.
Perform nozzle check and check whether print nozzles are clogged.
If the print nozzles are clogged, perform head cleaning. Hold down the
cleaning button for more than three seconds to start head cleaning.
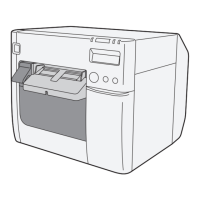
Check if the shutters on the
platen on the outer side of
the paper are open.
When the shutters on the platen on the outer side of the paper are set to
open, air current may cause white lines on the print result. Follow the
instructions on the label on the top of the printer, and set the shutters on
the platen. For details, see
"Shutter Adjustment" on page 40.
Check if the paper you are
using matches the paper
set in [Media Type].
Check the paper you are using and the [Media Type] settings.
For details, see step 9 in "Replacing Roll Paper with Fanfold Paper" on
page 66, or step 10 in "Replacing Fanfold Paper with Roll Paper" on page
75.
Correct the paper feeding
misalignment
The paper feeding amount changes depending on the paper you are
using, and it may cause white lines or black lines to be printed.
On the printer driver's [Printer Utilities] tab, click [Printer Setting Utility].
When the PrinterSetting screen is displayed, click [Printer Adjustment] -
[Print Head Alignment], and per-form [Banding Adjustment].
For details, see the following:
"How to Make Media Settings" on page 172
"Print Head Alignment" on page 136