Considering this demonstration only needs to set the direction of PIO as output, which is the default
direction of the PIO IP, the step above can be skipped. The following statement is used to set the
output state of the PIO.
alt_write_word(h2p_lw_led_addr, Mask );
The Mask in the statement decides which bit in the data register of the PIO IP is high or low. The
bits in data register decide the output state of the pins connected to the LEDs. The HEX controlling
part is similar to the LED.
Since Linux supports multi-thread software, the software for this system creates two threads. One
controls the LED and the other one controls the HEX. The system calls pthread_create, which is
called in the main function to create a sub-thread, to complete the job. The program running in the
sub-thread controls the LED flashing in a loop. The main-thread in the main function controls the
digital shown on the HEX that keeps changing in a loop. The state of LED and HEX state change
simultaneously when the FPGA is configured and the software is running on HPS.
Demonstration Source Code
Build tool: Altera SoC EDS V13.1
Project directory: \Demonstration\ SoC_FPGA\HPS_LED_HEX
Quick file directory:\ Demonstration\ SoC_FPGA\HPS_LED_HEX\ quickfile
FPGA configuration file : soc_system_dc.rbf
Binary file: HPS_LED_HEX and hps_config_fpga
Build app command: make ('make clean' to remove all temporal files)
Execute app command:./hps_config_fpga soc_system_dc.rbf and./HPS_LED_HEX
D
D
e
e
m
m
o
o
n
n
s
s
t
t
r
r
a
a
t
t
i
i
o
o
n
n
S
S
e
e
t
t
u
u
p
p
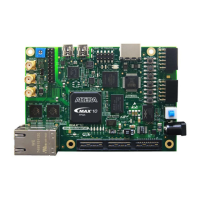
Quartus II and Nios II must be installed on the host PC.
The MSEL[4:0] is set to 01010 or 01110.
Connect a USB cable to the USB-Blaster II connector (J13) on the DE1-SoC board
and the host PC. Install the USB-Blaster II driver if necessary.
Connect a USB cable to the USB-to-UART connector (J4) on the DE1-SoC board and
the host PC.
Copy the executable files "hps_config_fpga" and "HPS_LED_HEX", and the FPGA
configuration file "soc_system_dc.rbf" into the microSD card under the "/home/root"
folder in Linux.
Insert the booting microSD card into the DE1-SoC board. Please refer to the chapter 5
Downloaded from Arrow.com.Downloaded from Arrow.com.Downloaded from Arrow.com.Downloaded from Arrow.com.Downloaded from Arrow.com.Downloaded from Arrow.com.Downloaded from Arrow.com.Downloaded from Arrow.com.Downloaded from Arrow.com.Downloaded from Arrow.com.Downloaded from Arrow.com.Downloaded from Arrow.com.Downloaded from Arrow.com.Downloaded from Arrow.com.Downloaded from Arrow.com.Downloaded from Arrow.com.Downloaded from Arrow.com.Downloaded from Arrow.com.Downloaded from Arrow.com.Downloaded from Arrow.com.Downloaded from Arrow.com.Downloaded from Arrow.com.Downloaded from Arrow.com.Downloaded from Arrow.com.Downloaded from Arrow.com.Downloaded from Arrow.com.Downloaded from Arrow.com.Downloaded from Arrow.com.Downloaded from Arrow.com.Downloaded from Arrow.com.Downloaded from Arrow.com.Downloaded from Arrow.com.Downloaded from Arrow.com.Downloaded from Arrow.com.Downloaded from Arrow.com.Downloaded from Arrow.com.Downloaded from Arrow.com.Downloaded from Arrow.com.Downloaded from Arrow.com.Downloaded from Arrow.com.Downloaded from Arrow.com.Downloaded from Arrow.com.Downloaded from Arrow.com.Downloaded from Arrow.com.Downloaded from Arrow.com.Downloaded from Arrow.com.Downloaded from Arrow.com.Downloaded from Arrow.com.Downloaded from Arrow.com.Downloaded from Arrow.com.Downloaded from Arrow.com.Downloaded from Arrow.com.Downloaded from Arrow.com.Downloaded from Arrow.com.Downloaded from Arrow.com.Downloaded from Arrow.com.Downloaded from Arrow.com.Downloaded from Arrow.com.Downloaded from Arrow.com.Downloaded from Arrow.com.Downloaded from Arrow.com.Downloaded from Arrow.com.Downloaded from Arrow.com.Downloaded from Arrow.com.Downloaded from Arrow.com.Downloaded from Arrow.com.Downloaded from Arrow.com.Downloaded from Arrow.com.Downloaded from Arrow.com.Downloaded from Arrow.com.Downloaded from Arrow.com.Downloaded from Arrow.com.Downloaded from Arrow.com.Downloaded from Arrow.com.Downloaded from Arrow.com.Downloaded from Arrow.com.Downloaded from Arrow.com.Downloaded from Arrow.com.Downloaded from Arrow.com.Downloaded from Arrow.com.Downloaded from Arrow.com.Downloaded from Arrow.com.Downloaded from Arrow.com.Downloaded from Arrow.com.Downloaded from Arrow.com.Downloaded from Arrow.com.Downloaded from Arrow.com.Downloaded from Arrow.com.Downloaded from Arrow.com.Downloaded from Arrow.com.Downloaded from Arrow.com.Downloaded from Arrow.com.Downloaded from Arrow.com.Downloaded from Arrow.com.Downloaded from Arrow.com.Downloaded from Arrow.com.Downloaded from Arrow.com.Downloaded from Arrow.com.Downloaded from Arrow.com.Downloaded from Arrow.com.Downloaded from Arrow.com.Downloaded from Arrow.com.