Cleaning, maintenance and repair
Pantera 4502 CP1_E3A_E4 BAG0166.5
13.7.3 Checking and replacing the suction and pressure-side valves (workshop
work)
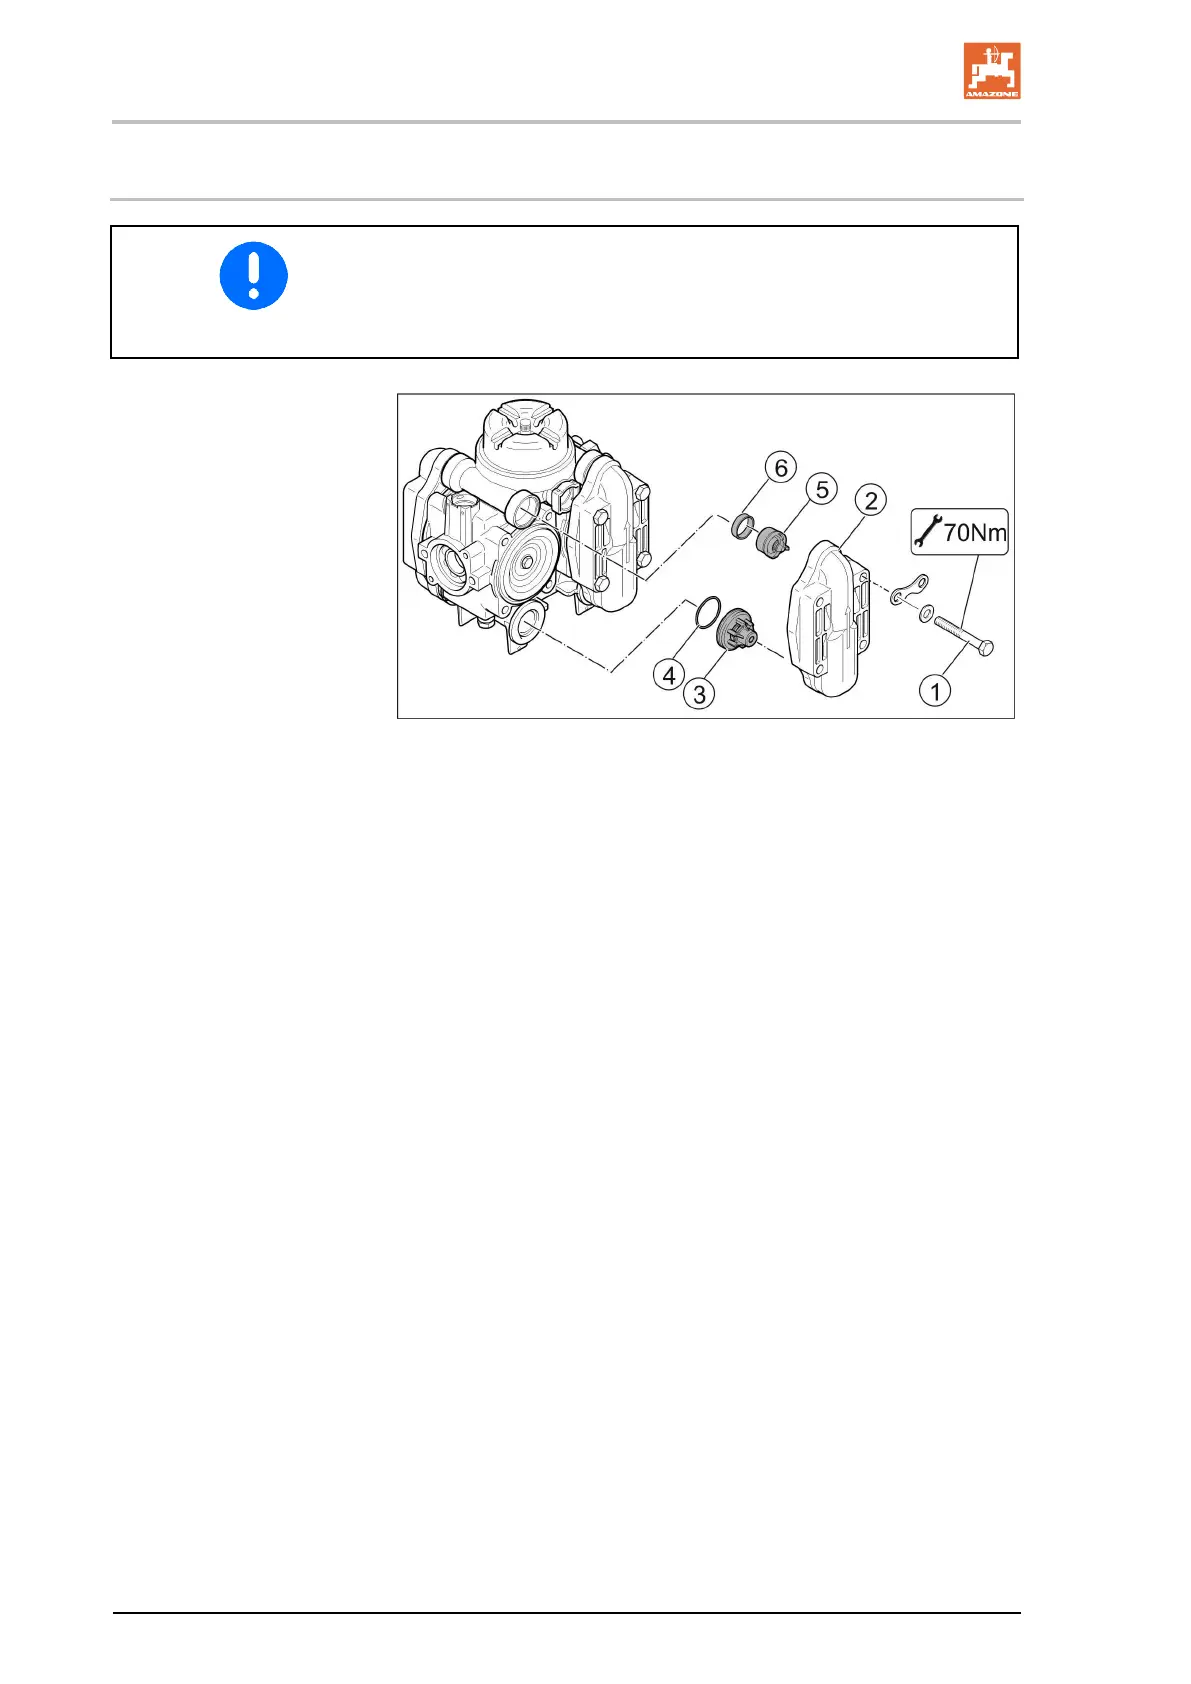
• Pay attention to the respective installation position of the valves
on the suction and pressure sides before removing the valve
groups.
• When reassembling, ensure that the valve guide is not dam-
aged. Damage may cause the valves to jam.
1. If necessary, remove the pump.
2. Remove (Fig. 199/1) bolts.
3. Remove the valve cover (Fig. 199/2).
4. Remove the valve groups (Fig. 199/3).
5. Remove valve sealing ring (Fig. 199/4) and o-ring (Fig. 199/5).
6. Check the valve seat, valve spring and valve guide for damage
or wear.
7. Replace defective parts.
8. Fit the valve groups after testing and cleaning.
9. Insert new O-rings.
10. Re-fit the valve cover, tighten the bolts to a torque of 70 Nm.



 To Next Page