LCX 890 Installation Guide 39
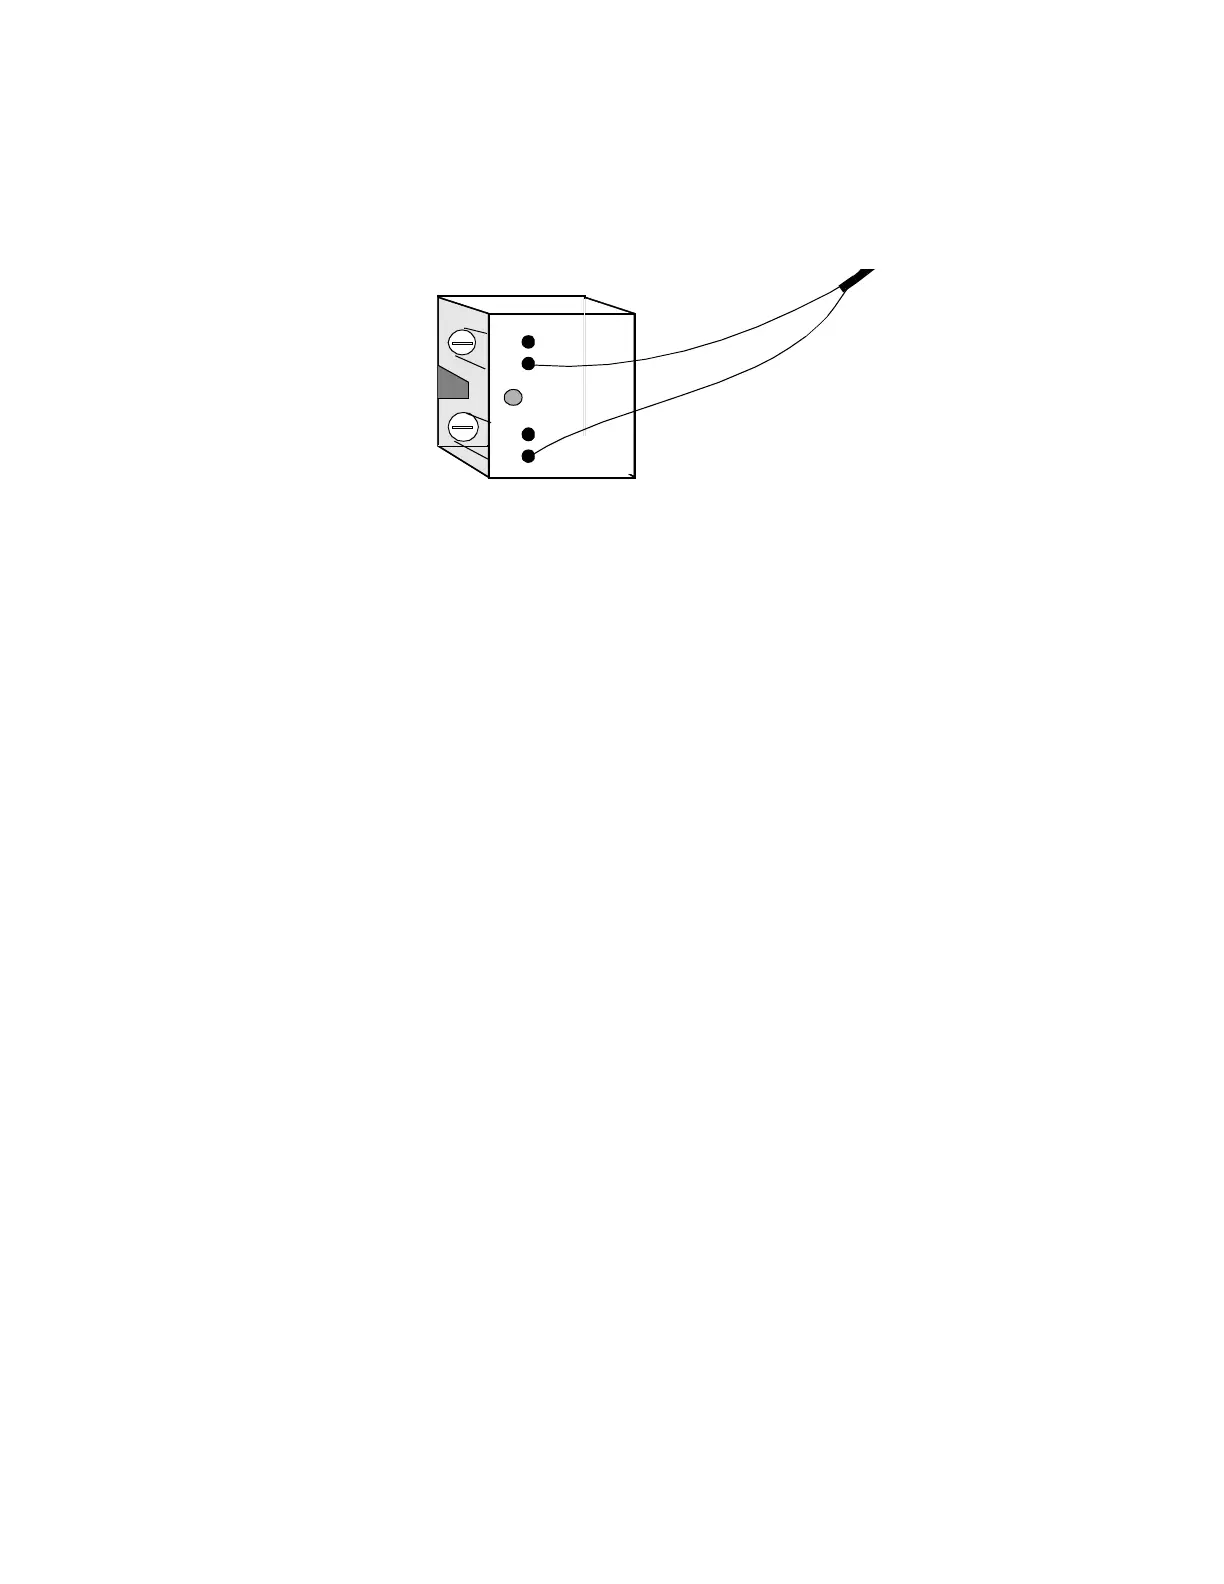
3. Slip the first wire for the light into an inlet under the first screw and
tighten the screw down on it.
Figure 18. Illustration of Wiring Lights to Output Relays
4. Slip the second wire for the light into an inlet under the second screw
and tighten the screw down on it.
5. Repeat the above steps for each output.
Locating/Wiring the Momentary Switches
Each output can be controlled in two possible ways:
• Through the software based on the setting of an input.
• Through a momentary switch (such as a motion detector or push
button) that you wire to the terminals labeled OUT on the other side
of the vertical divider from the output relay. They are each
associated with a particular output and labeled with the output
number.
As shown in Figure 2-1, on the LCX 890 the momentary switches are
all to the left of their corresponding output.
As shown in Figure 2-2, on the LCX 898 the momentary switches are
either to the left or to the right of their corresponding output.
 Loading...