26
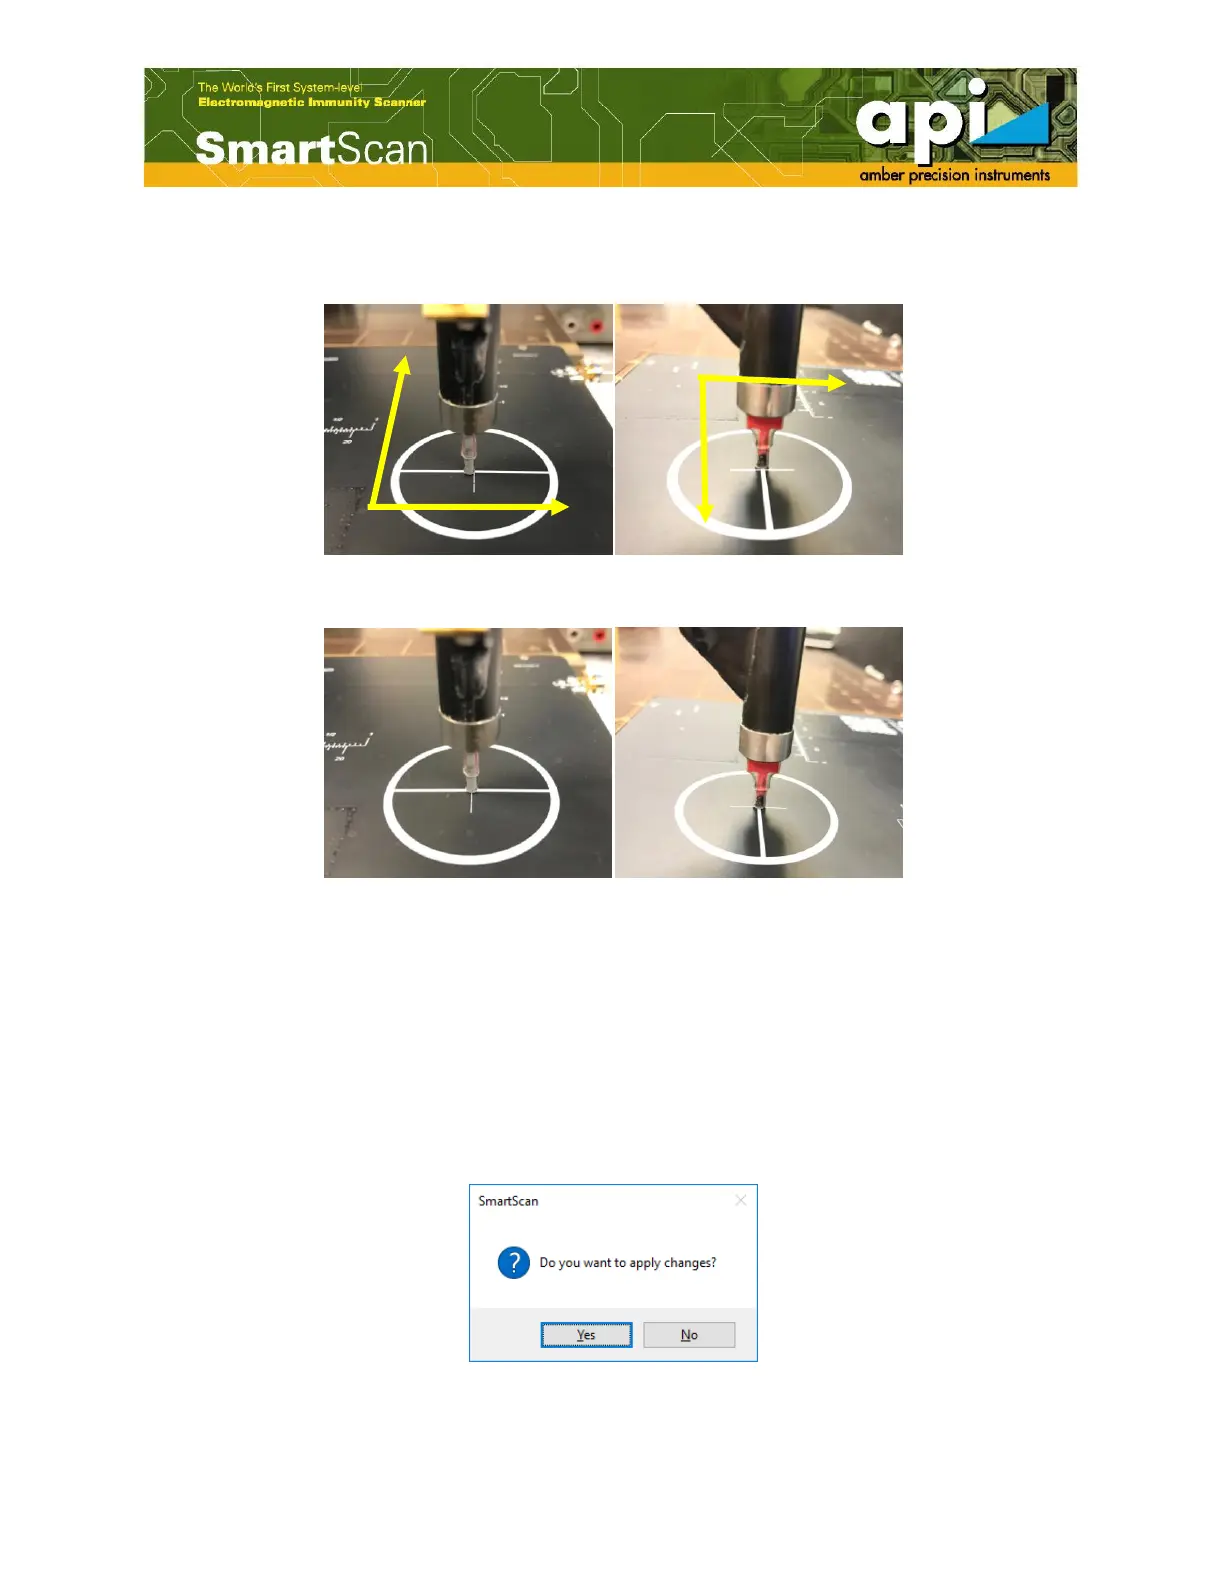
e. Click on "Robot Movement" to align the probe landing position with the defined reference
point position.
Figure 34: Probe landing position.
Figure 35: Probe adjustment position (aligned with reference point).
f. Close the "Robot Movement" window after the probe is moved to the reference point.
g. Click on "Next".
h. Depends on the probe type, click on "Next" to continue calibration if it is an Hx or Ex probe;
click on "Finish" if it is an Hz or Ez probe.
i. Apply the changes.
Figure 36: Apply XY offset changes.