SECTION 2 INSTALLATION AND PREPARATION FOR USE
______________________________________________________________________
2-1
SECTION 2
2 INSTALLATION AND PREPARATION FOR USE
____________________________________________________
INTRODUCTION
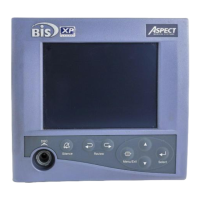
This section provides installation instructions for the Aspect A-2000 BIS Monitor, Digital
Signal Converter, and accessories. It includes:
• Installation checklist
• Proper environment
• Required equipment and supplies
• Cable connections
• Start and shutdown procedures
• Menu settings
2.1 A-2000 BIS MONITOR INSTALLATION AND CHECKOUT
1. Open packages and inspect for all components:
• Monitor with power cable
• DSC
• PIC (Patient interface cable, connects DSC to patient)
2. Connect power cable to monitor, plug power plug into appropriate wall outlet.
3. Power up monitor by pressing power switch (lower, right side of case).
• Verify beep tone as power switch is activated.
• Verify fan (rear case wall) moves air outward.
• Verify all power on self-tests complete successfully (approx. 30 seconds).
• Verify next screen says ‘CONNECT DSC CABLE TO FRONT OF MONITOR.’
4. Connect DSC with PIC and Sensor.
• Verify DSC test completes.
• Verify SENSOR CHECK screen displays.
5. Exit from SENSOR CHECK screen by passing impedance check or by exiting with
MENU/EXIT key.
6. Disconnect power cord from rear of monitor.
• Verify ‘OPERATING ON BATTERY BACKUP (E33)’ is displayed.
• Verify battery icon displays in BIS banner.
7. Reconnect power cord.
• Verify battery icon is not displayed in BIS banner.
• Verify ‘OPERATING ON BATTERY BACKUP (E33) is not displayed.
8. Do keyboard checkout:
• Press SILENCE key Verify icon shows at BIS banner.
• Press ARROW BACK key Verify REVIEW MODE screen displays.
• Press MENU/EXIT key Verify REVIEW MODE screen exits.