SECTION 7 DIAGNOSTICS AND TROUBLESHOOTING
______________________________________________________________________
7-3
7.1.4 Clear Data
This option clears all data from the system memory and starts a new case.
1. Press [MENU/EXIT] to access the Setup Menu.
2. Highlight Clear Data, using the [↑] or [↓] arrows.
3. Press [SELECT]. The system will respond with the message; “Clear Data Memory?”
4. Press [SELECT] to confirm, or press [MENU/EXIT] to cancel.
7.1.5 Diagnostic Codes
If you are experiencing problems with the A-2000 monitor, you may wish to turn the Diagnostic
Codes ON so that numerical diagnostic values will be displayed in the Message Region of the
screen. To do so, press [SELECT] when “Diagnostic Codes” is highlighted until “ON” appears in
reverse video. Then use the arrows to go to the next option, or press [MENU/EXIT] to exit.
7.1.6 Impedance Checking
The A-2000 continually checks impedance levels during a procedure by generating a 128 Hz
test signal. Occasionally this signal may interfere with other equipment. If this becomes a
problem, you may turn off the continuous impedance checking by pressing the [SELECT] key
until the “Impedance Checking –OFF” appears in reverse video. Then use the arrows to go to
the next option, or press [MENU/EXIT] to exit. Impedance levels will still be tested at startup,
but once they pass, they will not be tested again until a new case is begun.
Note:
Turning off continuous impedance checking will not be saved by
the “Save Current Settings” feature. The next time the monitor is
powered on, the monitor will re-enable continuous impedance
checking.
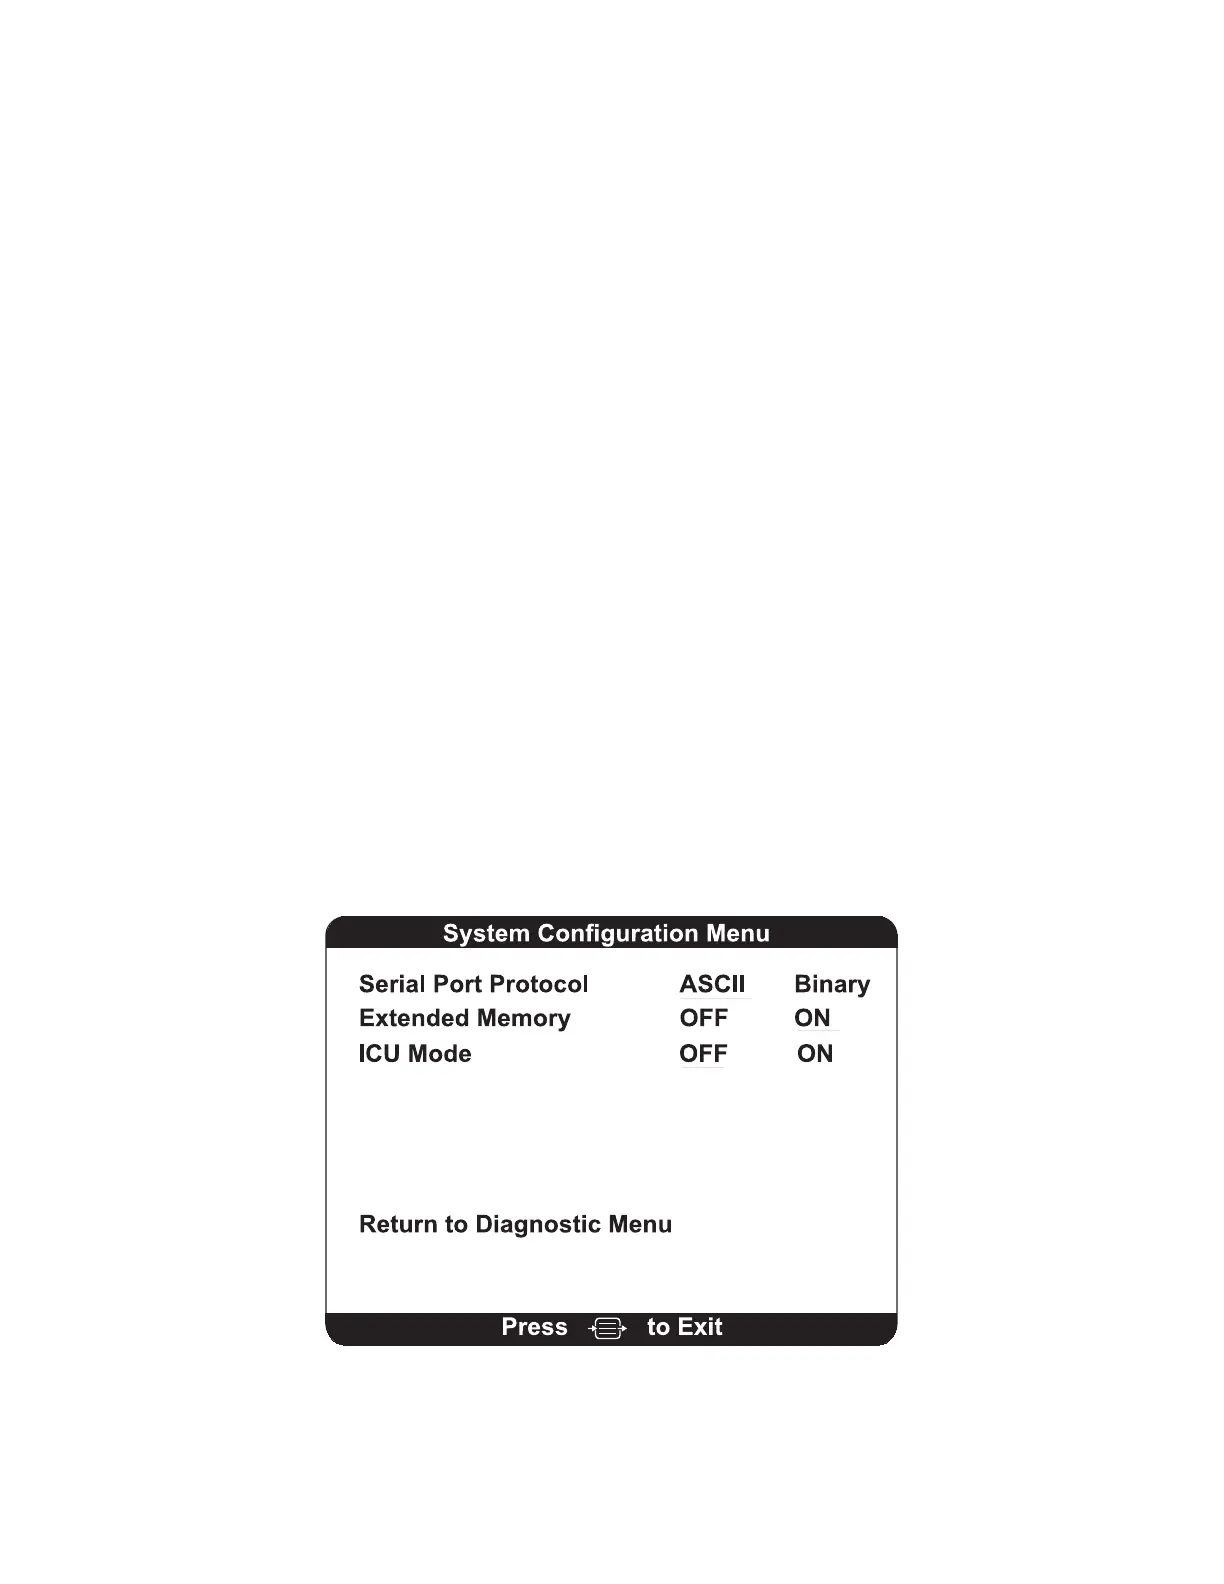
7.1.7 System Configuration Menu
Figure 27 The System Configuration Menu