IDA8 Global-Net User Manual174
© 2017, ATEÏS, member of PAX ProAV Group
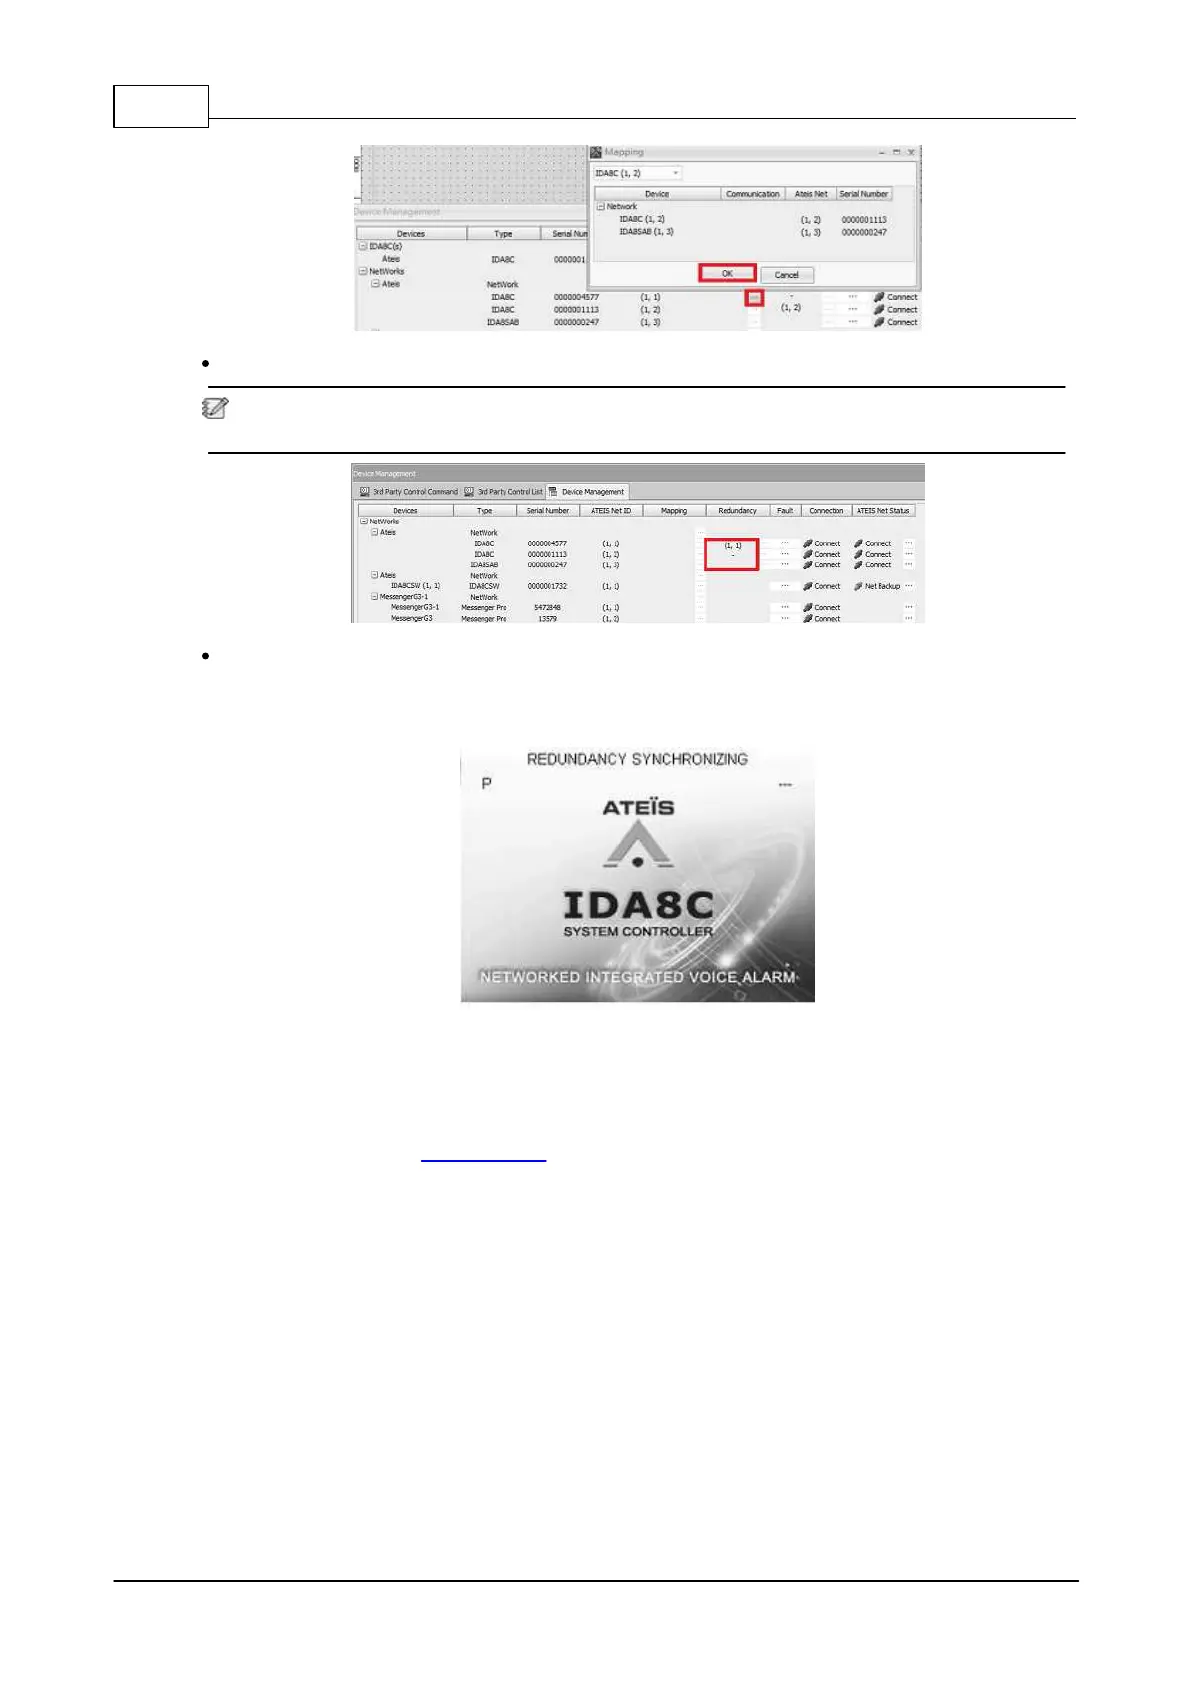
Step 4: click [Store] button to finish the redundancy set up.
If the IDA8 system switches the redundancy from primary IDA8 unit to the secondary unit, the
information will be shown on [Device Management] window as the picture below.
Step 5: IDA8 Front Panel
If the redundancy configuration has completed, the front panel will display the information as
below.
1. "P" or "S": If the device is the primary device, a letter P will be shown on the upper-left corner.
If it is a secondary device, a letter S will be shown.
2. "REDUNDANCY SYNCHRONIZING": it will be shown when the system is being synchronized.
3. "STANDBY": Display "STANDBY" on the upper-right corner when this IDA8 unit is currently not
active (refer to Standby Mode).
3.2.1.8 Standby Mode
If the IDA8 unit is currently not active under the redundancy configuration, it will enter the standby
mode. Please note the following behavior of standby mode:
1. If a fault is detected, the [System Fault] and [G.Fault] LEDs on IDA8 front panel will not light up. But
this fault will be recorded in the Fault List of Ateis Studio.
2. The [Remote Offline] fault and any faults which are related to the speakers and amplifiers such as
[Line A/B Monitor] etc. will also be disable.
3. The IDA8 will not output audio.
4. The [Bypass Monitoring] LED on IDA8 front panel will light up.
 Loading...