Product Features 247
© 2017, ATEÏS, member of PAX ProAV Group
Save/Cancel/Done buttons
3.2.10.4.2 Setup 1
Under the "Setup 1" and "Setup 2" tabs, you can set how PPM-IT5 connects to the network and performs
functions such as Stream Out, Logic Control, 3rd party control, etc.
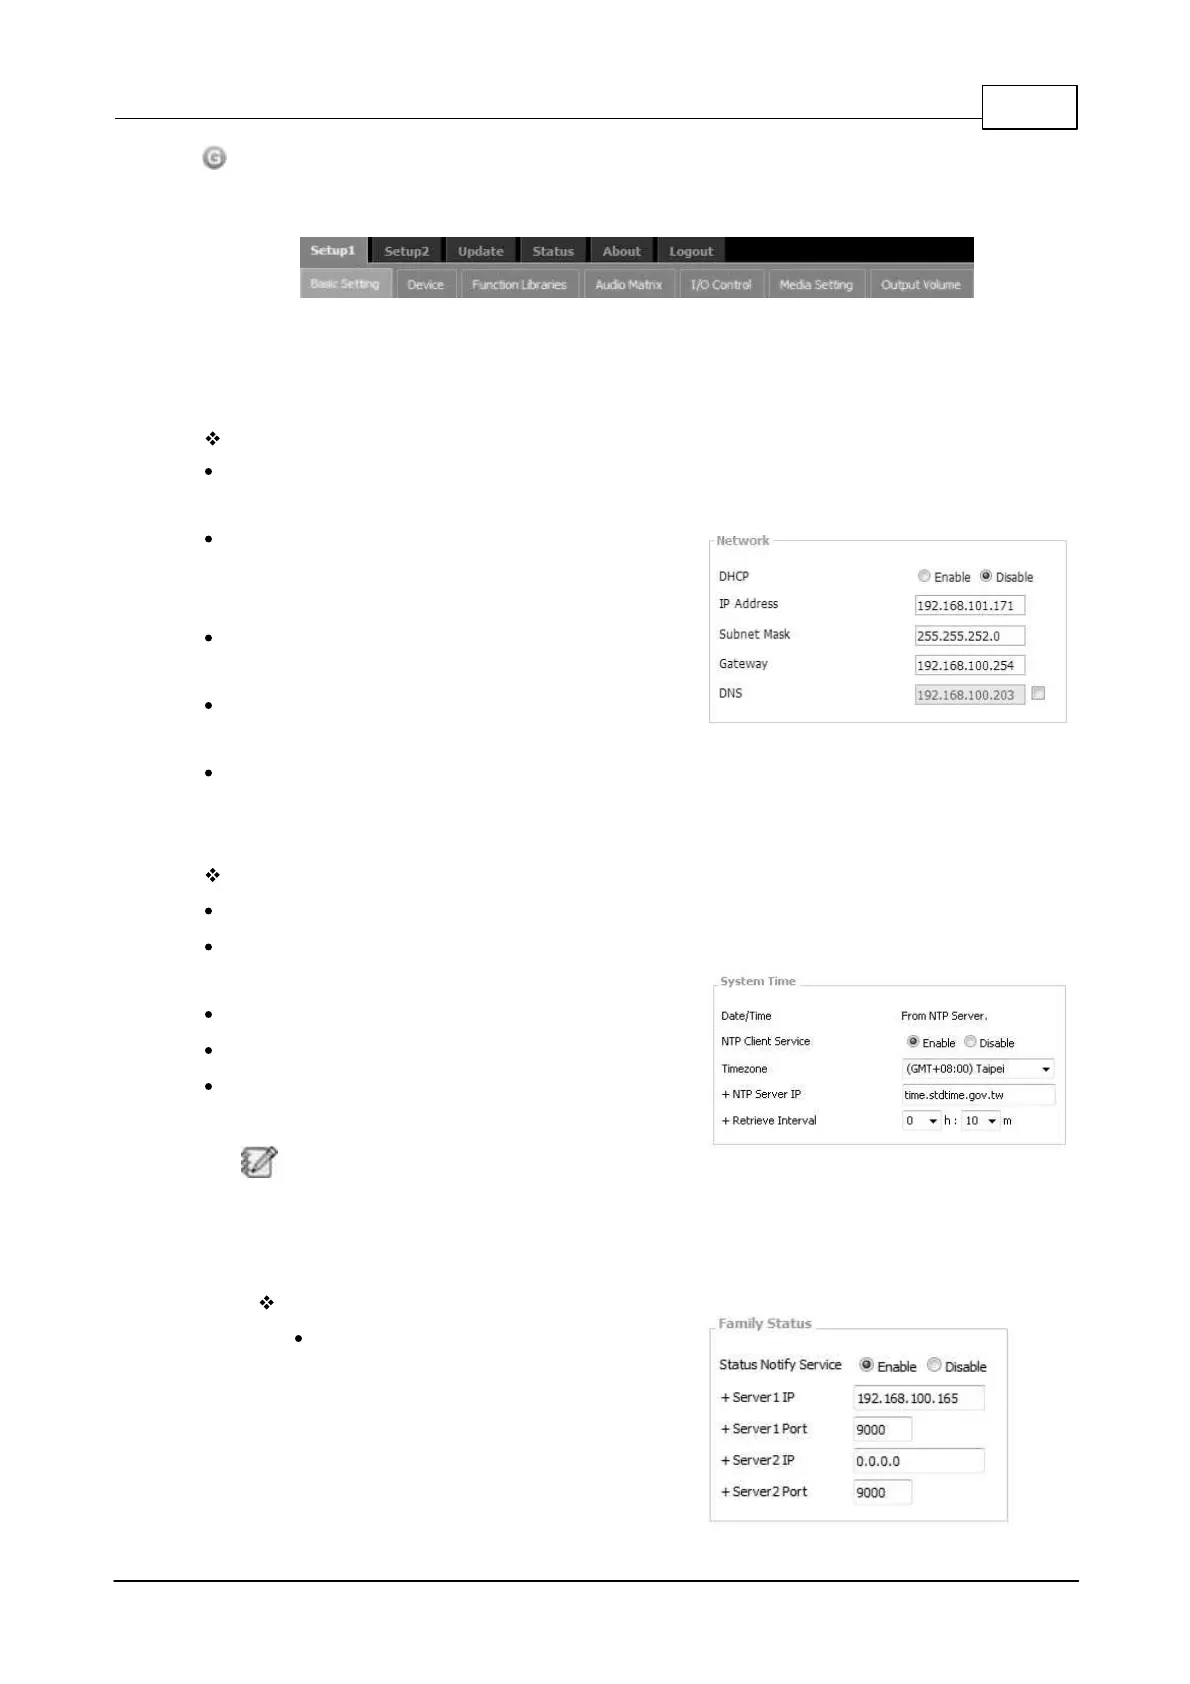
3.2.10.4.2.1 Basic Setting
Network:
DHCP: Enable/disable the Dynamic Host
Configuration Protocol.
IP Address: Click to change its IP to fit your network.
Each TERRACOM device is shipped from the factory
with a default IP address of 192.168.100.1
Subnet Mask: Depend on the LAN where the
Terracom devices are located.
Gateway Server: The IP address of the gateway
server.
DNS: Check the checkbox to enable the DNS server
and type the IP address.
System Time:
Date/Time: Manually set the device time.
NTP Client Service: Once enable this, the NTP Server
IP is needed.
Timezone: The timezone of your Terra devices.
NTP Server IP: The NTP Server IP address.
Location: Click the drop-down list to select the
location and click [Save] button to apply.
Changes in the System Time area will affect
the Scheduler and the Current Time display on the
web page.
Family Status:
Status Notify Service:
Enable/disable server for managing and
monitoring whether the network
support IGMP. If not, TerraServer is
needed to fix the problem. Once
enable Status Notify Service, the
 Loading...