Changing the Fuse Block Orientation
To change the fuse block orientation (for use when changing from
100/120 V line voltage to 230/240V line voltage or vice-versa):
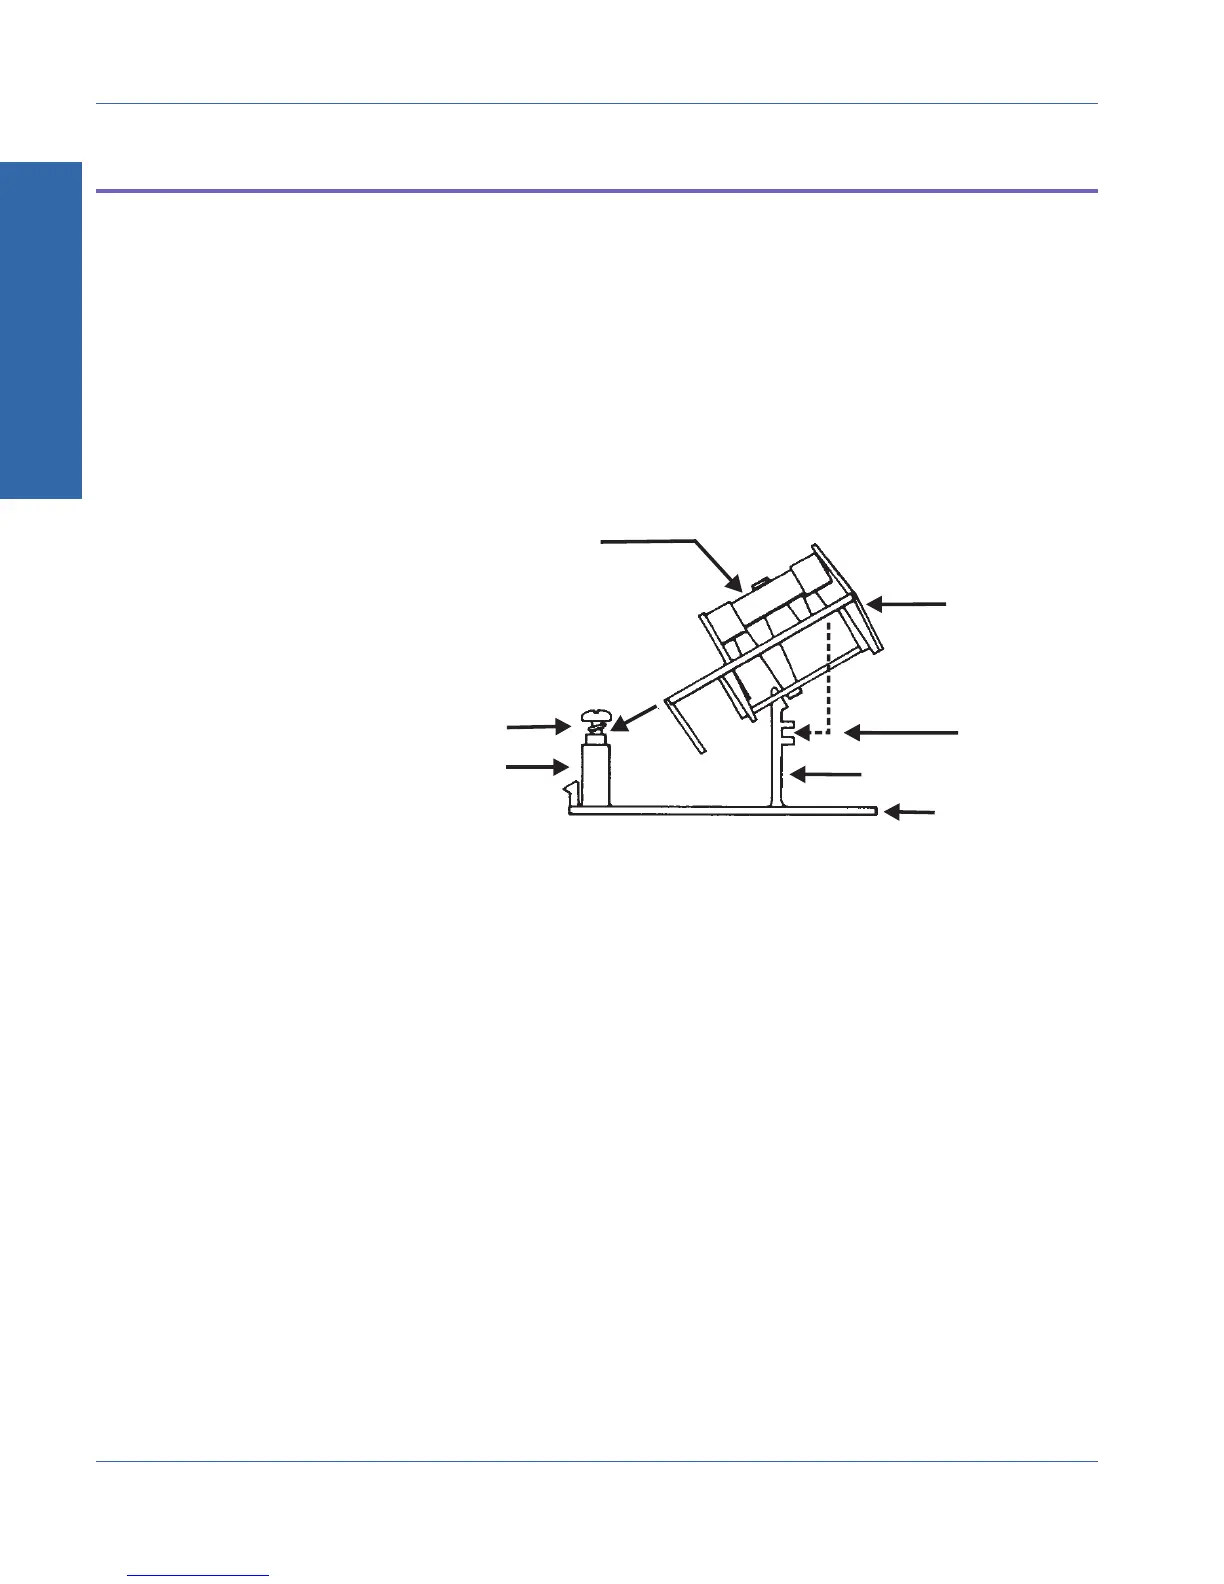
1. If the Cover is not already removed from the instrument, remove it
by inserting a small blade screwdriver (or similar tool) into the
Removal notch (shown on Figure A-2) and prying gently.
2. On the back of the cover, loosen the Phillips (cross-head) screw
two full turns. Then remove the Fuse Block by sliding it up, then
away from the screw and lifting it from the Support Pedestal at
the other end. Refer to the following figure:
3. Invert the Fuse Block and reassemble it. Make sure the the Fuse
Block fits into the notch on the Support Pedestal. Also be sure
that the cutaway on the Fuse Block fits around the top section of
the Screw Pedestal. The Fuse Block should sit flat, parallel to
the Cover. Tighten the screw. Figure A-5 shows the two fuse
block orientations.
4. Check the fuses as instructed in the next section.
Cover
Fuse Block
Fuse
Screw
Fuse Block
fits into notch
Support Pedestal
Screw Pedestal
Figure A-4. Insertion/Removal of Fuse Block
A Line and Fuses
Changing the Fuse Block Orientation Appendix A - Changing Mains Voltage Selection
A-4 ATS-1 Access User's Manual