TABLE OF CONT ENTS
Chapter 1: Getting Started . . . . . . . . . . . . . . . . . . . . . . . . . . . . . . . . .1–1
Introduction . . . . . . . . . . . . . . . . . . . . . . . . . . . . . . . . . . . . . . . . . . . . . . . . . . . . . . .1–2
Conventions Used . . . . . . . . . . . . . . . . . . . . . . . . . . . . . . . . . . . . . . . . . . . . . . . . . . .1–3
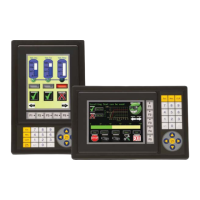
Product Overview - EA1-T4CL . . . . . . . . . . . . . . . . . . . . . . . . . . . . . . . . . . . . . . . . . .1–4
Product Overview - EA1-T6CL . . . . . . . . . . . . . . . . . . . . . . . . . . . . . . . . . . . . . . . . . .1–5
Agency Approvals . . . . . . . . . . . . . . . . . . . . . . . . . . . . . . . . . . . . . . . . . . . . . . . . . . .1–5
Part Number Key . . . . . . . . . . . . . . . . . . . . . . . . . . . . . . . . . . . . . . . . . . . . . . . . . . .1–6
Product Label Examples . . . . . . . . . . . . . . . . . . . . . . . . . . . . . . . . . . . . . . . . . . . . . .1–6
Serial Number and Date Code format . . . . . . . . . . . . . . . . . . . . . . . . . . . . . . . . . . .1–6
Quick Start Steps . . . . . . . . . . . . . . . . . . . . . . . . . . . . . . . . . . . . . . . . . . . . . . . . . . . .1–7
Step 1 – Unpack and Inspect . . . . . . . . . . . . . . . . . . . . . . . . . . . . . . . . . . . . . . . . . .1–7
Step 2 – Install Optional Hardware Accessories . . . . . . . . . . . . . . . . . . . . . . . . . . . .1–8
Step 3 – Become Familiar with Available Communication Ports . . . . . . . . . . . . . . . .1–9
Step 4 – Install C-more Color Micro-Graphic Panel . . . . . . . . . . . . . . . . . . . . . . . .1–10
Enclosure Clearances . . . . . . . . . . . . . . . . . . . . . . . . . . . . . . . . . . . . . . . . . . . . . . .1–12
Step 5 – Install the Programming Software and Develop a Project . . . . . . . . . . . .1–13
Step 6 – Connect C-more Color Micro-Graphic Panel to Computer . . . . . . . . . . . .1–14
Step 7 – Providing Power to the C-more Color Micro-Graphic Panel . . . . . . . . . . .1–15
Step 8 – Accessing the C-more Color Micro-Graphic Panel Setup Screens . . . . . . .1–16
Step 9 – Choose C-more Color Micro-Graphic Panel to PLC Protocol & Cables . . .1–17
Step 10 – Connect C-more Color Micro-Graphic Panel to PLC . . . . . . . . . . . . . . . .1–18
 Loading...