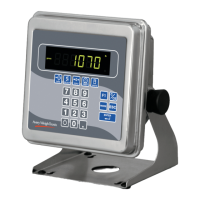
Model E1070 Indicator User Instructions 71
6. Press the SELECT key…
ADC is displayed.
7. Press the UNITS key…
DISP is displayed. This is the display test item.
8. Press the PRINT key to perform a dynamic test of the display…
All parts of the display flash.
9. Press the ESC key to stop the test…
The display flashes a couple more times and then DISP is shown.
10. Press the UNITS key…
BUTTON is displayed. This is the button test item.
11. Press the PRINT key to perform a button test. Each key you press will
be reflected on the display screen to confirm the button is functioning
correctly. The ESC key is excluded from this test. It is used to stop the
testing and return to the menu item
12. Press ESC key to stop the button test.
BUTTON is displayed.
13. Press the UNITS key…
SERIAL is displayed. This is the serial test item.
14. Press the PRINT key to access the serial test.
PORT1 is displayed. If you jumper the transmit and receive lines on
the serial port and press the PRINT key, the display should show
PASS. If there is a problem the display will show FAIL.
15. Press the SELECT key after checking the port function…
PORT1 is displayed.
16. Press the UNITS key…
PORT 2 is displayed. Repeat the test from step 14 to check the
port.
17. Press the SELECT key twice to exit the serial test.
SERIAL is displayed.
18. Press the SELECT key…
TEST is displayed.
19. Press the UNITS key…
AUDIT is displayed.
20. Press the PRINT key…
CFG is displayed. This stands for the configuration audit counter.
21. Press the PRINT key to see the number of times the configuration has
been altered on this indicator.
22. Press the SELECT key…
CFG is displayed.
23. Press the UNITS key…
CAL is displayed. This stands for the calibration audit counter.

 Loading...