S3 Audio I/O Connections 46
S3 Audio I/O Connections
This chapter shows how to use the built-in audio I/O on the S3, including:
Enabling S3 Audio on the Workstation Computer
To use the audio I/O on your S3 with your workstation computer, you must first enable the audio connection on the workstation
computer. This connection only needs to be enabled the first time you connect the S3 to a particular computer.
To enable S3 audio on your workstation computer:
1 Connect S3 to your workstation computer.
2 Power on S3, and make sure the S3 is in Studio mode.
3 Power on your workstation computer.
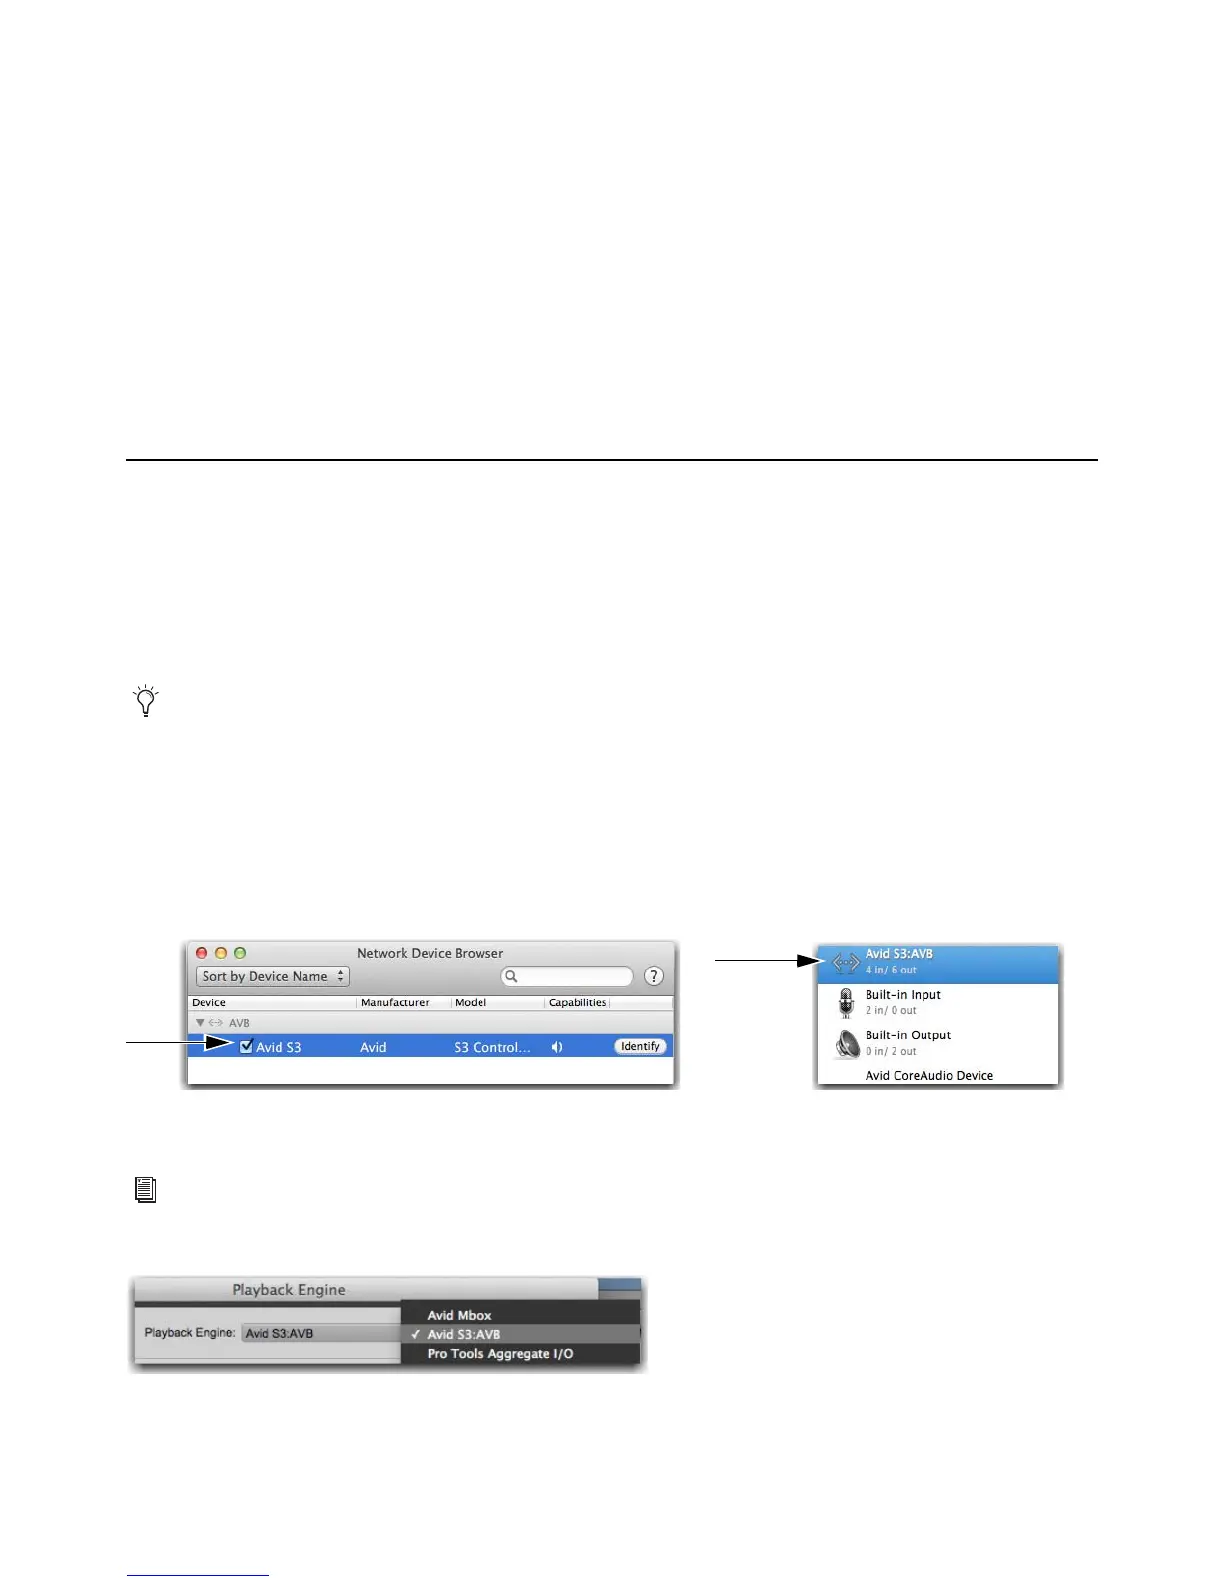
4 On your computer, go to Applications > Utilities > Audio MIDI Setup.
5 Fro the Window menu, choose Show Network Device Browser.
6 Click the checkbox next to Avid S3. If more than one device appears and both are checked, deselect the other device. Once
checked, the S3 appears in the list of available audio devices in the Audio Devices Window of the Audio MIDI Setup.
7 Launch Pro Tools, and from the Setup menu choose Playback Engine.
8 From the Playback Engine pop-up, choose Avid S3:AVB.
9 Choose Setup > IO Setup. Click Default on both the Input and Output tabs, then click OK to close IO Setup.
•
Enabling S3 Audio on the Workstation Computer
• S3 Audio Connections Overview
• Accessing Audio Control on the S3
• Connecting and Adjusting Inputs
• Connecting and Adjusting Outputs
• Connecting Hardware Inserts
• Connecting and Adjusting Headphones
• Saving S3 Monitor Settings
Display number 15 on the top row of encoders on the S3 shows the current mode (“Studio” or “Live”) when the S3 is initializing
after being powered on. See
Connecting a Second Workstation for more information.
S3 Surface shown in the Network Device Browser (left) and the Audio Devices Window (right) of the Audio MIDI Setup
For other DAWs, see the documentation for the application to configure its I/O settings.
Choosing the S3 as the Playback Engine for Pro Tools