Powering Up and Configuring the System 53
Virtual Soundcheck: Important Note
Slot designation (1–6) determines where I/O appears in the Patchbay I/O tabs 1–6, which also determines Virtual Soundcheck
channel order. For example, each Stage 16 slot occupies 16 channels of Virtual Soundcheck. However, switching any slot from
Stage 64 to Stage 16 creates four available Stage 16 slots. Even if only one Stage 16 I/O unit is physically connected and the re-
maining three Stage 16 slots are empty, if a Stage 64 was assigned and connected to slot 5 the Pro Tools inputs corresponding to
that Stage 64 will begin at channel 65. To avoid this, it is recommended to assign Stage 64s (if any) to the lowest numbered slots
1–3 whenever possible, followed by any Stage 32s, followed by any Stage 16s.
7 Once firmware updates are complete, dismiss all alerts and dialogs by selecting OK in each one.
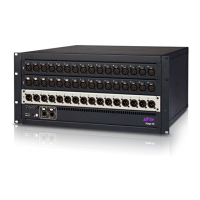
8 If desired, give each Stage I/O unit a unique name by doing the following:
• Make sure the system is in Config mode (see
Enabling Config Mode).
•In the
Options > Devices tab of the external screen, select the appropriate Stage I/O graphic so it is outlined in blue.
• In the Information pane, select the
DEVICE tab.
• Touch-and-hold (double-click) the field next to
Name, enter a unique name using the keyboard, then press Enter.
9 Shut down your system by doing the following:
• Make sure the system is in Config mode.
• On the external VENUE software screen, go to the
Options > System tab.
•Select Shut Down, then select Shut Down again to confirm.
10 Power down all connected components by pressing their back panel power switches to the off (0) positions, and leave all com-
ponents powered-off for at least 30 seconds.
11 Power the components back on in the following order:
• E6L engine
• S6L control surface
• Any connected Stage I/O units
12 Wait for the CTMs (if any) to complete their final software update, then proceed to Setting the System Clock (Time and Time
Zone)
.
About I/O Sharing
Always configure individual S6L systems separately before connecting them for I/O sharing. Complete the instructions on the fol-
lowing pages to configure each system, including any optional connections to Pro Tools or for ECx Ethernet Remote Control. Then
follow the instructions in
I/O Sharing Connections. (See the VENUE S6L System Guide.pdf for additional configuration steps to
assign I/O ownership and manage gain shared systems.)
For now, proceed to
Assigning Local 16 if your system includes one or more Local 16s. Otherwise, proceed to Setting the Sys-
tem Clock (Time and Time Zone)
.
You can reassign Stage I/O units at any time after initial software installation, and after all necessary firmware updates are
completed. If you are replacing Stage units with one of a different type, simply select and Disconnect the unwanted Stage I/O
unit in the Connected Devices list, re-assign the corresponding Stage slot if necessary, then assign the desired Stage I/O units.
See
Appendix D, “Managing Stage I/O Unit Connections” for additional information.
Stage unit names will appear in the corresponding tab of the Patchbay. Device names are not saved as part of Show files, they
are stored in the hardware unit. In addition, you cannot rename devices in the Standalone software.
A complete power-cycle is required before using your S6L system.
 Loading...
