75
The number of available Stage slots that appear is determined by the number of connected Stage 64s (if any), allowing for the
maximum supported configurations to be connected. For example, when one or two Stage 64s are already connected configuring
the third available slot to Stage 16 makes four Stage 16 slots become available. When three Stage 64s are already connected, no
additional slots are available.
Virtual Soundcheck: Important Note
The order of Stage I/O devices in the Connected Devices column does not need to match
the order of physical network connections. Slot designation (
1–6) determines where I/O appears in the Patchbay I/O tabs 1–6,
which also determines Virtual Soundcheck channel order. For example, because each Stage 16 slot occupies 16 channels of Virtual
Soundcheck, switching any slot from Stage 64 to Stage 16 will occupy 64 channels of Virtual Soundcheck. Even if only one Stage
16 I/O unit is connected and three Stage 16 slots are empty, followed by slot 5 assigned and connected to a Stage 64, the Pro Tools
inputs corresponding to that Stage 64 will begin at channel 65. To avoid this, it is recommended to assign Stage 64s (if any) to the
lowest numbered slots
1–3 whenever possible, followed by any Stage 32s, followed by any Stage 16s.
4 In the Available Devices column, select the desired Stage I/O device so it is outlined in blue.
5 Select the Connect button at the bottom of the Available Devices column.
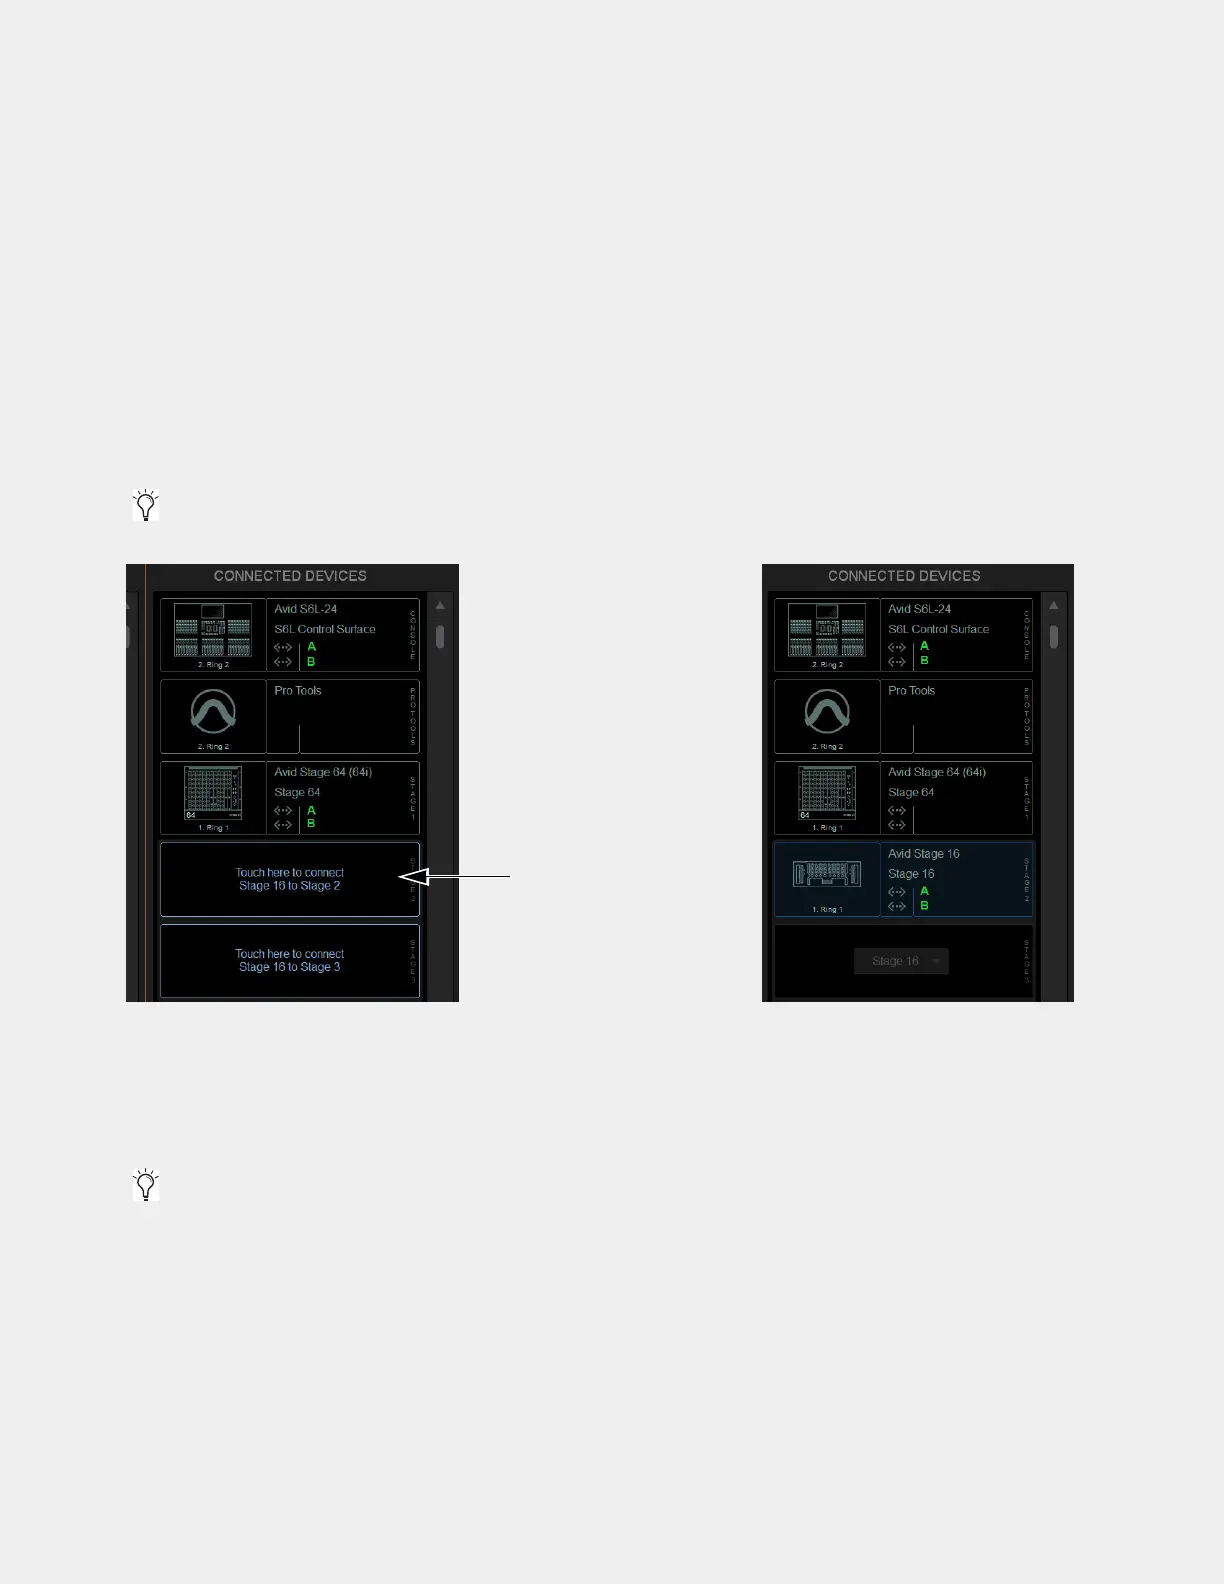
6 In the Connected Devices columns, select a flashing Stage 16 slot to assign the selected Stage 16 to that slot.
The
Stage slot is populated with the selected Stage 16, and the I/O on that Stage 16 is now available to be patched to system input
and output channels in the VENUE Patchbay under the corresponding
Stage 1–6 hardware tab. For more information on using
the Patchbay, see the VENUE S6L System Guide.pdf.
7 Assign any other available Stage I/O racks as desired.
You can also right-click on the desired Stage device in the Available Devices column and assign it by selecting an available slot.
Flashing Stage slots in the Connected Devices column (left) and a Stage 16 assigned to Stage slot 2 (right)
You can reassign Stage I/O units at any time after initial software installation, and after all necessary firmware updates are
completed. If you are replacing Stage units with one of a different type, simply select and Disconnect the unwanted Stage I/O
unit in the Connected Devices list, re-assign the corresponding Stage slot if necessary, then assign the desired Stage I/O units.
 Loading...