271
www.balluff.com
4
References
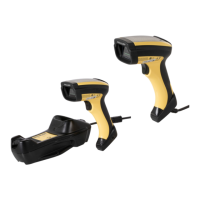
Balluff BVS HS-P Family
Industrial Handheld Barcode Readers
Source Radio
Address
Delimiter
Character
Setting
Examples
4.8.3 Bluetooth-Only
Features
Bluetooth Pin
Code
This option specifies the 4-character or 16-character pin code to be used for authentication of the
Bluetooth link. To set the pin code:
1 Scan the ENTER/EXIT PROGRAMMING MODE barcode to enter Programming Mode, then
enable
"Bluetooth Security Mode" on page 226.
2 Specify the desired pin code length (4 or 16) by reading the appropriate barcode in "Select
PIN Code Length" on page 226.
3 Determine the desired characters. For example, D254 or STOR12345678135M.
4 Convert the characters to hexadecimal using the ASCII Chart on the inside back cover of this
manual.
5 Go to page 226 and Scan the barcode: SET 4 CHAR PIN CODE or SET 16-CHAR PIN CODE.
6 Scan the appropriate alphanumeric characters from the keypad in Appendix D: Keypad, rep-
resenting the hexadecimal entries determined in the steps above. You will hear a two-beep
indication after the last character.
7 Scan the ENTER/EXIT PROGRAMMING MODE barcode to exit Programming Mode.
STEP ACTION EXAMPLES
1 Desired Setting
No delimiter
character
, (comma) - (dash) / (slash)
2 Scan ENTER/EXIT PROGRAMMING MODE
3 Scan SET SOURCE RADIO ADDRESS DELIMiTER CHARACTER
4
Scan Two Characters
From
Appendix D:
Keypad
‘0’ and ‘0’ ‘2’ and ‘C’ ‘2’ and ‘D’ ‘2’ AND ‘F’
5 Scan ENTER/EXIT PROGRAMMING MODE
NOTE
If you make a mistake before the last character, scan the CANCEL barcode to
abort and not save the entry string. You can then start again at the beginning.
NOTE
Changing the pin code setting will unlink the devices. If the Automatic Config-
uration Update is set to the default enabled setting, the devices must only be
relinked. Do not use this setting if AUTOMATIC CONFIGURATION UPDATE is
set to "Disabled"! Please check this setting first before going on.
 Loading...