4 Check after Repair
Infusomat® compact
plus
P 1.0 4 - 9
EN
For internal use, only
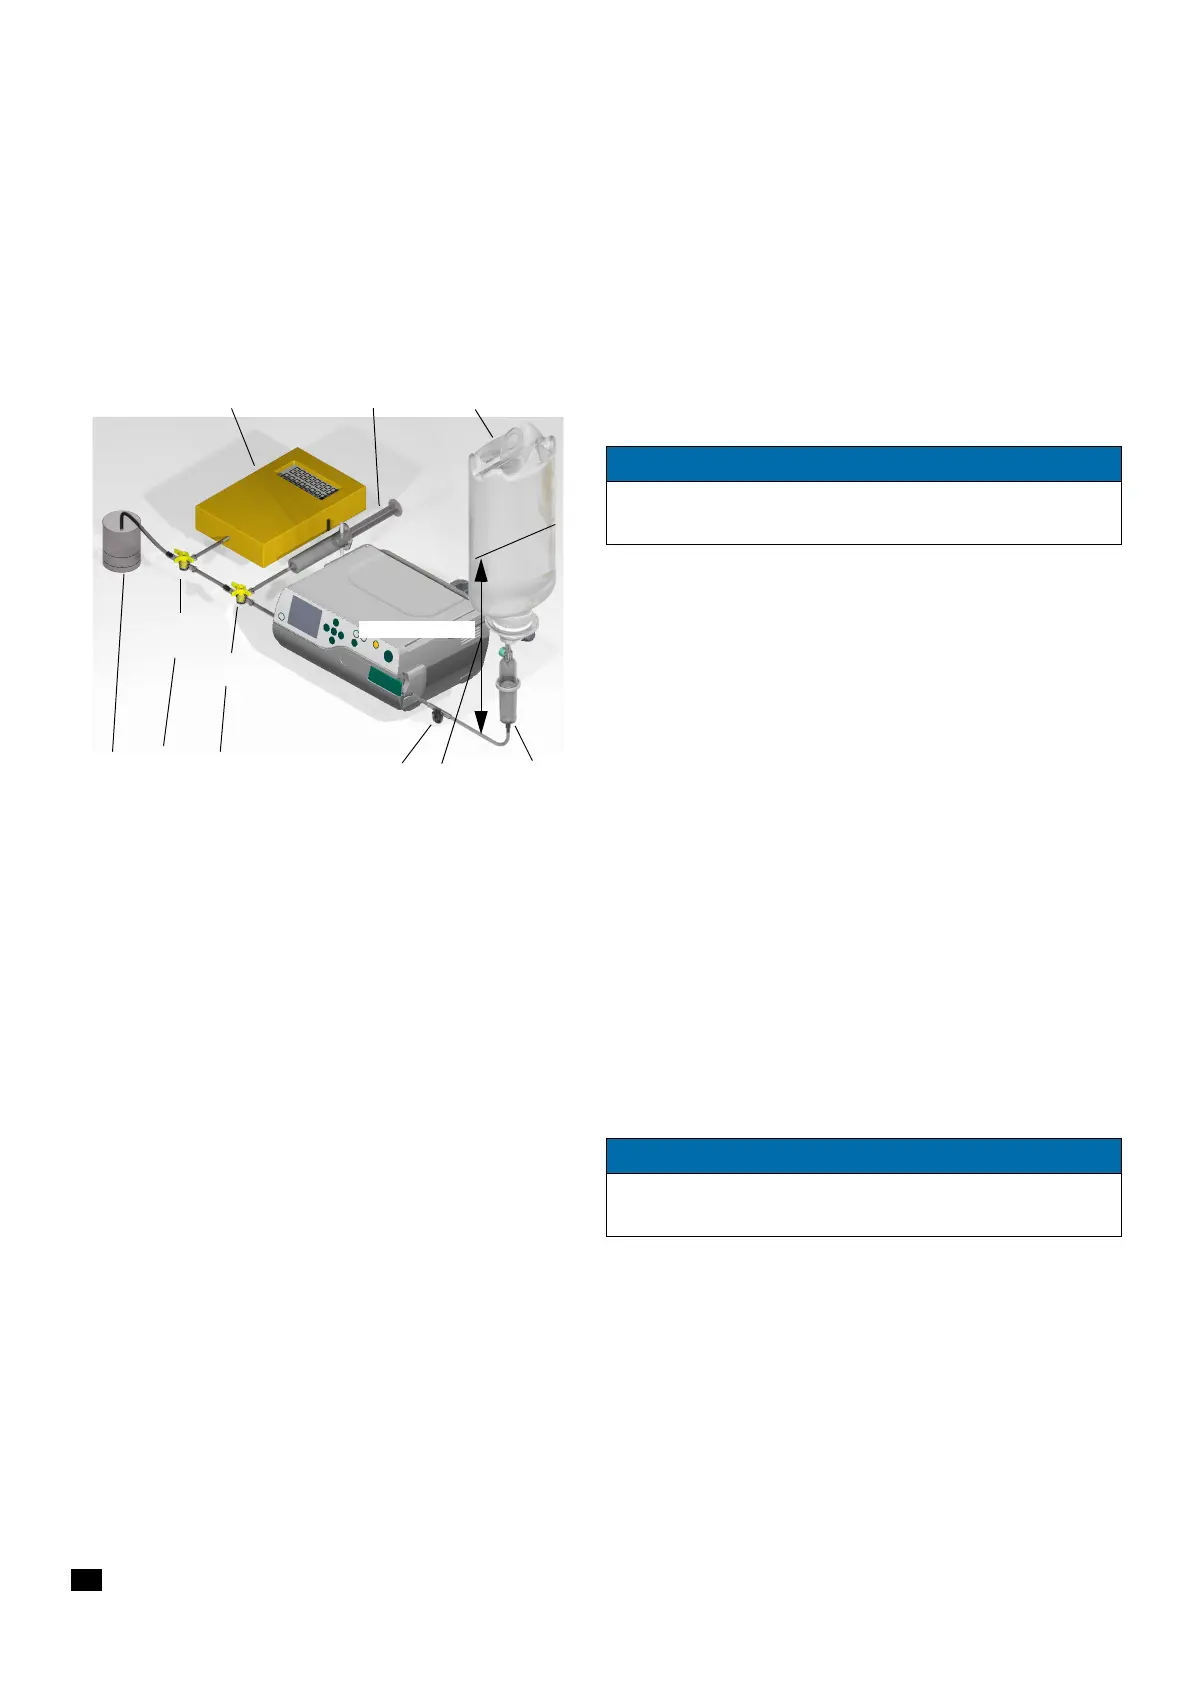
Test Setup
For the following tests, perform test setup with the subassemblies
listed below, please see also
Fig. 4 - 2:
Intrafix Primeline (new, unused, can be used for the complete
check after repair incl. functional check)
(1 piece)
Infusion bag or bottle, min. 100 ml
(1 piece)
Three-way valve (2 pieces for measurement with
electronic pressure gauge)
Injection port, inserted into the infusion line which has been cut
off approx. 2
cm on the right side next to the second clamp.
10 ml syringe (air buffer for measurement with
electronic pressure gauge)
(syringe drawn up to 10 ml and piston fixed mechanically)
(1 piece)
1 ml syringe for air bubble injection (1 piece)
Electronic pressure gauge with peak value recognition (1 piece)
Graduated cylinder 25 ml, ±0.04 ml (1 piece)
T5 Pressure cut-off, electronic
1. Insert the Intrafix Primeline of the test setup (Fig. 4 - 2) in the
device.
2. Enter a delivery rate according to the checklist and a volume of
250 ml.
3. Select pressure stage according to the checklist.
Fig. 4 - 2
1 Electronic pressure gauge accuracy class 1
2 10 ml syringe (piston fixed)
3 Infusion bottle
4 Intrafix Primeline
5 Distance between liquid level and middle Intrafix Primeline
6 Injection port
7 Three-way valve 1
8 Three-way valve 2
9 Graduated cylinder
4
3
9
1 2
8 7
1
2
5
approx. 50 cm
6
NOTICE
The filling level in the container must be approx. 50 cm above the
middle of the unit opening for the Intrafix Primeline.
NOTICE
The occlusion test with an air-filled line may fail. In this case,
insert an Intrafix Primeline filled with water.