36
bernette
SEWING MACHINE WORK
BOOK
bernette Stitch Designer - b79 Only
Editing an Existing Stitch
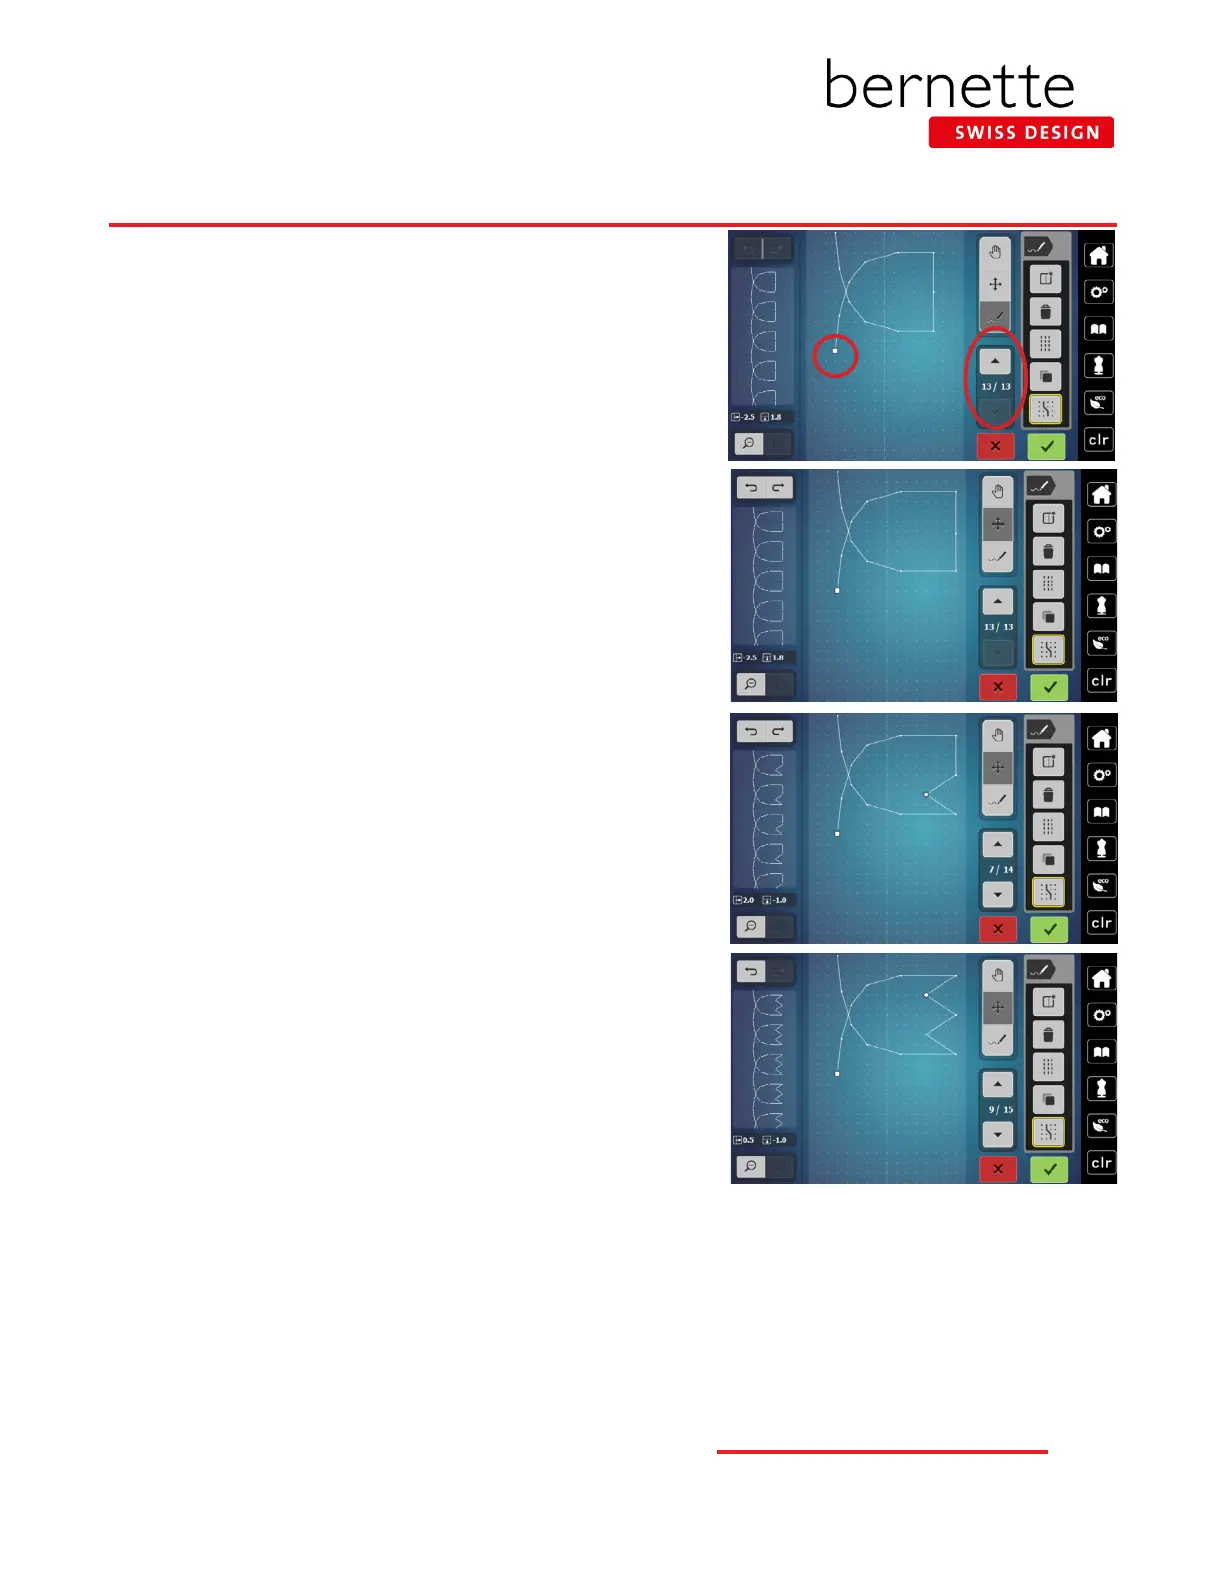
1.
From the Sewing display, select stitch #191.
2. Select the Stitch Designer icon.
3. Engage Snap to Grid.
4. To move through a design, locate the current stitch
point (indicated by the largest dot, and exact stitch
number is noted in Scroll Through Points section).
5. The up and down arrows allow you to move through
the stitch pattern point by point. Touch the up arrow to
move to position 8 / 13.
6. Engage the Move icon and drag the point to the outer
boundary on the screen.
7. Touch the center right stitch (7 / 13) point directly on
the screen. Move this stitch point to the outer boundary
of the screen.
8. Touch the lower right point on the design (6 / 13).
9. Drag the point to the outer boundary on the screen.
Adding a Stitch Point
1. Select Move and touch the stitch point just before the
position you would like to add a new stitch point. For
today, this will be stitch 6/13. (Or use the Up/Down
arrows to scroll to the stitch point just before the
position you would like to add the new stitch point.)
2. Select the Insert/Edit a Stitch (pencil) icon and tap two
dots up from this point.
• A new large dot appears indicating the location
of the new stitch point and the stitch count has
changed (7/14).
• If the dot does not go where you want it to, touch
the Undo icon to remove it.
3. Select Move icon; drag the point in 4 dots in toward
the center.
4. With Move still selected, touch the center right stitch
point.
5. Select the Insert/Edit a Stitch icon; touch the screen
two dots up from the center point.
6. Select the Move icon and move the new stitch point 4
dots in toward the center.
7. Touch Conrm to return to the Sewing display; sew out
or save to the bernette Personal Program.
HOW