7
bernette
SEWING MACHINE WORK
BOOK
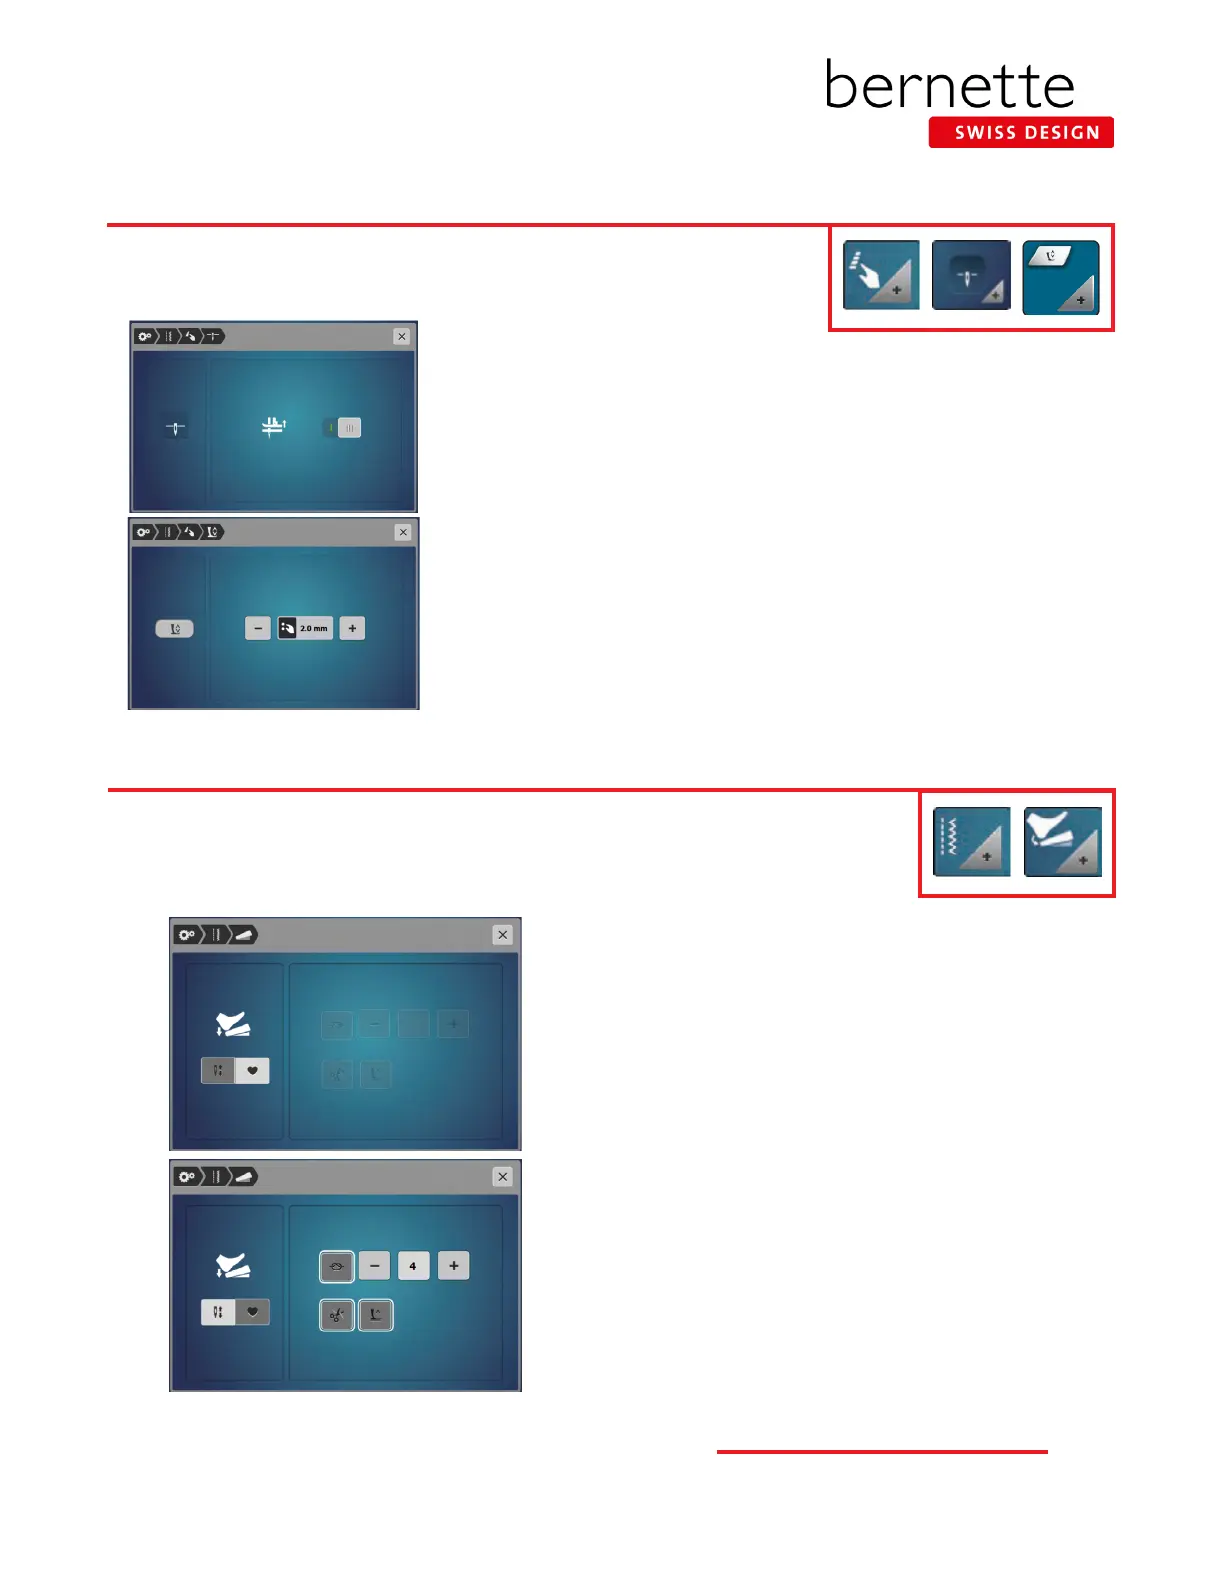
Program Needle Stop Down and Hover
Program the bernette Foot Control
1. Select Programmable Buttons in the breadcrumb path..
2. Select the Needle Stop Down icon.
3. Touch the switch to activate Needle Stop Down.
Note: If you should wish to deactivate Hover entirely, this switch should be set
to off.
To set the height of the hover position:
1. Select Programmable Buttons in the breadcrumb path.
2. Select Program the Hovering Position of the Presser Foot.
3. Turn the Multunction knobs (or touch - / +) to adjust the distance between the
stitch plate and the presser footfrom 1 mm to 6 mm. Leave the setting at the
default of 2 mm for these lessons.
1. Using the breadcrumb path, navigate back to the Setup
menu; select Sewing Settings.
2. Select the Foot Control icon.
3. If the Needle icon is selected, the back-kick will move the
needle to the next position.
4. Select the Heart icon. The back-kick can be programmed
in a number of ways:
• When the Securing icon is selected, the number of
securing stitches can be programmed for two to six
securing stitches in place. The standard is 4 stitches.
• When the Automatic Thread Cutter icon is selected, the upper
and lower threads are cut automatically by the back-kick.
• When the Presser Foot Lift icon is selected, the presser
foot raises when using the back-kick.
5. For the class exercises, program the Foot Control to raise
or lower the needle. Select the Needle Up/Down icon.
6. Exit the Setup menu.
Take advantage of Hover when stitching with Needle Stop Down engaged. When the
stitching stops with Needle Stop Down engaged, the machine can be programmed to
stop with the presser foot down or to hover.
The bernette Foot Control with Back-kick can be programmed with desired settings. The Foot Control
default setting is to raise or lower the needle when the heel of the foot control is depressed. The
Programmable Foot Control back-kick options also allow the heel-down to signal a tie-off, cut the thread,
and raise the presser foot.