34
bernette
SEWING MACHINE WORK
BOOK
Creating New Stitches-Free-hand Drawing
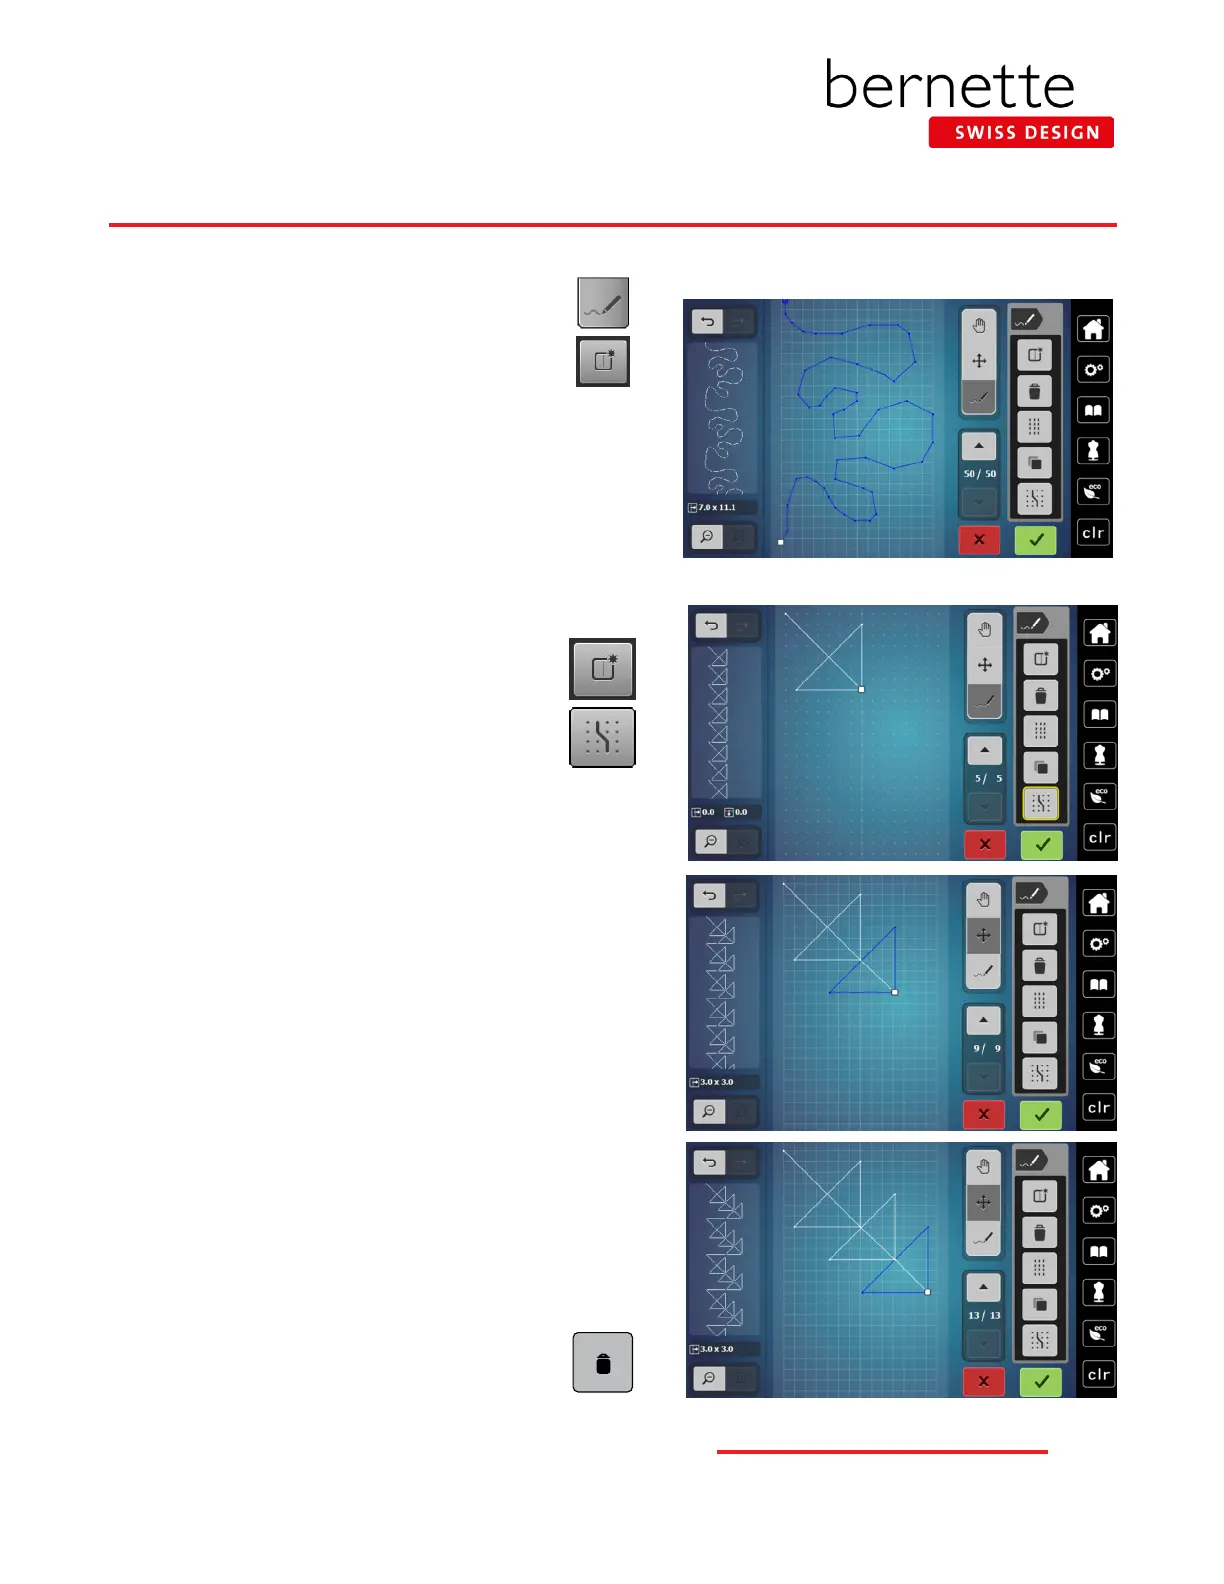
1. Select the bernette Stitch Designer icon from the
bottom right of the sewing display.
2. Touch the Create a New Stitch Pattern icon to get
a fresh page. Insert/Edit a Stitch (pencil icon) is
the default when entering Stitch Designer.
3. With your ngertip or stylus, free-hand draw on the screen
to ll the 7 mm boundary. Begin and end on the same or
approximate vertical grid line for a seamless look.
4. Select Undo/Redo until pleased with the stitch.
5. To start with a fresh screen, touch the Create a New Stitch
Pattern icon.
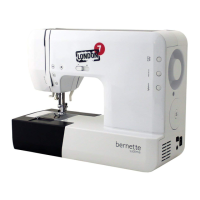
Creating New Stitch Patterns
1. Touch the Create a New Stitch Pattern icon to start
another stitch.
2. Select Snap to Grid icon. Snap to Grid makes it
easy to align points as stitch points will only fall
on a dot (note the grid changed to dots).
3. Select Insert/Edit a Stitch Pattern.
4. Design stitch by setting points:
• Click 1: to begin click at the upper left corner of screen
• Click 2: diagonal line 8 grids down and 8 grids over
• Click 3: straight line 7 grids up
• Click 4: diagonal line 6 grids down and 6 grids to left
• Click 5: straight line 6 grids to the right.
The way the design will stitch out will appear in the Preview window.
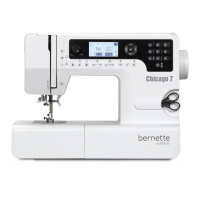
5. Use the up arrow in the Scrolling Through Points section
until the last 3 stitches are selected.
6. Disengage Snap to Grid.
7. Select Duplicate; the duplicate is on top of the pattern.
8.
Select Move; drag the duplicate down and to the right using
your ngers or stylus, or by using the Multi-function knobs.
9. With the triangle still selected, select Duplicate again.
10. Move this triangle to the right and below the others using
drag and drop or the Multi-function knobs.
Notes:
The Delete icon (Trash Can) deletes whatever is
selected indicated by the blue selection. This can be
a single point, a group of points or the entire stitch.
bernette Stitch Designer - b79 Only