106 of 109
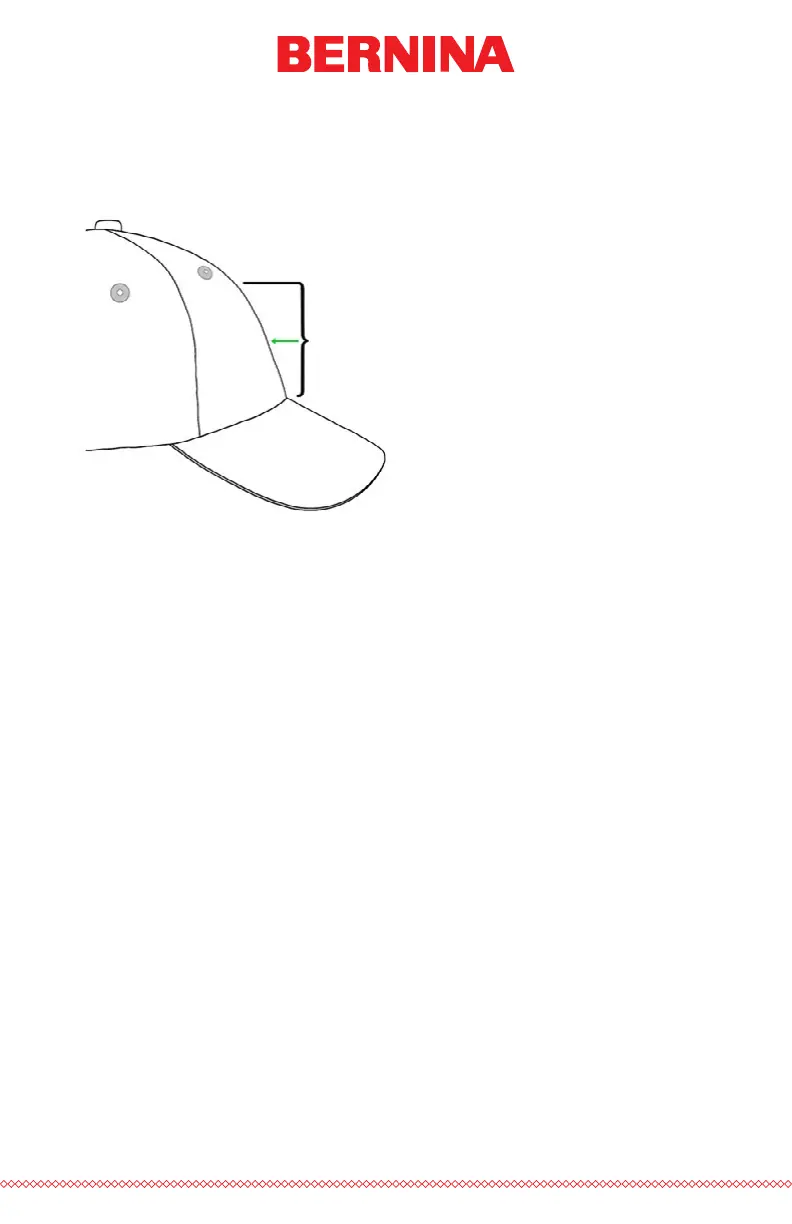
is similar to measuring the design height that the cap can accommodate.
Once measured, divide the measurement in half. Measure up from the
bill that half distance to nd a good vertically centered placement for the
design.
Divide
this
height
in half.
Marking this measurement on the cap with masking tape or tailor’s chalk
works well. Use the hoop and up or down arrows to move the hoop into
position. As you use these keys, the machine’s laser will illuminate the
placement.
Centering Horizontally
With the cap frame loaded on the machine, use the Hoop Key and the left
or right arrow on the machine keypad to center the cap horizontally. If the
cap has six panels, you will have a seam running down the middle of the
front. This acts as a marker for center. If the cap has ve panels, it will not
have a seam, and you may need to use a tape measure and tailor’s chalk to
nd center.
Using the laser to line up to center may not work as well in this case. As
the cap comes of the needle plate, the laser is displayed farther to the right.
This is from the laser being set just behind the right upper arm front cover
of the machine.
For a more accurate placement, line up the active needle (the needle with
the presser foot behind it).