72 of 109
11. Slide the red driver assembly onto the lower arm and support shaft.
This may be easier if the grabber bar of the machine is closed. To
close the bar, simultaneously press the “Adjustment” and “Center”
keys on the keypad of the machine.
+
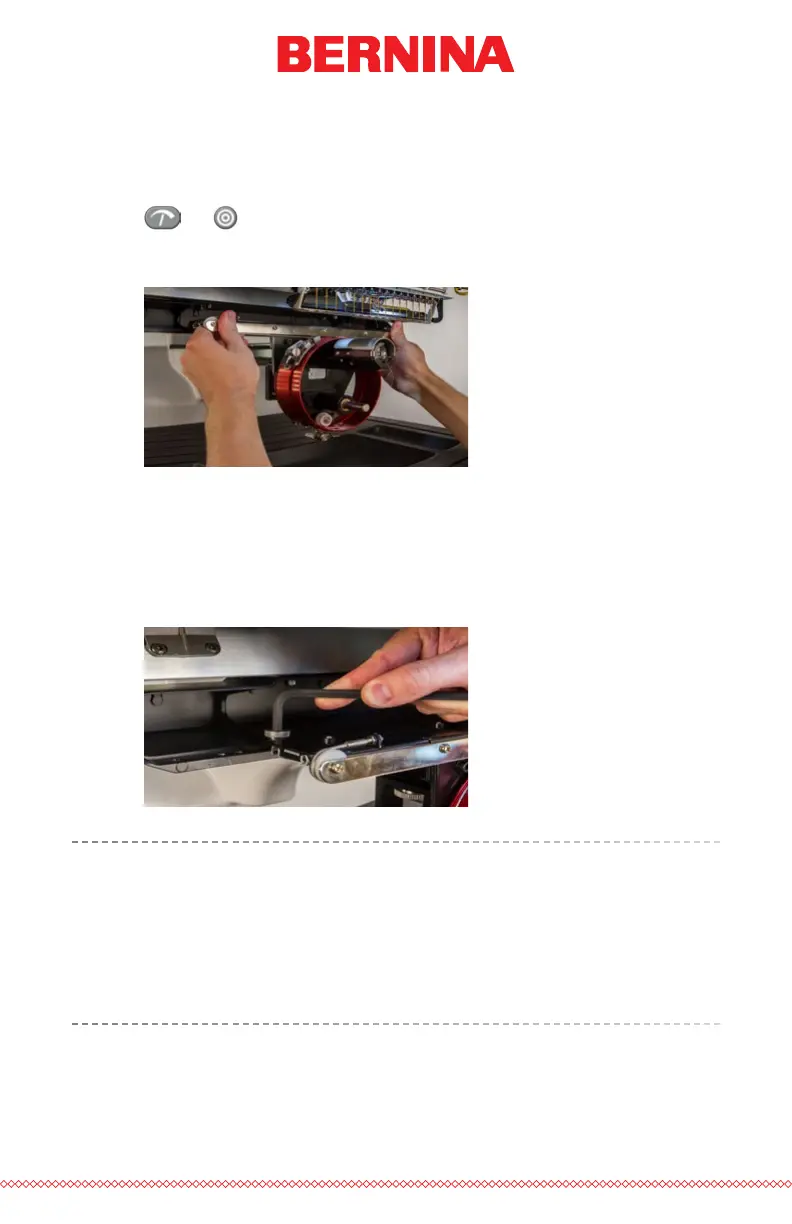
Then, slide the red driver assembly onto the lower arm and support
shaft. Notice the orientation of the ring in the picture.
12. Using two of the thumb screws from the hoop arms, attach the red
driver to the x-carriage of the machine. The driver will attach to the
two innermost holes. Tighten them to nger-tight, and then use a
6mm Allen wrench to tighten an eighth to quarter turn more. Do
not over-tighten the screws as they are designed to break before
damage to the machine can occur.
The red driver ring should slide easily over the lower arm of the
machine and should allow for a business card or two to t between
the ring and the lower arm. The space should be enough for the
card(s), but no more. If the gap between the ring and the lower arm
is incorrect, or if you are unable to install the driver, it will need to be
adjusted. See the adjustment section for instructions on how to test
and adjust.