96 | Appendix A: Install the Barcode Scanner
Left-Side Installation
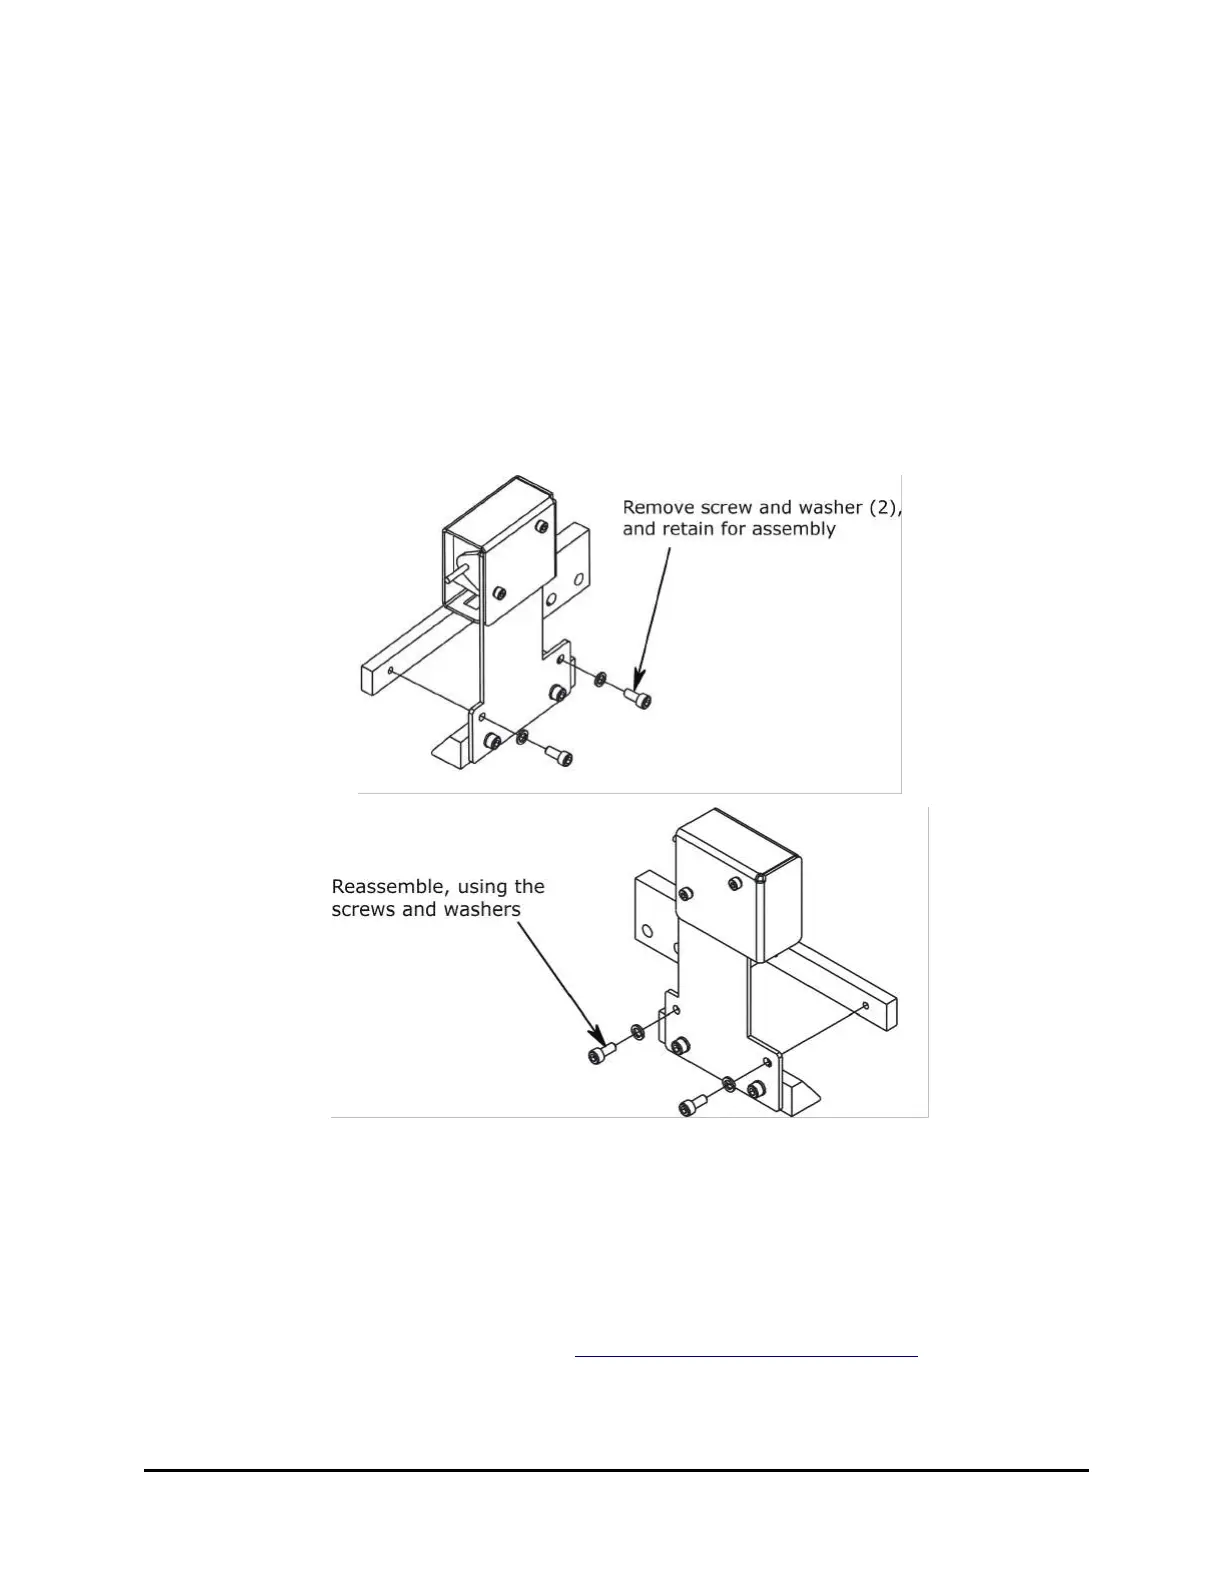
1. Using the supplied screwdriver, remove the two screws and washers that
attach the scanner assembly to the mounting bracket, as shown below, and set
them aside.
2. Using a 9/64" hex wrench, remove the scanner from the bracket. Be very
careful not to scratch or damage the mirror.
3. Position the scanner on the opposite side of the bracket and align the mounting
holes.
4. Reassemble, using the two screws and washers and a 9/64" hex wrench.
5. Align the two holes in the scanner mounting bracket with the two holes on the
left side of the BioStack.
6. Using the two shoulder screws, attach the scanner to the BioStack.
7. Using lens tissue or a soft cloth moistened with lens cleaner, carefully wipe the
mirror to remove any dust or particles.
8. To complete the installation See Install the Scanner Cable Duct on the facing
page.
BioStack™ Microplate Stacker
 Loading...