90 | Chapter 6: Troubleshooting & Error Codes
3. Using a pencil tip, push SW-1 switch #1 (the left-most dip switch) to its Open
position, away from the instrument.
4. Replace the plug.
See also Plate Stacked Height on page 88
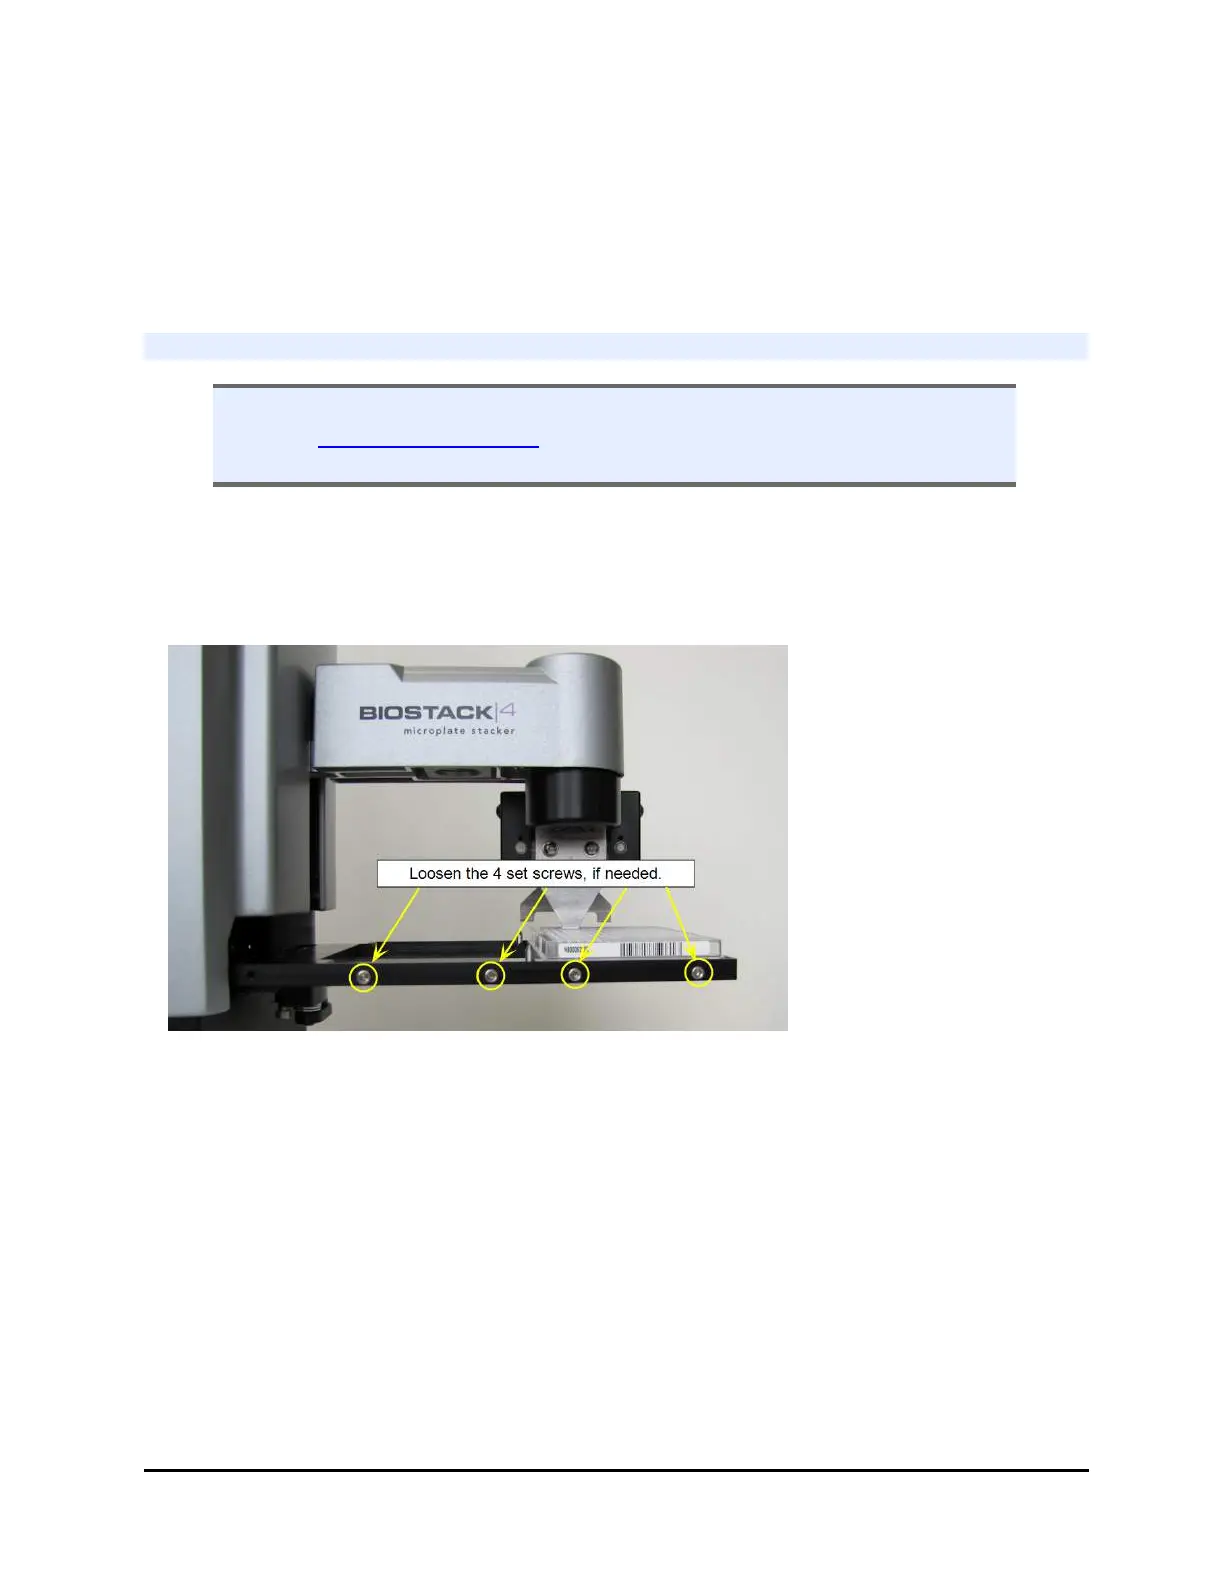
Loosen Plate Carrier Set Screws - BioStack 4 Only
n Caution: This is a delicate procedure, best performed by a technical expert.
Consider contacting BioTek TAC to let the professionals resolve your
performance problems.
If your microplates are not transferring properly, first Test Plates for
Compatibility—BioStack 4 Only on page 30. If the plates sit too snugly in the
carrier, loosening the set screws on the side of the carrier may resolve the problem.
Tools: 1/8" Allen (hex) wrench
BioStack 4 plate carrier exposed to access 4 set screws
1. Turn off and unplug the BioStack, if necessary.
2. Expose the BioStack's plate carrier: slip your hand inside the front of the
BioStack under the gripper, feel for the outer edge of the plate carrier, and gently
pull it out.
3. Use the 1/8" hex or Allen wrench to slightly loosen the screws until the plate is
free to move a bit from side to side. Each carrier position has two screws: try to
apply the same offset to both screws, as precisely as possible.
BioStack™ Microplate Stacker