Install the Shipping Hardware—BioStack2WR | 37
Install the Shipping Hardware—BioStack2WR
Reverse the process of uninstalling the shipping hardware. Refer to photos on
page 18.
Tools: You need a standard screwdriver, a small Phillips-head screwdriver and
3/32" hex wrench.
1. Turn on the BioStack to keep the gripper arm in its highest position.
n If the BioStack cannot be turned on, manually raise the gripper to its full height
and hold it there.
2. Install the gripper shipping screw (see below).
3. Remove the gripper arm cover and install the wrist shipping block using the
hex wrench.
4. Replace the gripper arm cover.
5. Install the shipping block inside the instrument.
6. Install the plate carrier shipping screw.
Next step: Repacking—Install Shipping Panel on page 39.
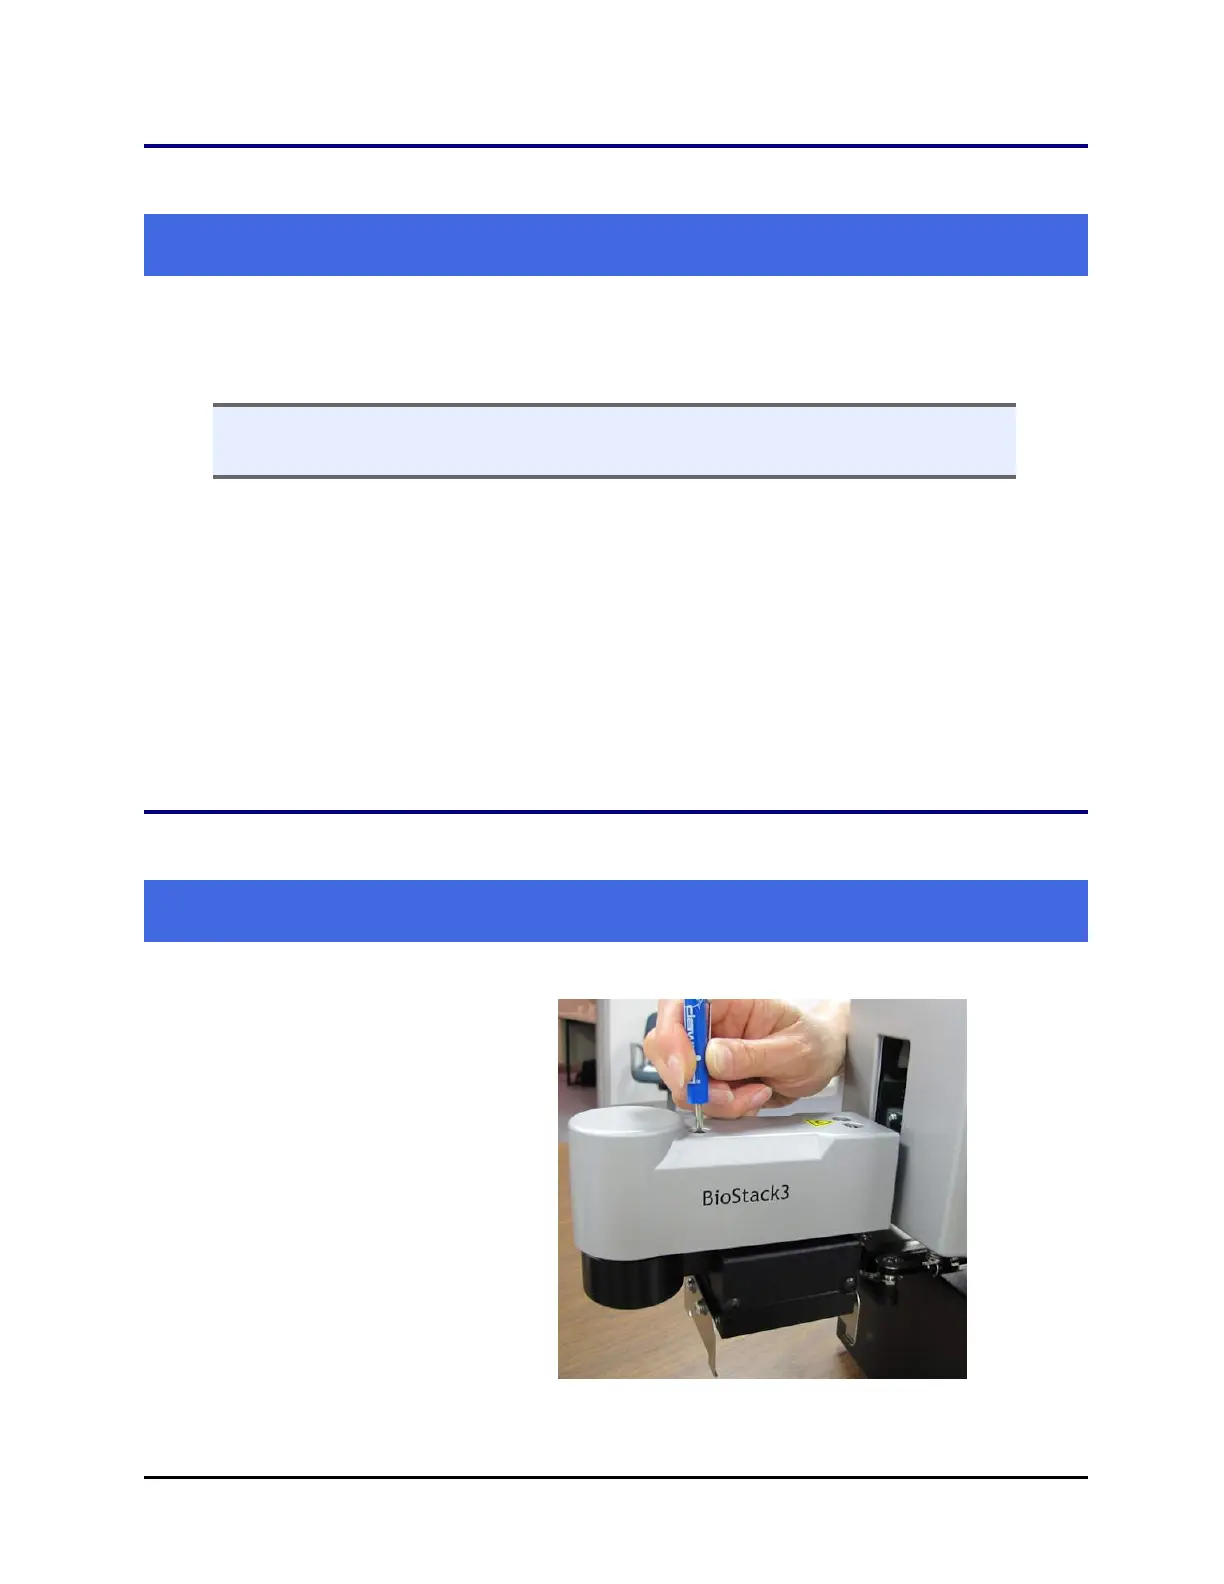
Install the Shipping Hardware—BioStack 3
Reverse the process of uninstalling the shipping hardware. Refer to the photos
on page 20.
Tools: You need a standard screwdriver and a small Phillips-head screwdriver.
1. Turn off the BioStack and
unplug the power cable.
2. Remove the gripper arm
cover. Place the screws in
the plastic bag (#98170) and
put the bag inside of the
arm cover. Put the arm
cover with the screws into
the bubble bag (#91083).
BioTek Instruments, Inc.