EasyManua.ls Logo

Biotek BioStack 3 User Manual

Biotek BioStack 3
127 pages
To Next Page IconTo Next Page
To Previous Page IconTo Previous Page
Page #79 background image
Processing Plates with Lids | 57
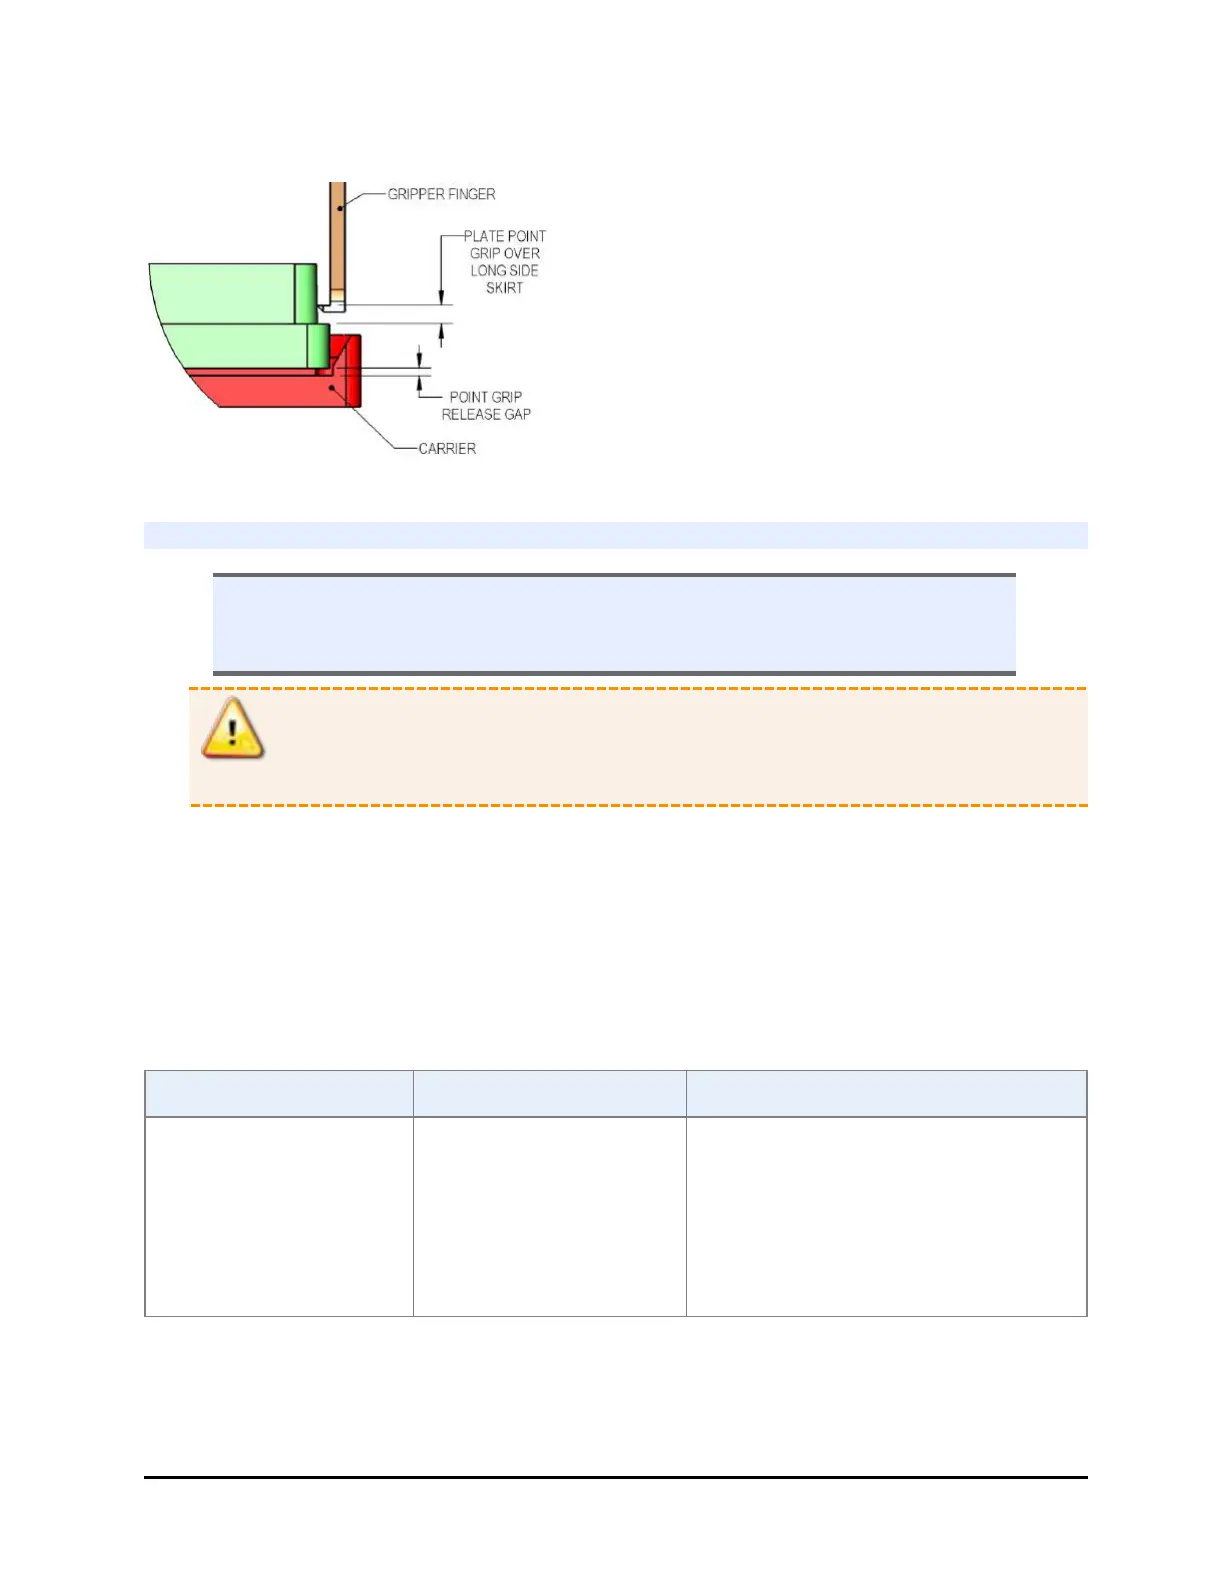
Point Grip
Start Up the BioStack
n Always turn on the BioStack before turning on the interfacing instrument.
BIOSTACK2WR: Make sure the gripper can be homed without causing a
collision.
Warning! Keep hands away from the BioStack's gripper and plate carrier during
power-up.
The BioStack runs its system test when started. The LED on the back shows the
status:
l LEDflashing indicates an error condition.
l LED not flashing = system test passed.
If the system test fails, turn on the interfacing instrument. Its system test will run.
Liquid Handlers
LHC Keypad Touch screen
1. Select
Tools>BioStack
Utilities.
2. Click Reset
BioStack.
1. Press
UTIL>Setup
Menu.
2.
Select g,
BIOSTK > ALIGN
> HOME.
1. At the Home screen, press
Instrument.
2. Select Next > BioStack and
press Get Basecode Version.
BioTek Instruments, Inc.

Table of Contents

Question and Answer IconNeed help?

Do you have a question about the Biotek BioStack 3 and is the answer not in the manual?

Biotek BioStack 3 Specifications

General IconGeneral
TypeMicroplate Stacker
Plate Transfer TimeLess than 10 seconds per plate
Power SupplyExternal power supply
Power Requirements100-240 VAC, 50/60 Hz
Operating Temperature15 °C to 35 °C
CapacityUp to 50 microplates
Plate Types96- and 384-well microplates
CompatibilityCompatible with BioTek washers, dispensers, readers, and imagers
Power24 VDC
Control InterfaceRS-232
InterfaceRS-232 and USB
Operating Temperature (°C)15°C to 35°C

Related product manuals