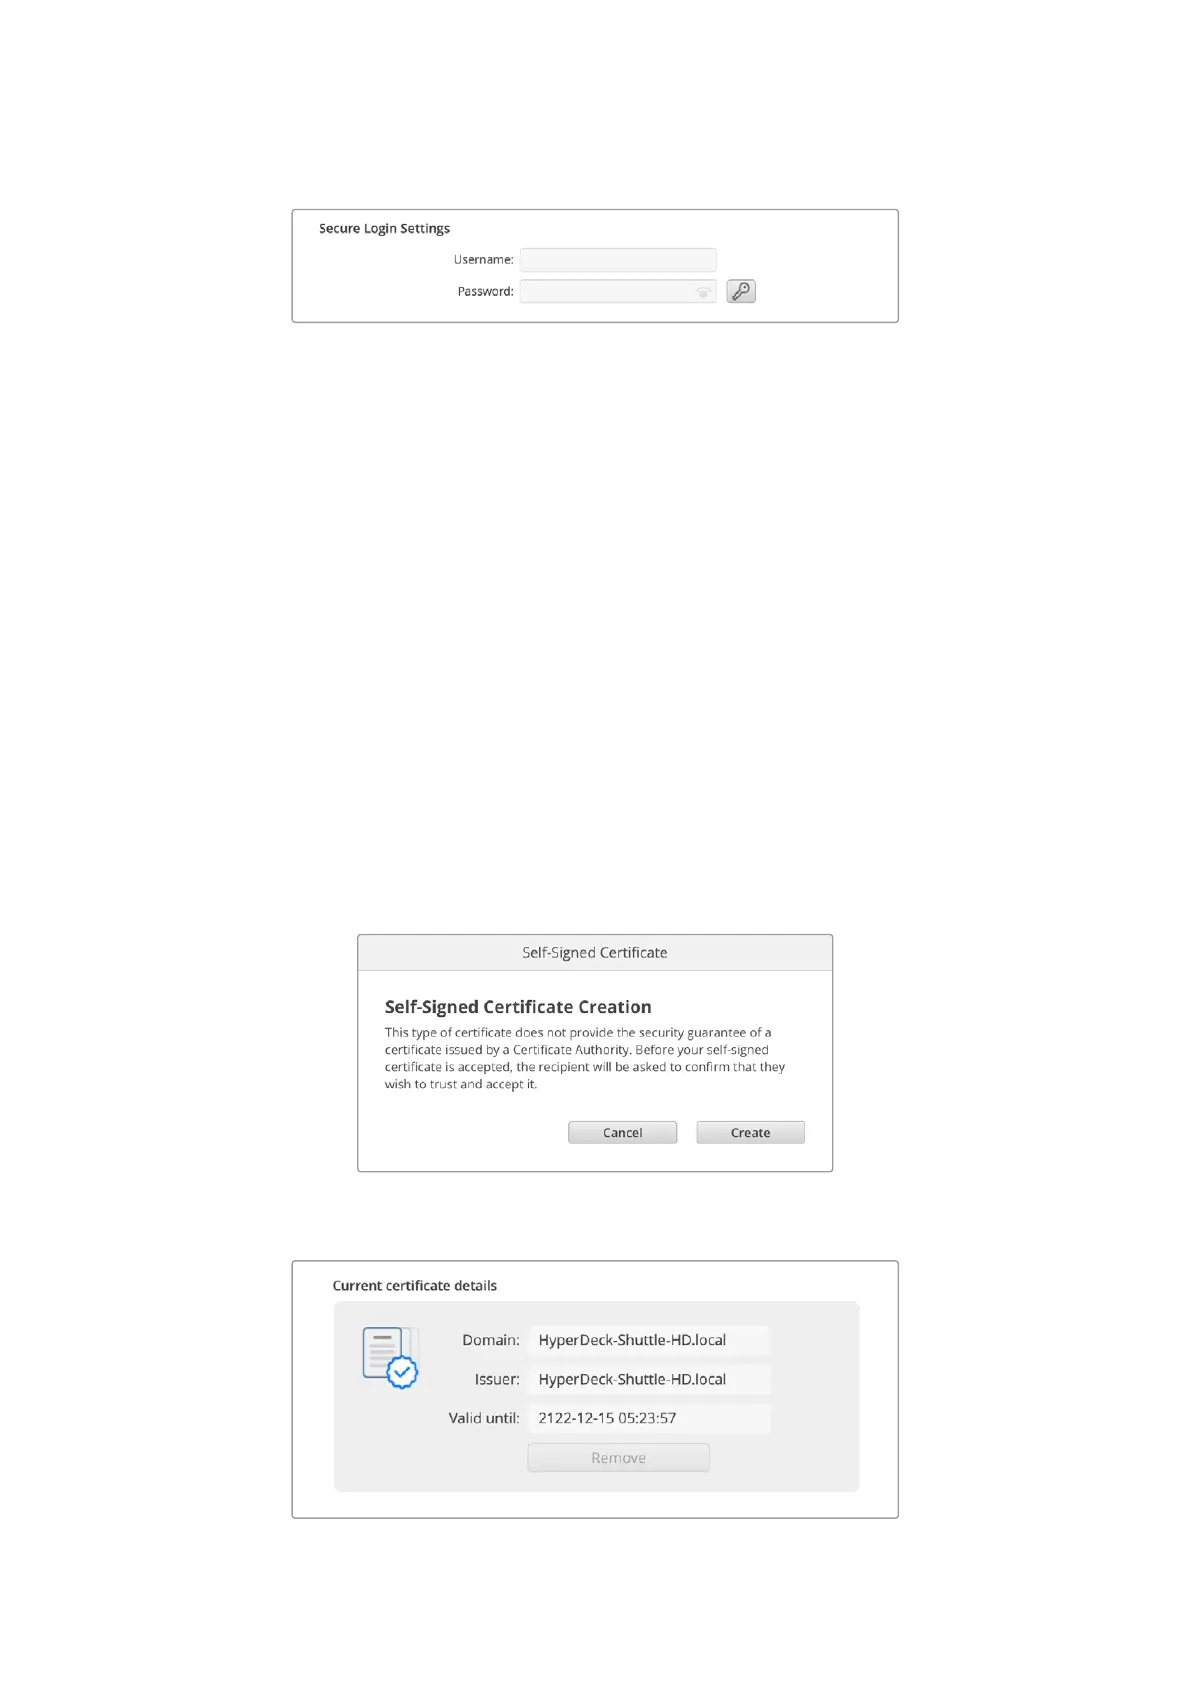
Secure Login Settings
If you have selected ‘enabled with security’ for HyperDeck Ethernet Protocol access you will
need to enter a username and password. Type a username and password and click ‘save’.
Thepassword field will appear empty once a password is entered. Once a username and
password is set, you will need to enter it when accessing the web media manager if ‘enabled
with security’ is selected.
Secure Certificate
To enable web media manager access via HTTPS, or when HyperDeck Ethernet protocol has
been configured to the security only option, you will require a secure certificate. This digital
certificate acts as an identification card for your HyperDeck Shuttle HD so that any incoming
connections can confirm they are connecting to the correct unit. Along with confirming the
identity of the unit, using a secure certificate ensures data transmitted between HyperDeck
Shuttle HD and a computer or server will be encrypted. When using the secure login settings
the connection will not only be encrypted but require authentication for access.
There are two certificate types you can use with HyperDeck Shuttle, a secure certificate signed
by a certificate authority, or a self signed certificate. A self signed certificate may be secure
enough for some user workflows, for instance only accessing the HyperDeck Shuttle HD via a
local network.
To generate a self signed certificate click on ‘create certificate’. You will be prompted to confirm
you understand the risks with using a self signed certificate. Once you click on ‘create’, the
certificate details will autofill the ‘domain’, ‘issuer’ and ‘valid until’ fields in the HyperDeck
Setup utility.
Following a factory reset any current certificate will be deleted, but you can also remove it at
any time by clicking on the ‘remove’ button and following the prompts.
31Blackmagic HyperDeck Setup
 Loading...