The Blustream Multicast system can be configured without the need of a computer, allowing basic setup options such
as addressing of products (IP configuration), EDID setup and scaler output setup.
Manual configuration does not require the product to be connected to a network switch in order to be setup, they only
require the units to be powered either by local power supply (24-54V 1A) or by a PoE switch/power injector. This means
total configuration can easily be achieved osite without any network hardware.
Note: Advanced features such as video walls cannot be setup via manual configuration, and requires the PC soware.
Configuring the IP100UHD-TX
1) Power the Multicast product - To configure the Multicast Transmitter first connect the product to a power supply
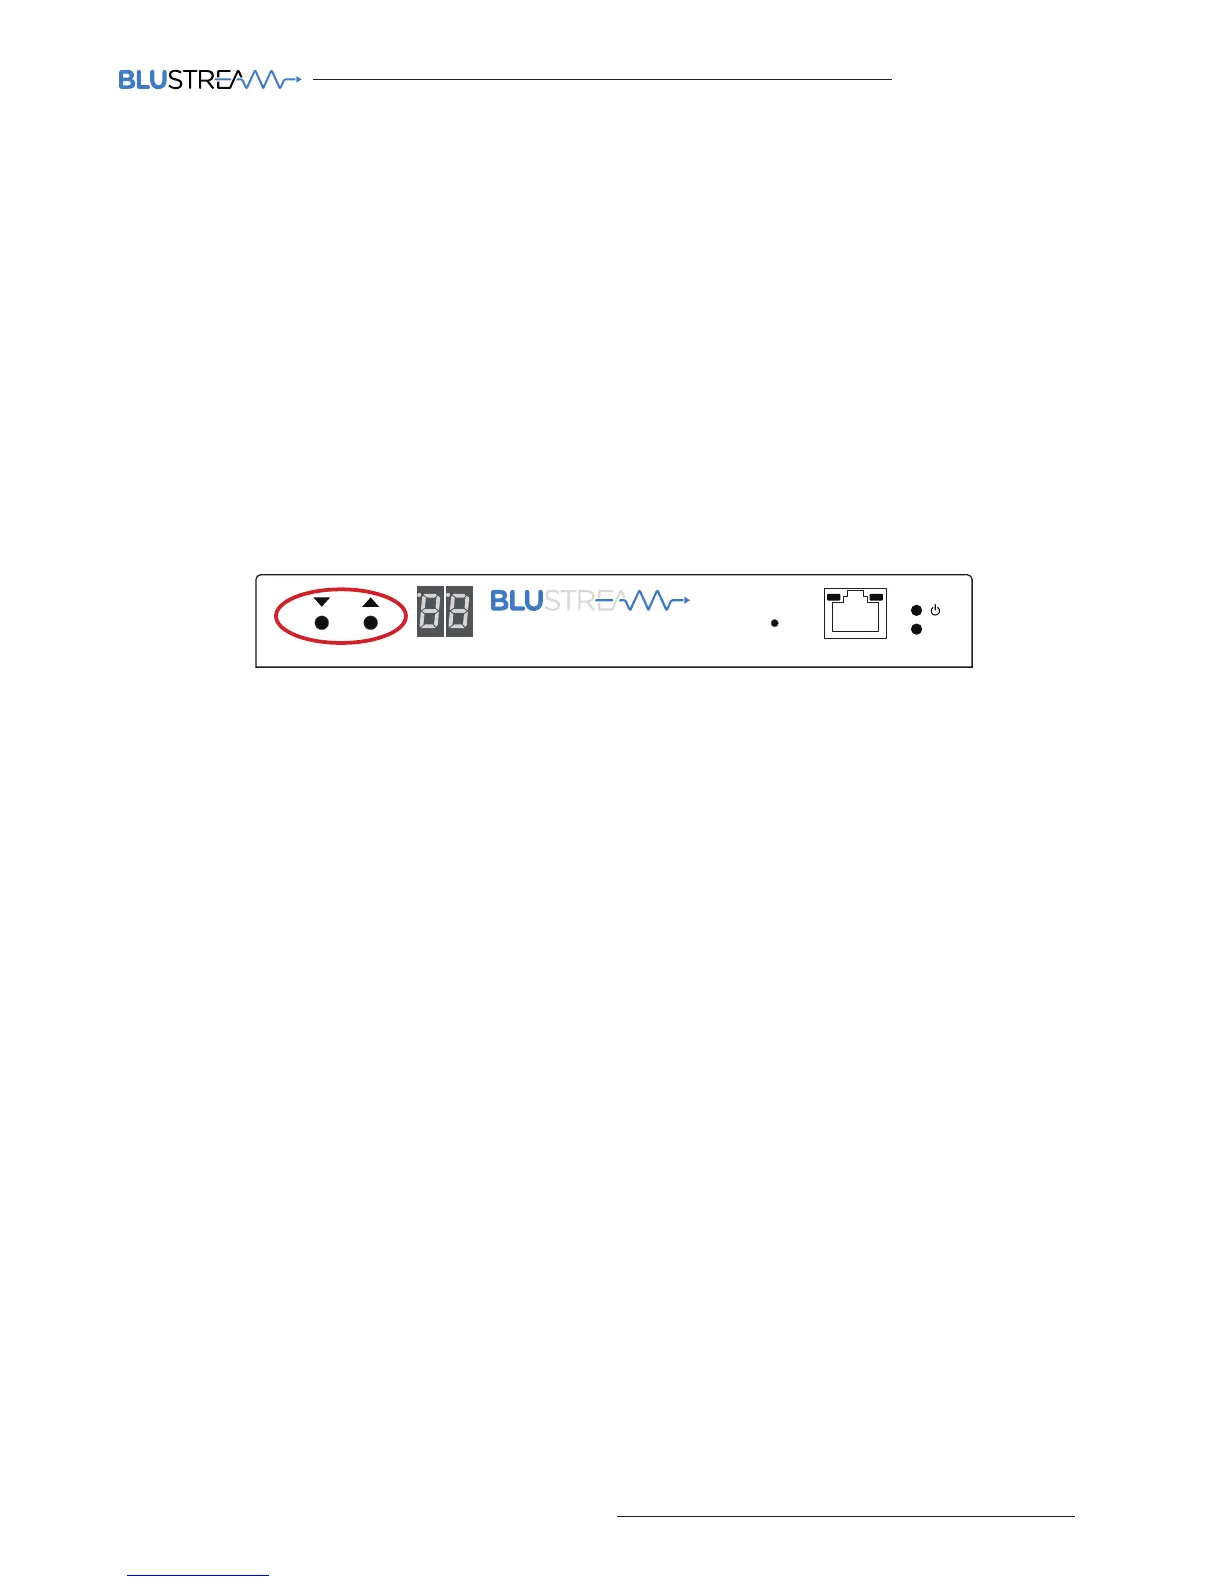
(local or PoE network) and wait for the product to boot up. The front panel LED display will rotate whilst booting and
display a 2 digit number when complete.
2) Put the Multicast product into 'Local Configuration' mode - Once the product is powered press both the 'UP'
and 'DOWN' channel buttons on the front panel at the same time for 6 seconds to enter 'Local configuration' mode.
You will know that the IP100UHD-TX is in this mode as the LCD front display of the product will show 'LC'.
3) Assign the Transmitter ID (IP address) - Once the product is local configuration mode the display will begin to
flash with a lowercase 't' to indicate that you are about to assign the transmitter identity. The identity will also be the IP
address that is automatically assigned so it is of upmost importance that you do not assign any 2 Multicast Transmitter
products with the same ID/IP address.
The first ID you should assign is ID1 = 169.254.3.1 (IP address 1)
The second ID you should assign is ID2 = 169.254.3.2 (IP address 2)
And so on....
Once you have selected the ID number press both Channel 'UP' and 'DOWN' buttons at the same time to move on to
setting the EDID.
4) Set the EDID - Once the product is in EDID configuration mode the display will begin to flash with a lowercase
'e' to indicate that you are about to assign an EDID value. Use the 'UP' and 'DOWN' arrows to select the EDID setting
required. A full list of EDID settings can be found on page 16 'EDID Control'.
For example: If the display shows '00' the EDID will be 1080P 2CH.
Once you have selected the EDID required press both Channel 'UP' and 'DOWN' buttons at the same time to finalise
the setup. The Multicast product will reboot with the new configuration settings applied.
5) Configuring the IP100UHD-RX
Configuring the identity of the IP100UHD-RX Receiver is the same steps (steps 1 to 3) as shown above for the configura-
tion of the IP100UHD-TX. When ID has been assigned the Receivers have the following IP addresses:
The first Receiver ID assigned is ID1 = 169.254.6.1 (IP address 1)
The second Receiver ID is ID2 = 169.254.6.2 (IP address 2)
And so on....
6) Set the Video Scaler of the Receiver - Once the product ID has been configured the display will begin to flash with
a lowercase 's' to indicate that you are about to set the scaler output. Use the 'UP' and 'DOWN' arrows to select the
scaler setting required. A full list of scaler settings can be found on page 17 'Scaler Output Control'.
For example: If the display shows '10' the Scaler output will be 4K 30Hz.
Once you have selected the Scaler output required press both Channel 'UP' and 'DOWN' buttons at the same time to
finalise the setup. The Multicast product will reboot with the new configuration settings applied.
Manual Configuration of Multicast Products
Link
PoE PWR
CH
CH Select
Lan
IP100UHD-TXMULTICAST UHD