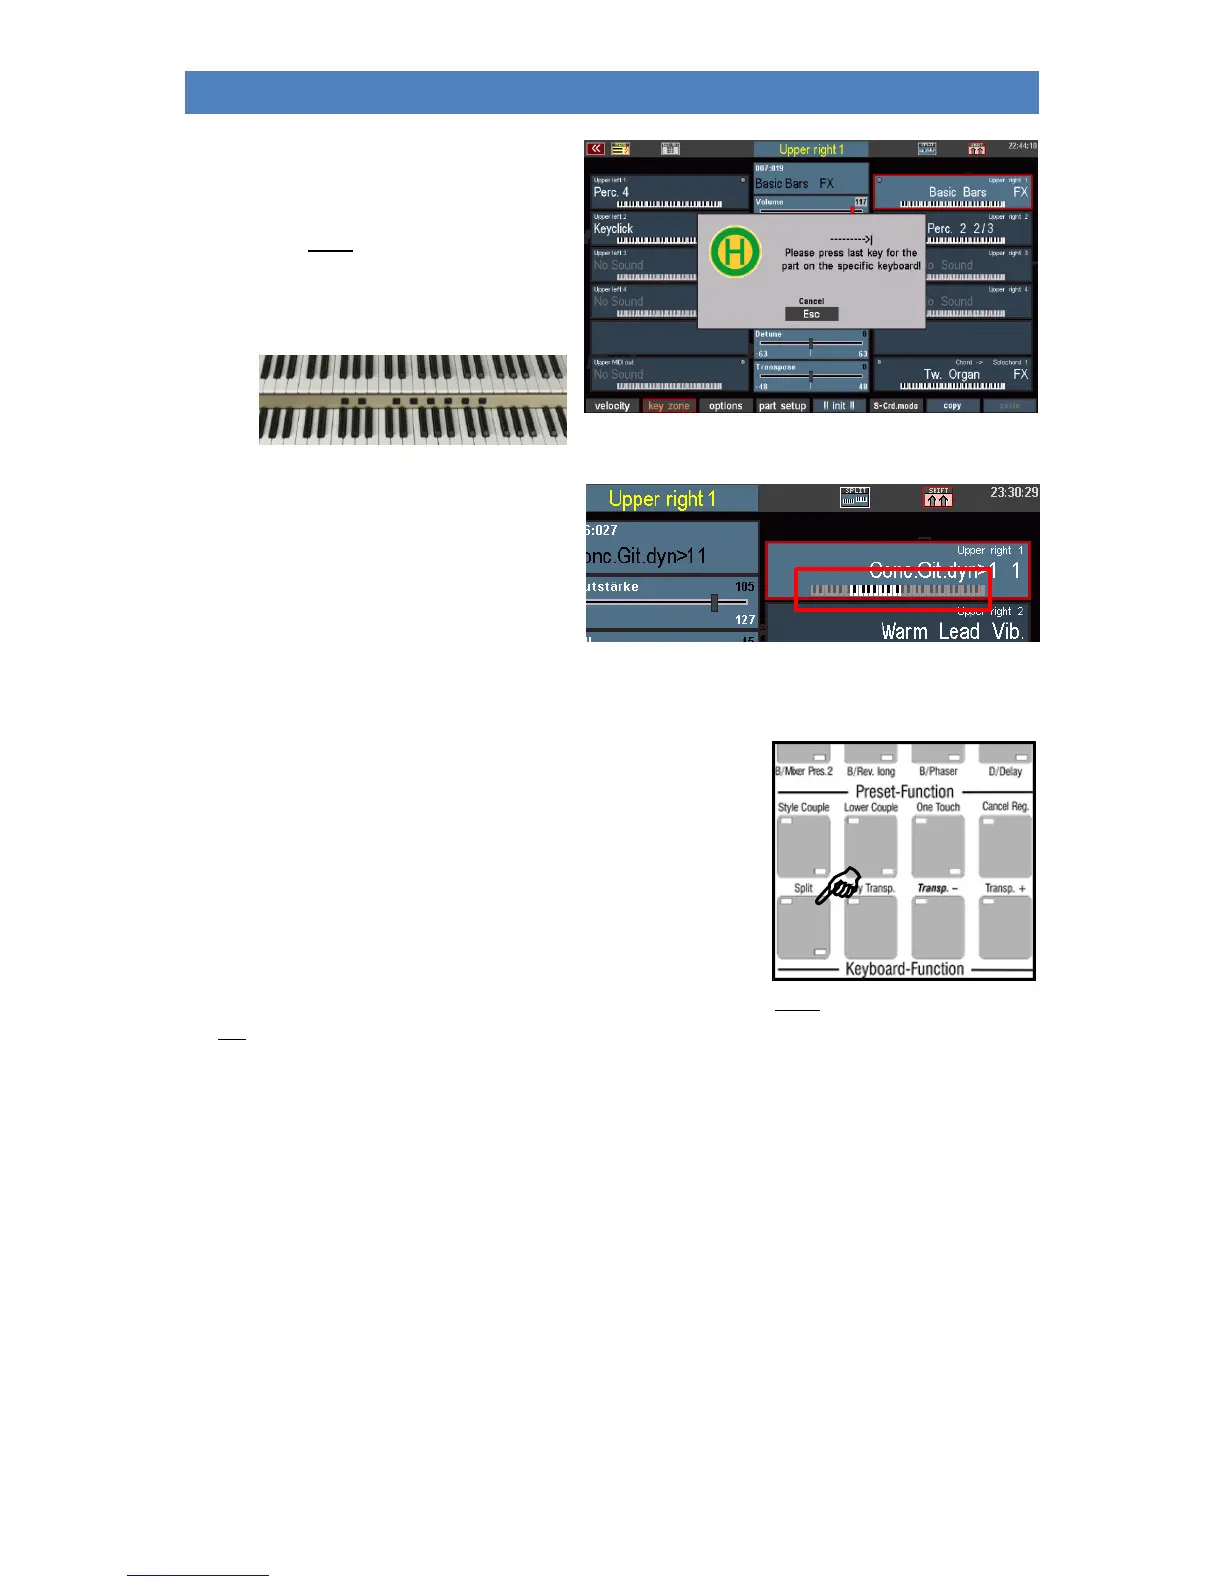
• You will now be prompted to enter
the last key of the Key Zone. This is
the key that is to limit the key zone
to the right.
• Press the desired key on the
corresponding keyboard.
This defines the key zone. You can read the
area you have defined from the keyboard
symbol of the corresponding part - shown
here using an example:
Special features of Key Zones and Manual Split
In the previous chapter, we had already dealt with the manual
divisions via the [Split] button (see page 72 ff.). There we already got
to know some special features in connection with manual splits,
especially the lower manual split point.
These also influence the key zones of the parts. The following points
must be observed in connection with the manual splits:
We remember: The [Split] button can be used to globally split the
upper and lower manual, whereby the right parts first "move" to the right and the left parts first to
the left manual area.
➢ In the upper manual, you can define the key zones independently of any previously set manual
division, i.e. the individual key zones of the parts can cancel the previously defined global split
point for these parts.
➢ If, on the other hand, a global split point is entered in the upper manual via the [Split] button,
even though individual key zones were already defined in the manual, these are now limited
to the newly entered global split point if necessary. In addition, right parts are assigned to the
right and left parts to the left split area.
➢ On the lower manual, individual key zones cannot be defined beyond the global split point,
but are automatically limited to the left (for right parts) or right (for left parts) of the global
split point.