Menus
Printer Defaults
30
BMP
®
21-PLUS/BMP
®
21-LAB User’s Manual
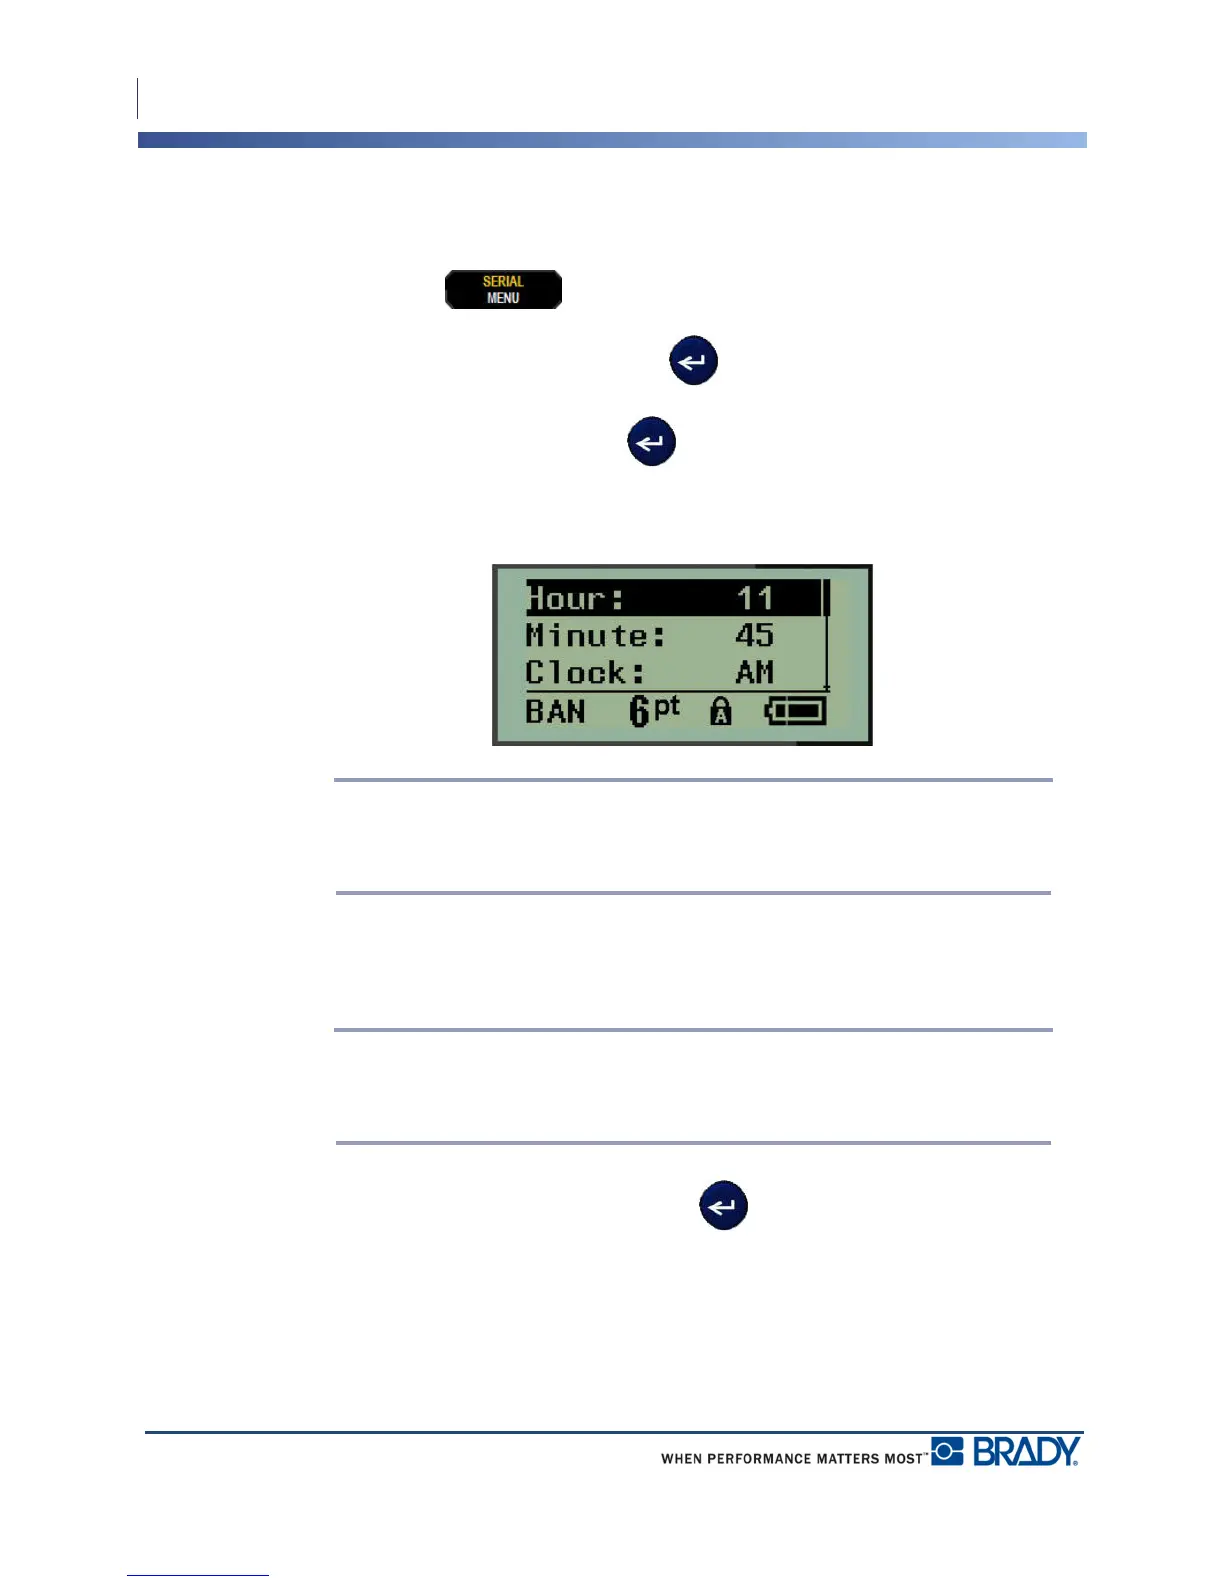
Set Time
To set the time:
1. Press MENU .
2. Navigate to Set Clock, then press Enter .
3. Navigate to Time, then press Enter .
4. Navigate to various fields to set the hour and/or minutes of the desired time.
Note: When using the time format HH:MM:SS, no field for seconds displays. The
internal clock in the printer starts the seconds based on the minutes you have
chosen.
5. Enter the time from the keyboard OR use the left/right navigation key to decrease or
increase the time, one hour or minute at a time. (The left navigation key decreases the
time, the right navigation key increases the time.)
Note: If you have chosen the 12 hour clock format, you can toggle the Clock field
between AM and PM. If you have chosen the 24 hour clock format, you will not be
able to access the Clock field.
6. When finished setting the time, press Enter .
The date and time format and date and time are stored on the printer and will automatically
increment forward to the current date or time whenever the printer is used. The date and time
format you have chosen only displays when the date or time function is used. You can enter
any date or time, in any format, from the keyboard. Entered data is not affected by the internal
clock.