7850-Install-IG101 Installation Guide
Brocade
®
7850 Extension Switch Hardware Installation Guide
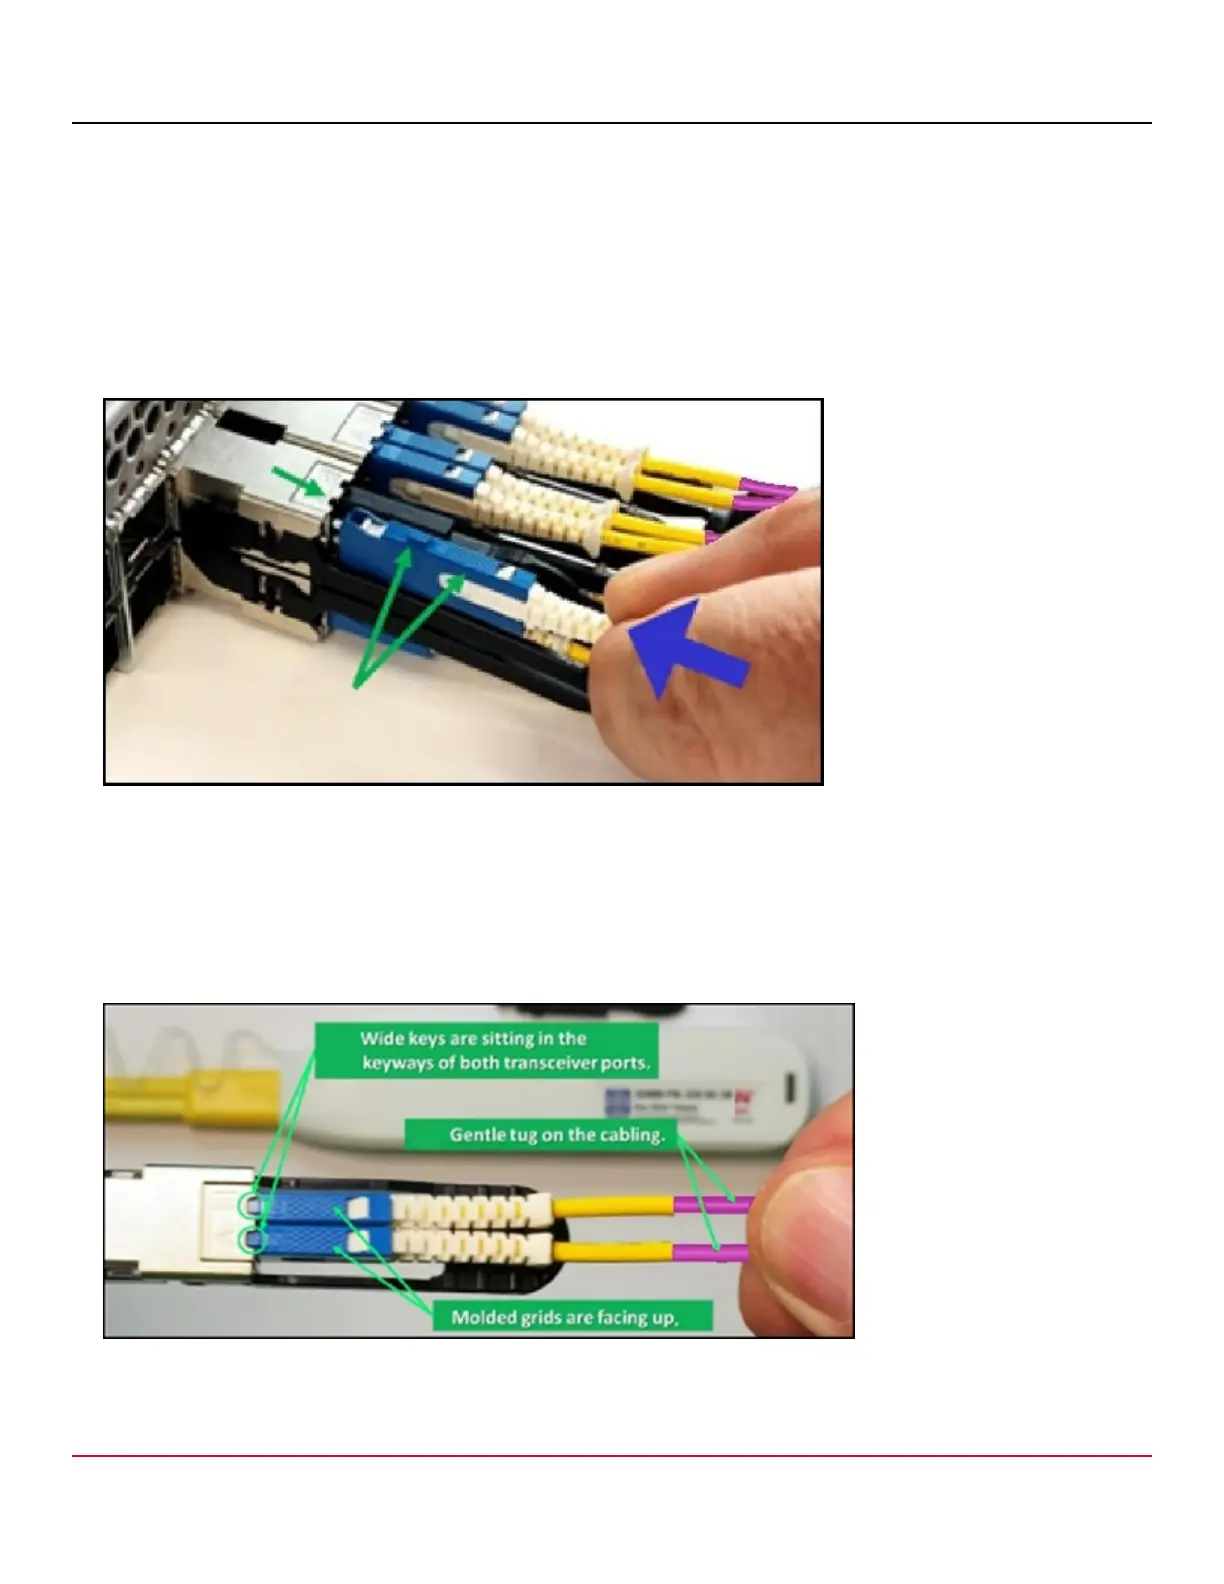
4. Hold the white push-pull boot, and push the connector straight into the port on the transceiver until the latching
mechanism clicks.
The connector will make two soft clicks as it enters the port, and the wide key will fit into the key slot on the SFP-DD
transceiver.
NOTE
This photo is for illustration/instructional purposes only. This graphic displays two rows of SFP-DD ports and
is used to illustrate installing an SFP-DD transceiver. However, the Brocade 7850 Extension Switch has one
row of SFP-DD ports only.
Figure 33: Installing an SFP-DD Connector
NOTE
Cables are keyed so that they can be inserted in only one way. If a cable does not slide in easily, ensure
that it is correctly oriented. Do not force the cable. Do not insert any unsupported cable or a cable that is
intended for another type of transceiver into an SFP-DD transceiver. You may damage the cable as well as
the transceiver.
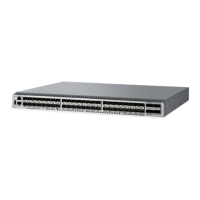
5. Gently tug on the cable to make sure that it is seated firmly.
Figure 34: SFP-DD Connectors Correctly Inserted
Remove the second dust cap, and repeat Steps 3 through 5 to insert the second cable into the transceiver.
7850-Install-IG101
63