3. Remove the following items from the chassis and set aside.
• 14U Rack Mount Kit
• Accessory kit
• Packing foam
• Antistatic plastic
4. Remove the chassis door from the device.
5. Remove the cable management comb.
6. If installing the device in an equipment rack, install the applicable rack mount kit using instructions in Mounting the Device on
page 29.
7. Use a lift to raise the chassis to the correct level. If installing the chassis in a cabinet, follow the instructions provided by the rack
kit manufacturer.
8. If applicable, lock the wheels of the lift.
9. Gently slide the chassis onto the nal installation surface, ensuring that it remains supported during the transfer.
10. Ensure that the chassis is oriented so that the nonport side has access to intake air (cool).
11. Reinstall the cable management comb.
12. Reinstall the door. The door must be installed to meet EMI compliance.
Installing the 14U Rack Mount Kit for Four-Post Racks (XBR-DCX-0120
and XBR-DCX-0152)
Use the following instructions to install a modular device in a 19-in. (48.3 cm) EIA rack using the 14U Rack Mount Kit for Four-Post
Racks (XBR-DCX-0120 and XBR-DCX-0152). Any updates to these instructions will be added to the hardware installation guide for
your product.
Two rack-mount kits are available.
• XBR-DCX-0120 - Contains shelf brackets that telescope from 27 in. (68.58 cm) to 31 in. (78.74 cm) to t the majority of
racks.
• XBR-DCX-0152 - Contains 22 in. (55.88 cm) xed shelf brackets that are designed for specic racks.
NOTE
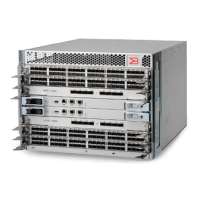
Hardware devices illustrated in these procedures are only for reference and may not depict the device you are installing into the
rack.
Time and items required
Allow approximately one hour to unpack and install a device in a rack.
The following tools are required when installing the 14U Rack Mount Kit for Four-Post Rack:
• Torque screwdriver with #2 Phillips screwdriver tip
• Slotted (at blade) screwdriver
• Hydraulic or assisted lift with a minimum raise of 140 cm (55 in.) and a minimum capacity of 113 kg (250 lb)
Parts list
The following table lists the parts supplied in the XBR-SLX9850-4-NEBS-KIT to help direct airow away from the rack area.
Installing the 14U Rack Mount Kit for Four-Post Racks (XBR-DCX-0120 and XBR-DCX-0152)
Brocade DCX 8510-8 Backbone Hardware Installation Guide
53-1002180-15 31
 Loading...