3 - 32
Lower shaft unit
Main unit
Assembly
Assembly
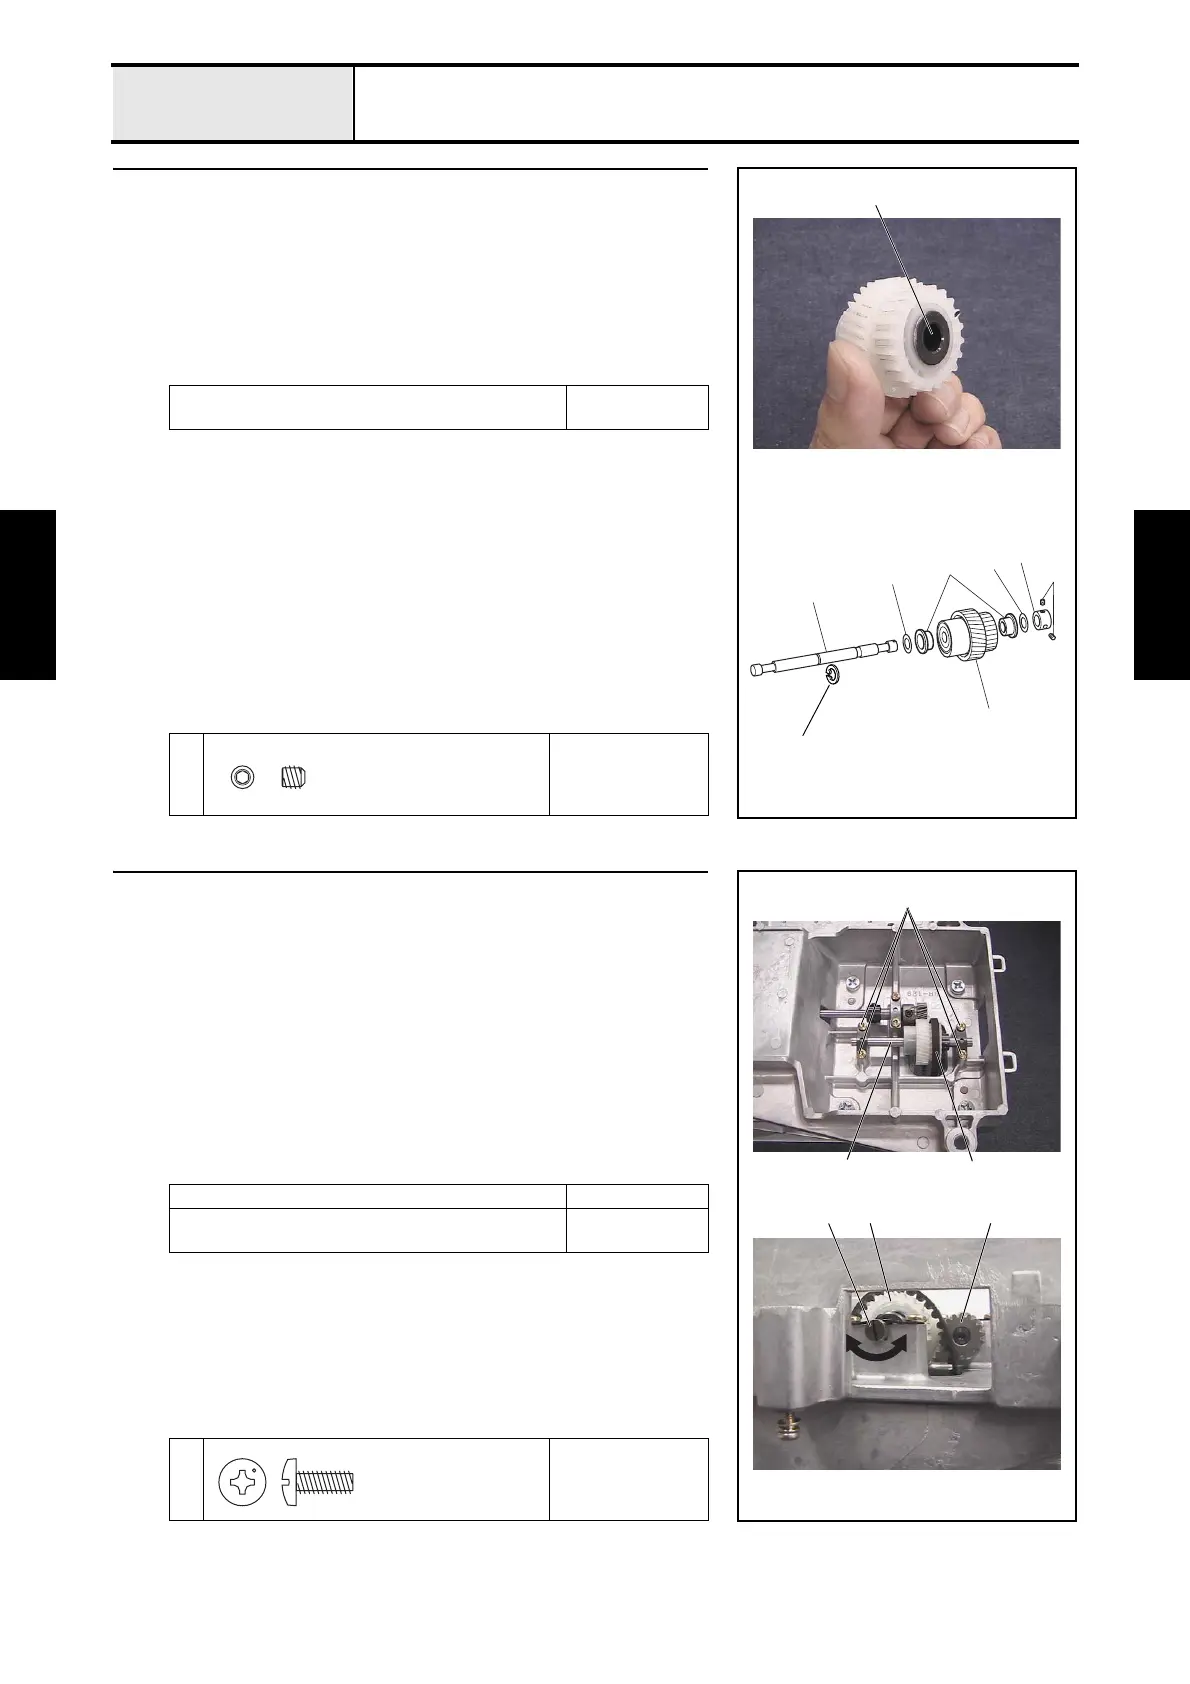
2 Idle pulley assembly
1. Apply FBK OIL RO100 to the shaft hole 1 on the idle pulley.
2. Attach the 2 ball bearings 6 to the idle pulley.
3. Attach the retaining ring E7 to the idle pulley shaft 2.
4. Attach the thrust washer 3, idle pulley 4, thrust washer 3, and set screw
collar 5 to the idle pulley shaft 2.
5. Draw the set collar toward the idle pulley, and secure the set screw collar
with the 2 screws 1.
Apply FBK OIL RO100 to the shaft hole on the idle
pulley.
1 drops
1
Torque
0.78 — 1.18 N-m
2
3
6
5
3
4
1
1
Retaining ring E7
Set Screw, Socket (CP
M4X4
3 Idle pulley assembly attachment
1. Hang the T-belt (S5M-525) 2 over the idle pulley assembly 1, and attach
the idle pulley assembly's 2 lower shaft metals so that they are aligned with
the lower shaft metal collars of the arm bed.
2. Attach the 2 bushing pressers and temporarily tighten them with 4 screws
1.
3. Insert a flat screwdriver from the rear, rotate the idle pulley shaft 3, and
adjust the backlash between the lower shaft gear 4 and the idle pulley 5.
4. Firmly tighten the 4 screws 1 securing the 2 bushing pressers.
*Key point
• Check that there is no backlash in the lower shaft.
5. Apply MOLYKOTE EM30L to the lower shaft gear.
Backlash between lower shaft gear and idle pulley: 0.03 mm
Apply MOLYKOTE EM30L to the lower shaft gear. Gear
circumference
1
Torque
1.47 — 1.96 N-m
1
12
3 4 5
Taptite, Bind S
M4X10



 To Next Page