3 - 69
Needle bar change unit
Main unit
Assembly
Assembly
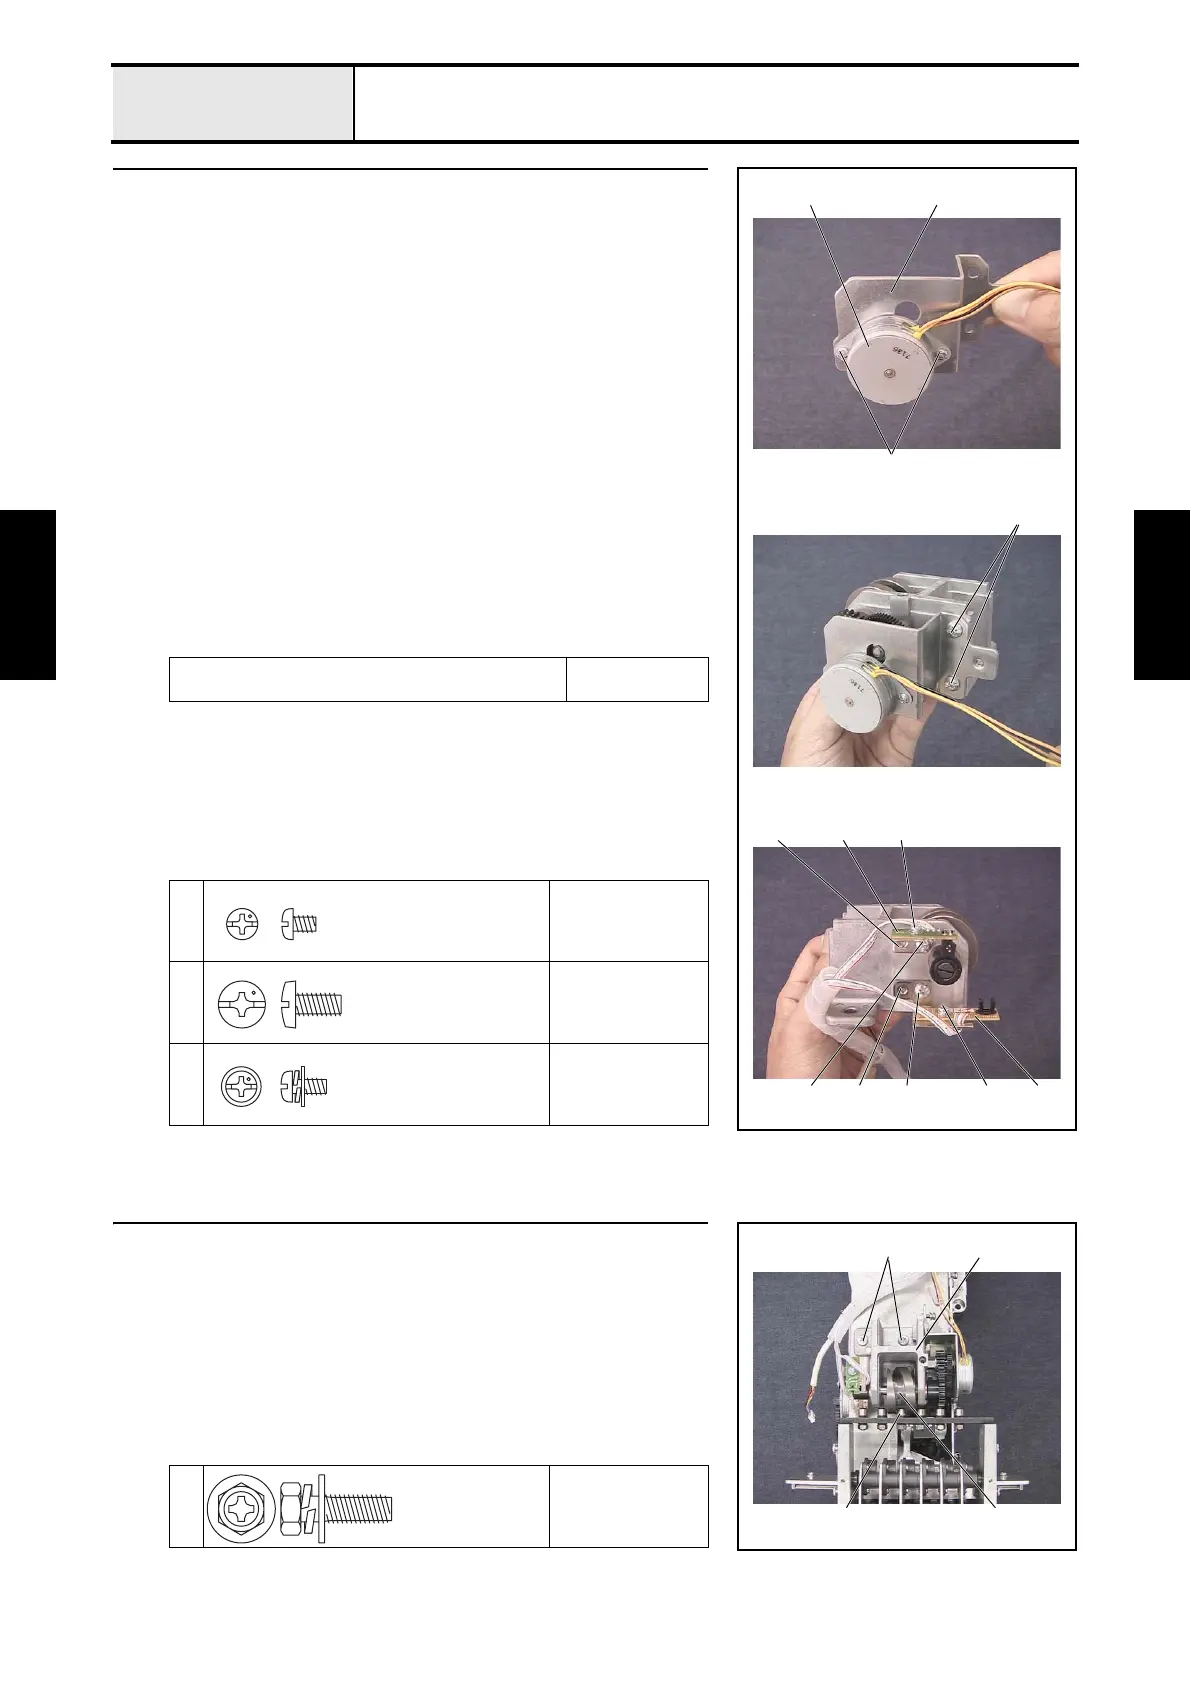
3 Change box assembly (Step 3)
1. Attach the index motor assembly 1 to the change motor base 2 with the 2
screws 1.
2. Attach the change motor base assembly to the change box assembly with
the 2 screws 2.
*Key point
• Move the change motor base assembly up and down to adjust
the backlash of the index motor assembly's gear and the C
differential gear.
3. Apply MOLYKOTE EM-30L to the index motor gear and the C
differential gear.
4. Attach the color change sensor assembly 3 to the C sensor bracket 4 with
the screw 3.
5. Attach the C sensor bracket assembly to the change box assembly with the
screw 4.
6. Attach the index sensor assembly 5 to the C sensor bracket lower 6 with
the screw 5.
7. Attach the C sensor bracket assy lower to the change box with the screw
6.
8. Paint the index motor assembly's connector green.
Apply MOLYKOTE EM-30L to the index motor gear
and the C differential gear.
Size of grain of
rice
1
Torque
0.78 — 1.18 N-m
2
4
6
Torque
1.18 — 1.57 N-m
3
5
Torque
0.59 — 0.78 N-m
1
2
3
1
2
4 3
6 5564
Screw, Pan
M3X4
Screw, Bind
M4X8
Screw, Pan (S/P washer)
M3X6
4 Change box assembly attachment
1. Attach the change box assembly 1 with the 2 screws 1.
*Key point
• Align the change roller 3 with the cam groove 2 on the
change cam.
• Temporarily tighten the screws 1 first. Firmly tighten them
after completing 4 - 19 "Needle position (left/right)".
1
Torque
Hand start
1 1
23
BOLT. (S/P WASHER)
M5X16



 To Next Page