4 - 41
Inspection and
Adjustment
Inspection and
Adjustment
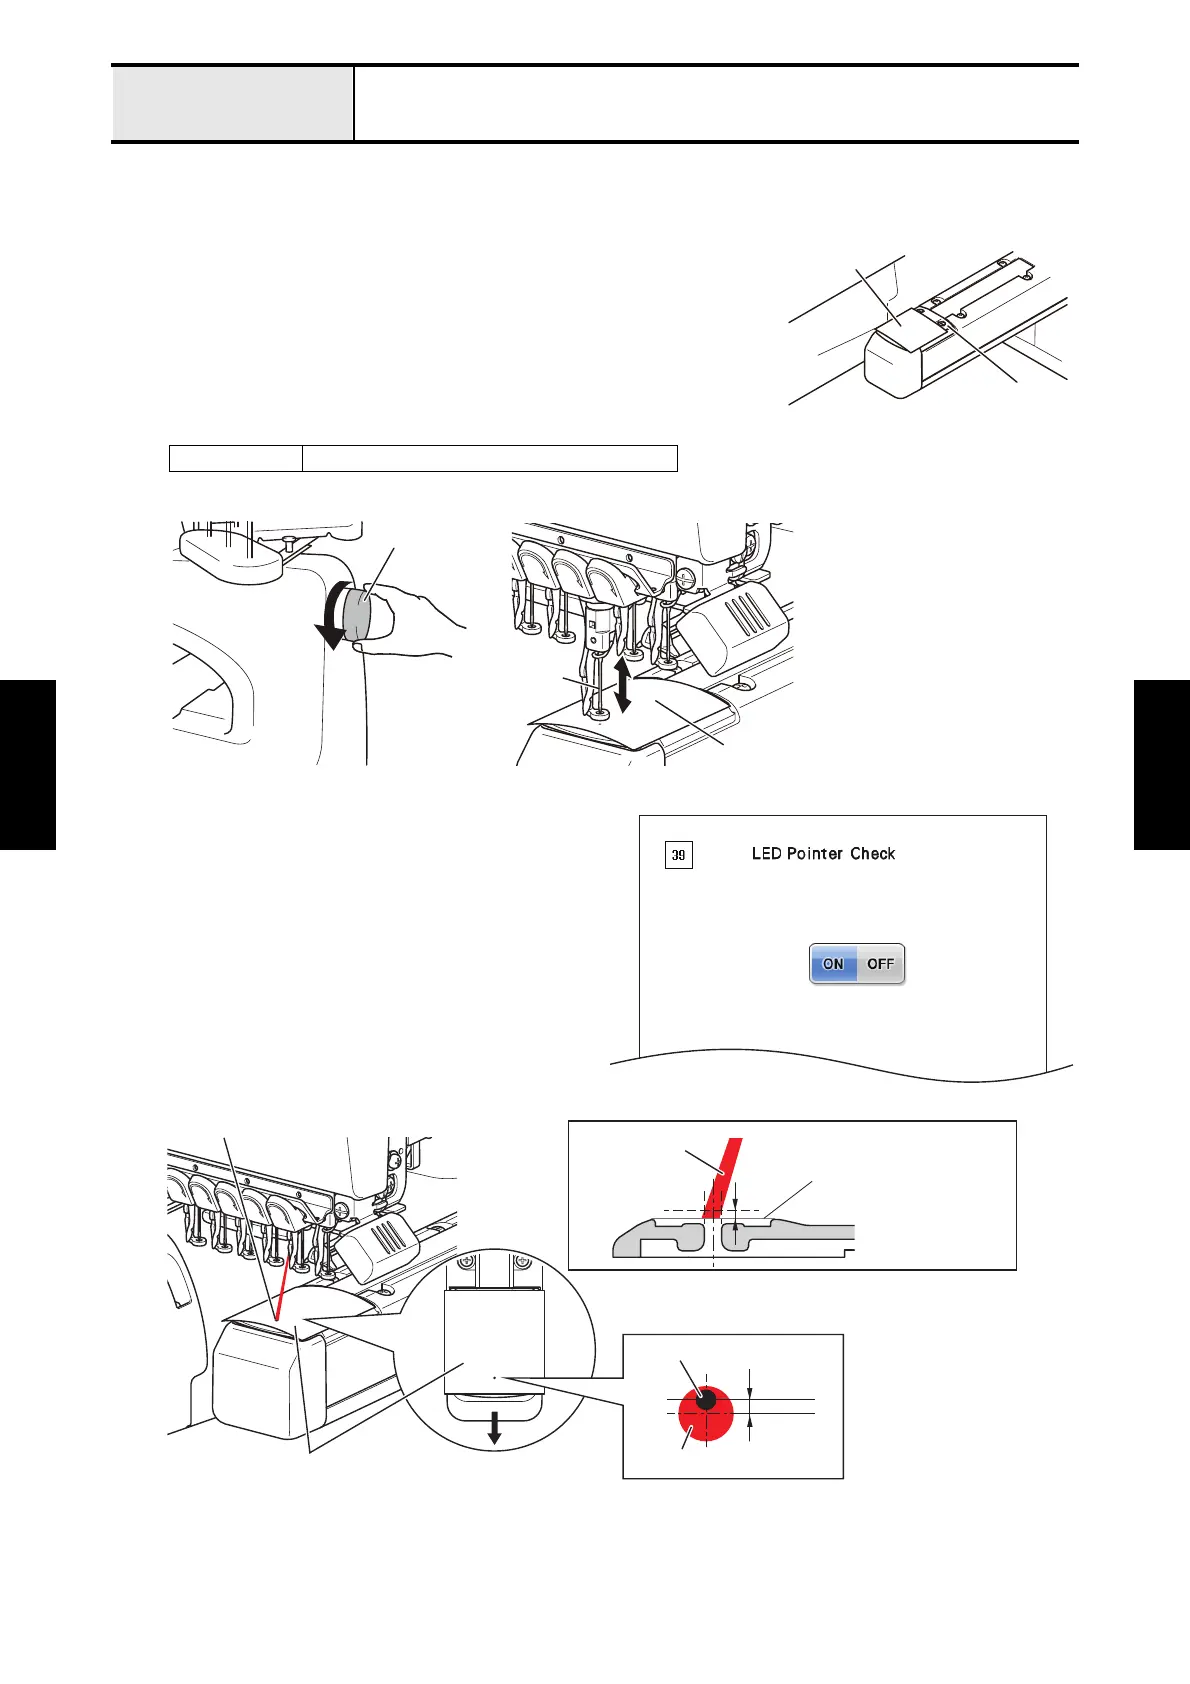
Adjustment LED pointer position
[Standard]
The needle drop point is within a radius of the LED pointer beam.
[Adjustment]
1. Turn OFF the power switch.
2. Attach the needle position detection sticker so that the needle hole on the
needle plate will be completely covered.
*Note
• Needle position detection sticker is an optional accessory.
3. Turn the pulley by hand to pierce the needle position detection sticker by the needle point.
4. Start the test mode and select [#39 LED Pointer Check]
under [PANEL BOARD TEST MODE].
5. Press [ON] on the screen to turn ON the light of the LED
pointer.
6. Check the position of the LED pointer.
*Key point
• Make sure that the center of the pointer is
positioned 0.2mm forward from the center of the
needle drop position. (Fig.1)
• Positions of LED pointer and needle point must
be matched on the cloth surface (1mm above
from the needle plate).
To next page
XE7916001 Needle position detection sticker
Needle position
detection sticker
Needle Plate
Pulley
Needle
Needle position
detection sticke
Forword
Needle position
detection sticker
LED Pointer
0.2mm
LED Pointer
Needle drop position
Fig.1
1mm
LED Pointer
Cross-section drawing of needle plate
Needle position
detection sticker