4 - 36
Inspection and
Adjustment
Inspection and
Adjustment
Adjustment Hoop sensor (A/D value)
6. Attach the tubular round arm set B to the carriage.
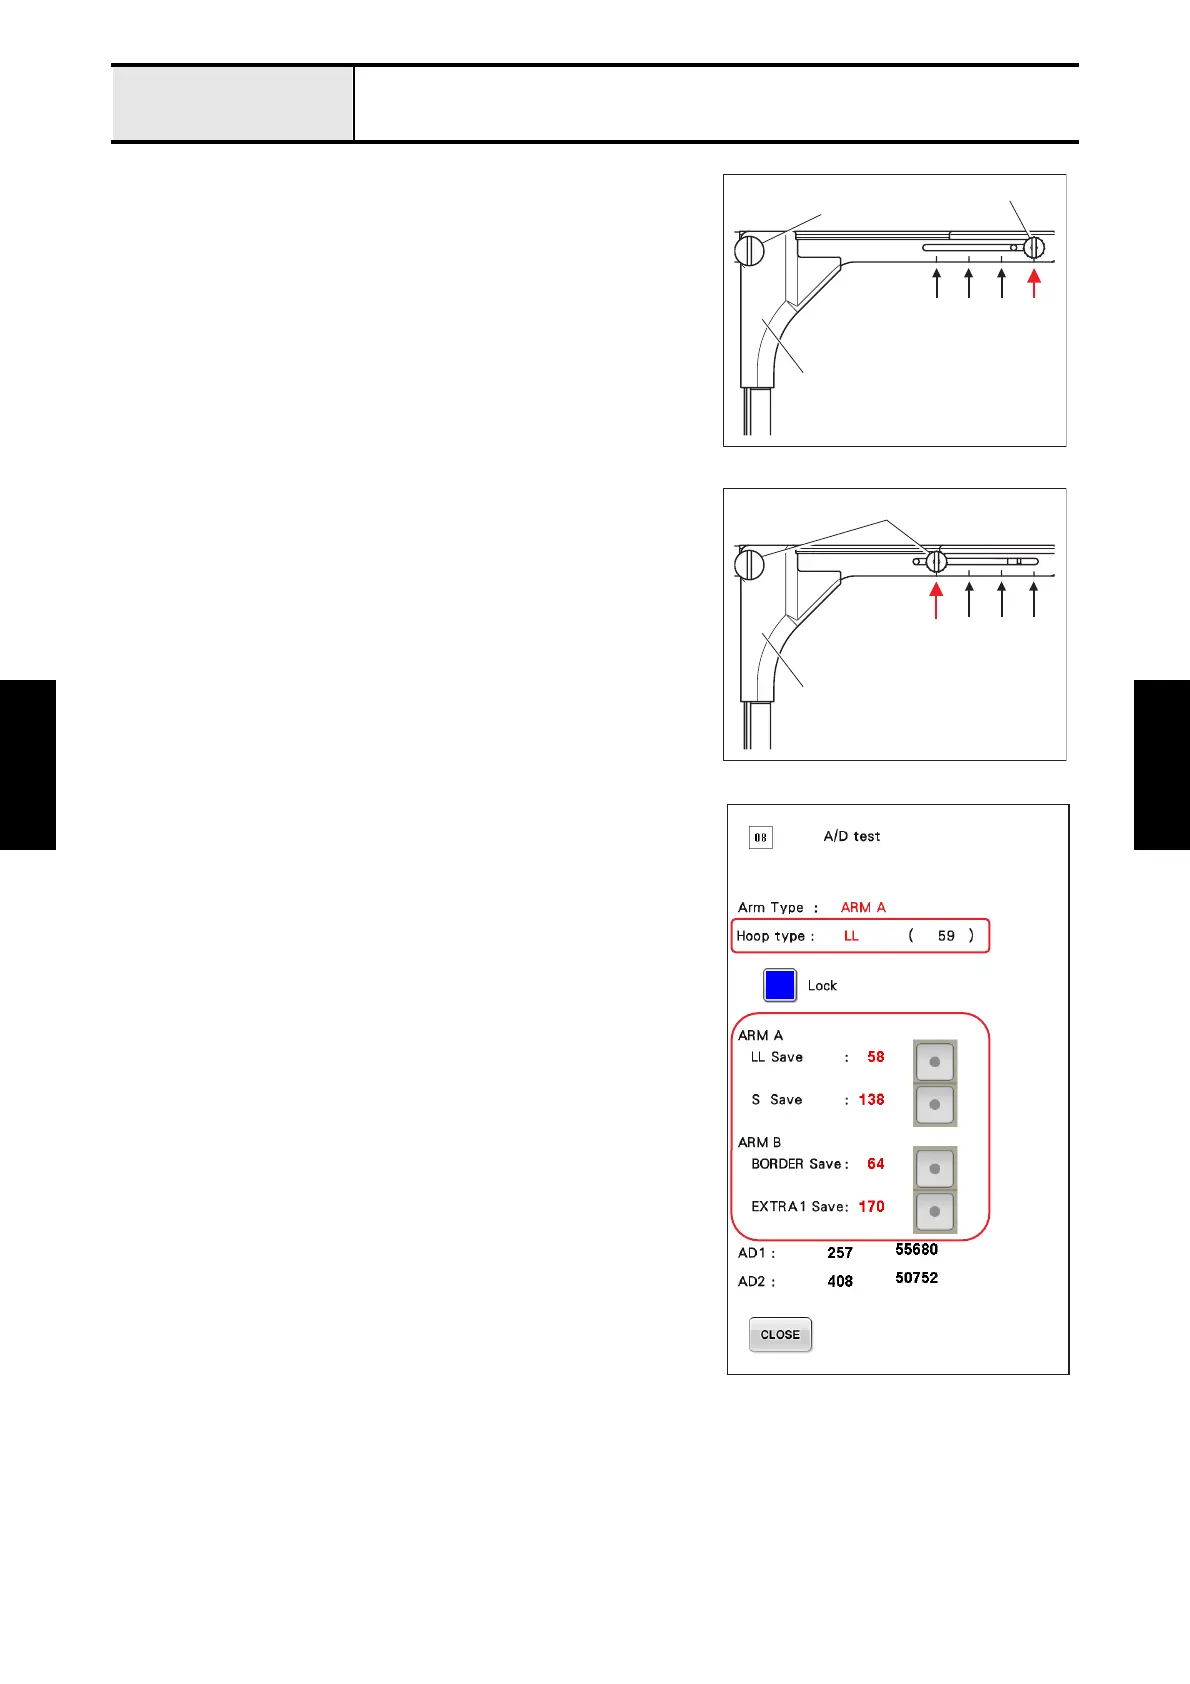
7. Press the [BORDER Save] after attaching the left arm of the
tubular round arm set B to the position 1 (refer to Fig.3) and
tightening the 2 thumb screws certainty.
*Key point
• Save the A/D value of the hoop sensor to the flash memory
the sewing machine at the attachment position
1 of the
BORDER frame.
8. Press the [EXTRA1 Save] after attaching the left arm of the
tubular round arm set B to the position 4 (refer to Fig.4) and
tightening the 2 thumb screws certainty.
*Key point
• Save the A/D value of the hoop sensor to the flash memory
the sewing machine at the attachment position
4 of the
EXTRA1 frame.
9. Attach the other than using frame by above adjustment, and check
that the displayed frame type at the right side of [Hoop type] and
the attached frame type are the same types.
10. If press [Unlock] or [CLOSE] on the screen, lock the A/D value
of the hoop sensor again.
Thumb screw
Arm B
Thumb screw
4 3 2 14321
Fig.3
5 34 33
23
1
Arm B
Fig.4
Thumb screw



 To Next Page