6 - 19
Replacement
Maintenance &
Replacement
Maintenance &
Replacement
Main motor assy
11 12
13
14
15
1
5
4
7
2
3
6
1
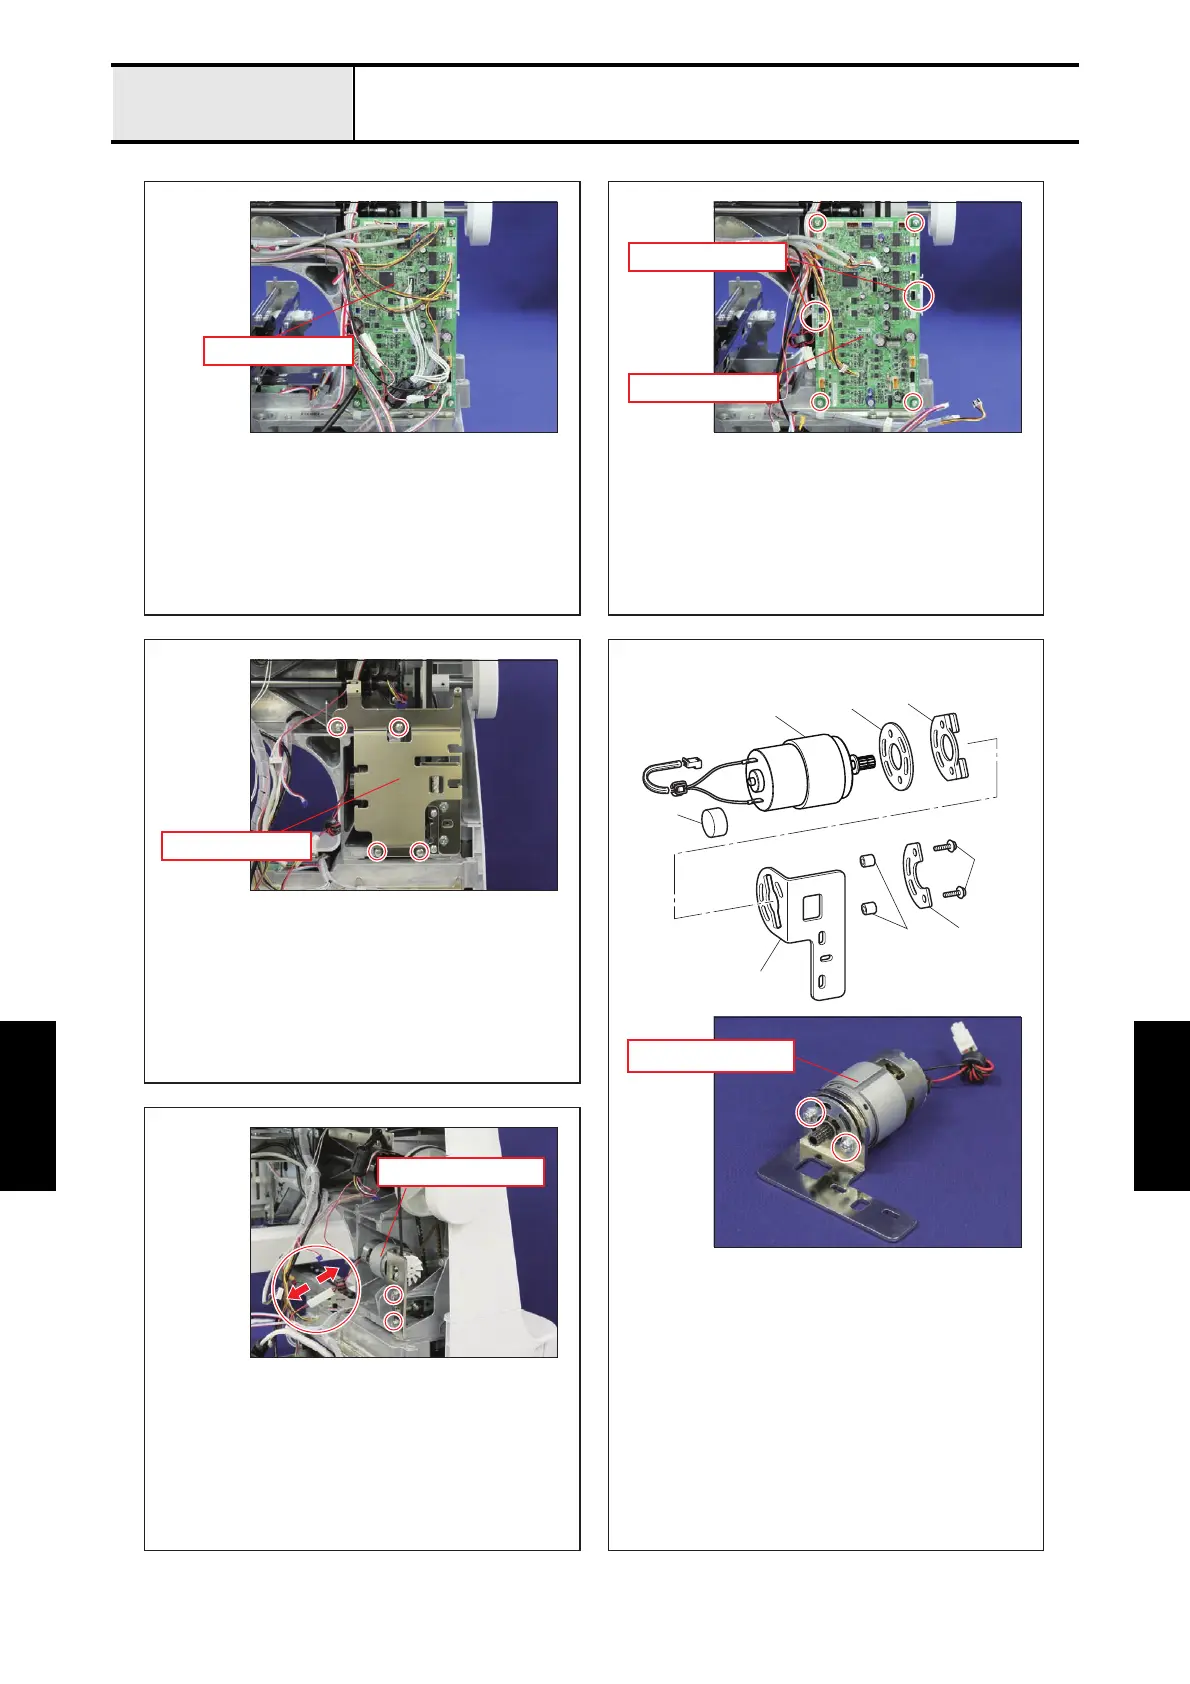
Main PCB assy
Board holder U
Main motor assy
Main PCB assy
PCB supporters
Main motor unit
- Disconnect the all connectors on the main PCB assy. - Remove the 2 PCB supporters.
- Remove the 4 screws, and then remove the main PCB
assy.
- Remove the 4 screws, and then remove the board
holder U.
- Disconnect the connector of the main motor unit.
- Remove the motor fan.
- Remove the T-belt.
- Remove the 2 screws, and then remove the main
motor unit.
Key point
- When using screwdriver, be careful not to damage the
head of the screw.
- Remove the 2 screws 1, and then remove the motor
spacer presser 1, the main motor assy 2 and the
motor holder spacer 3 from the motor holder 4.
- Remove the 2 spacers 4 x 7 5, and then remove the
fender rubber 6 rubber from the motor holder 4.
- Remove the motor cap 7 from the main motor assy
2.



 To Next Page