11
BRAVO Analyzer - User Manual
Safety 1
1.4.5 Enabling / disabling the laser
In the enabled state, the laser is switched on and ready to emit radiation, but it does not
emit radiation. The laser does not emit radiation before the user actively starts a mea-
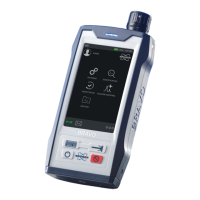
surement by pressing the button at the BRAVO spectrometer or tapping the icon
on the touchscreen display. The duration of the laser radiation emission is automatically
limited to the measurement time. In the disabled state, the laser is switched off. In this
case, a spectroscopic measurement cannot be performed.
1.4.5.1 How to enable the laser
1.4.5.2 How to disable the laser
Enabling the laser
1. Switch on BRAVO by pressing the ON /
OFF button .
➣ After you have switched on BRAVO, the
laser status LED is still off. This indicates
that the laser is not yet activated.
2. Enable the laser by pressing the button
at the BRAVO button panel.
➣ The laser status LED lights blue. This
indicates that the laser is ready for emit-
ting radiation and laser safety status is
OK.
i Before starting a measurement, make sure
that the laser is enabled. When you start a
measurement with a disabled laser,
BRAVO aborts the measurement and
delivers a result of the category Aborted.
The reason stated for the abortion is Laser
not enabled.
Disabling the laser (e.g. in case of emer-
gency)
Press the button at the BRAVO button
panel.
➣ This action switches off the laser i.e. it is
not ready for emitting radiation any
more. As a consequence, the laser sta-
tus LED turns off.
Note: To re-enable the laser, press again the
button
at the BRAVO button panel.