2002 Buell X1: Chassis 2-63
HOME
INSTRUMENT SUPPORT 2.26
REMOVAL
1. Remove four screws and washers to detach windscreen.
2. See
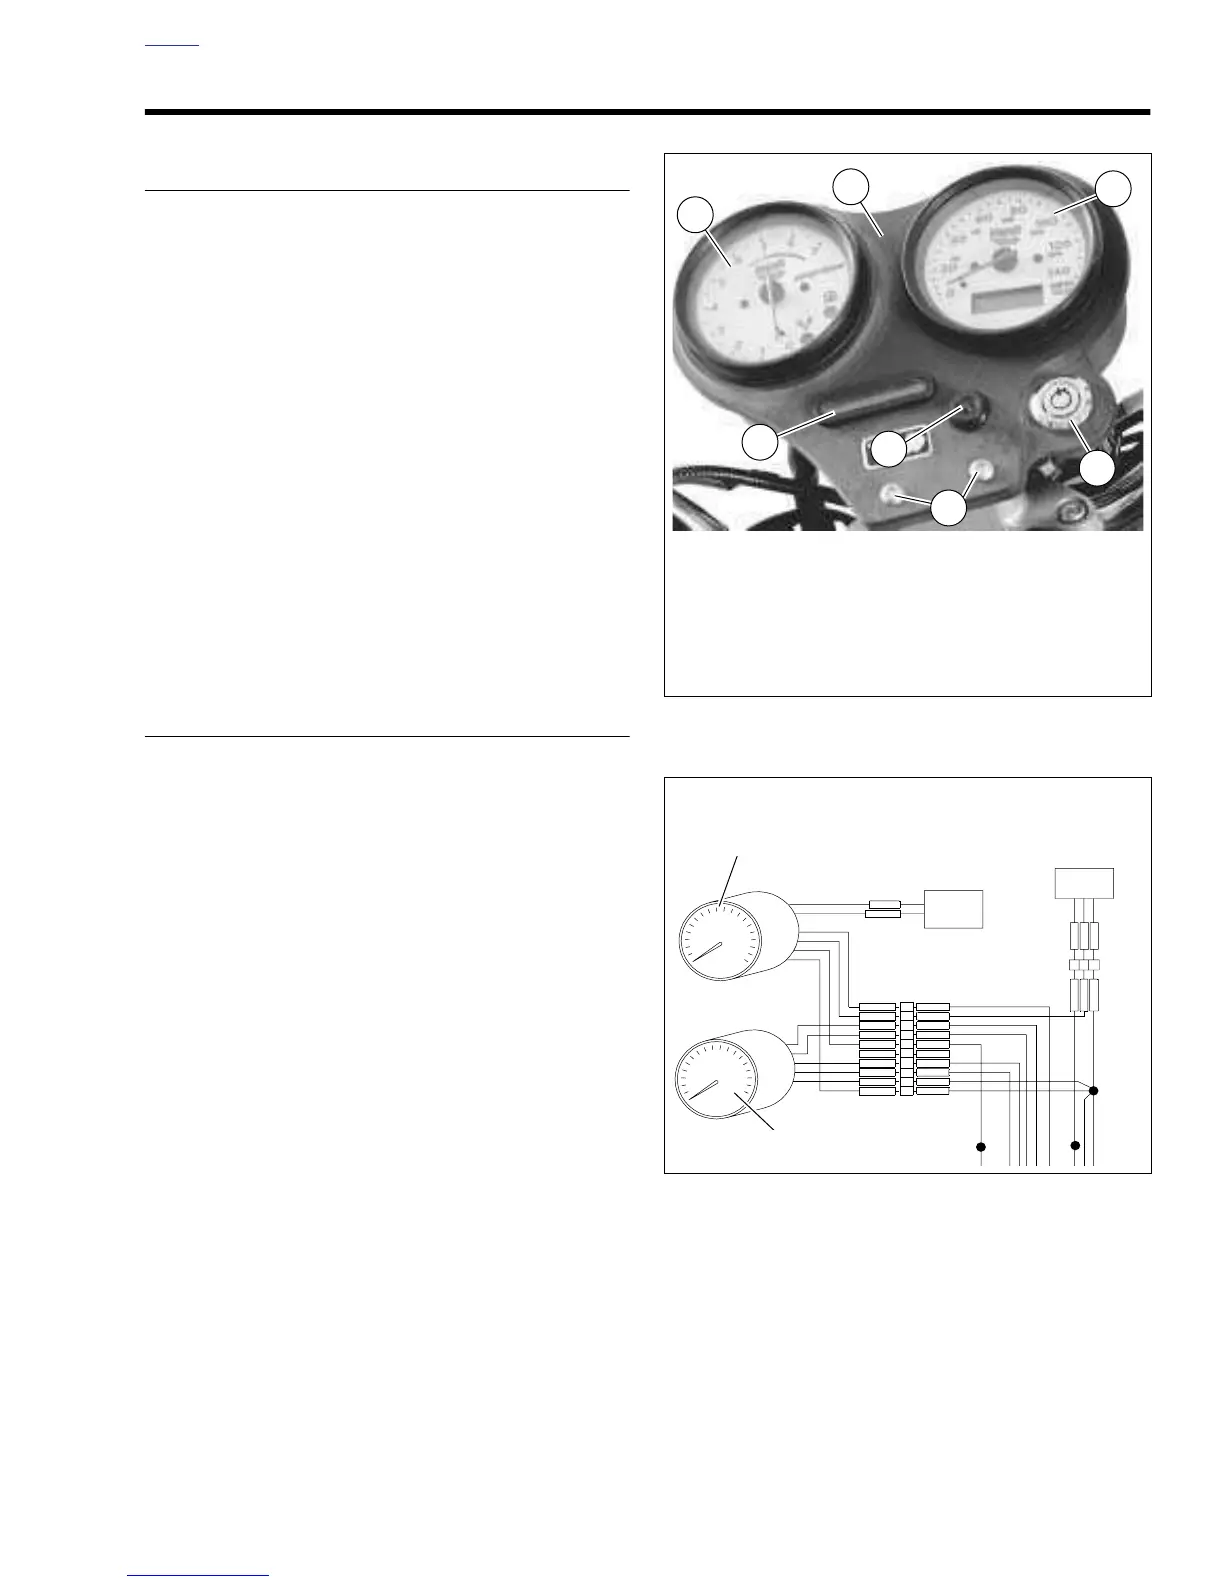
Figure 2-100. Remove speedometer (1) and
tachometer (4). See
7.17 SPEEDOMETER and 7.18
TACHOMETER.
3. Remove face nut (3) from ignition key switch. See
7.3
IGNITION/HEADLAMP KEY SWITCH.
4. Remove indicator lights (5) from instrument support (2).
a. Loosen all four catches on indicator light housing.
b. Remove indicator light housing from behind instru-
ment support.
c. Pull indicator light bezel and graphics panel through
front of instrument support.
5. Pull plastic cap from odometer reset button. Remove but-
ton from behind dash.
6. Remove two screws (6) to detach instrument support
from handlebar clamp.
INSTALLATION
1. See
Figure 2-100. Attach instrument support to handle-
bar clamp.
a. Apply LOCTITE THREADLOCKER 243 (blue) to
both screws (6).
b. Align instrument support on handlebar clamp. Install
two screws.
c. Tighten screws to 4-5 ft-lbs (5-7 Nm).
2. Install odometer reset button.
3. Install ignition key switch face nut (3). See
7.3 IGNITION/
HEADLAMP KEY SWITCH
.
4. Install indicator lights (5).
a. Place graphics panel inside indicator light bezel.
Install parts through front of dash.
b. See
Figure 2-101. Align wire colors on indicator light
housing with correct symbols on graphics panel.
c. Insert indicator light housing into bezel. Secure with
four catches.
5. See
Figure 2-100. Install both instruments. See 7.17
SPEEDOMETER and 7.18 TACHOMETER.
6. Attach windscreen using four screws and washers.
Figure 2-100. Instrument Support
Figure 2-101. Instrument Support Wiring












 To Next Page