2002 Buell X1: Maintenance 1-39
HOME
HANDLEBARS 1.22
INSPECTION
Check handlebar adjustment:
● Before every ride.
1. Check steering motion range to both fork stops. Handle-
bars should not make contact with the front forks or fuel
tank cover.
2. Handlebars should be equally spaced between outside
edge of handlebar clamp and inside edge of mirror
mounts.
If necessary, adjust handlebars as described below.
ADJUSTMENT
11WARNING1WARNING
Handlebars must not touch front forks or gas tank.
Improperly adjusted handlebars may cause loss of con-
trol which could result in death or serious injury.
CAUTION
Never adjust handlebars using excessive force or dam-
age to handlebars might result.
1. Detach windscreen by removing four screws and rubber
washers.
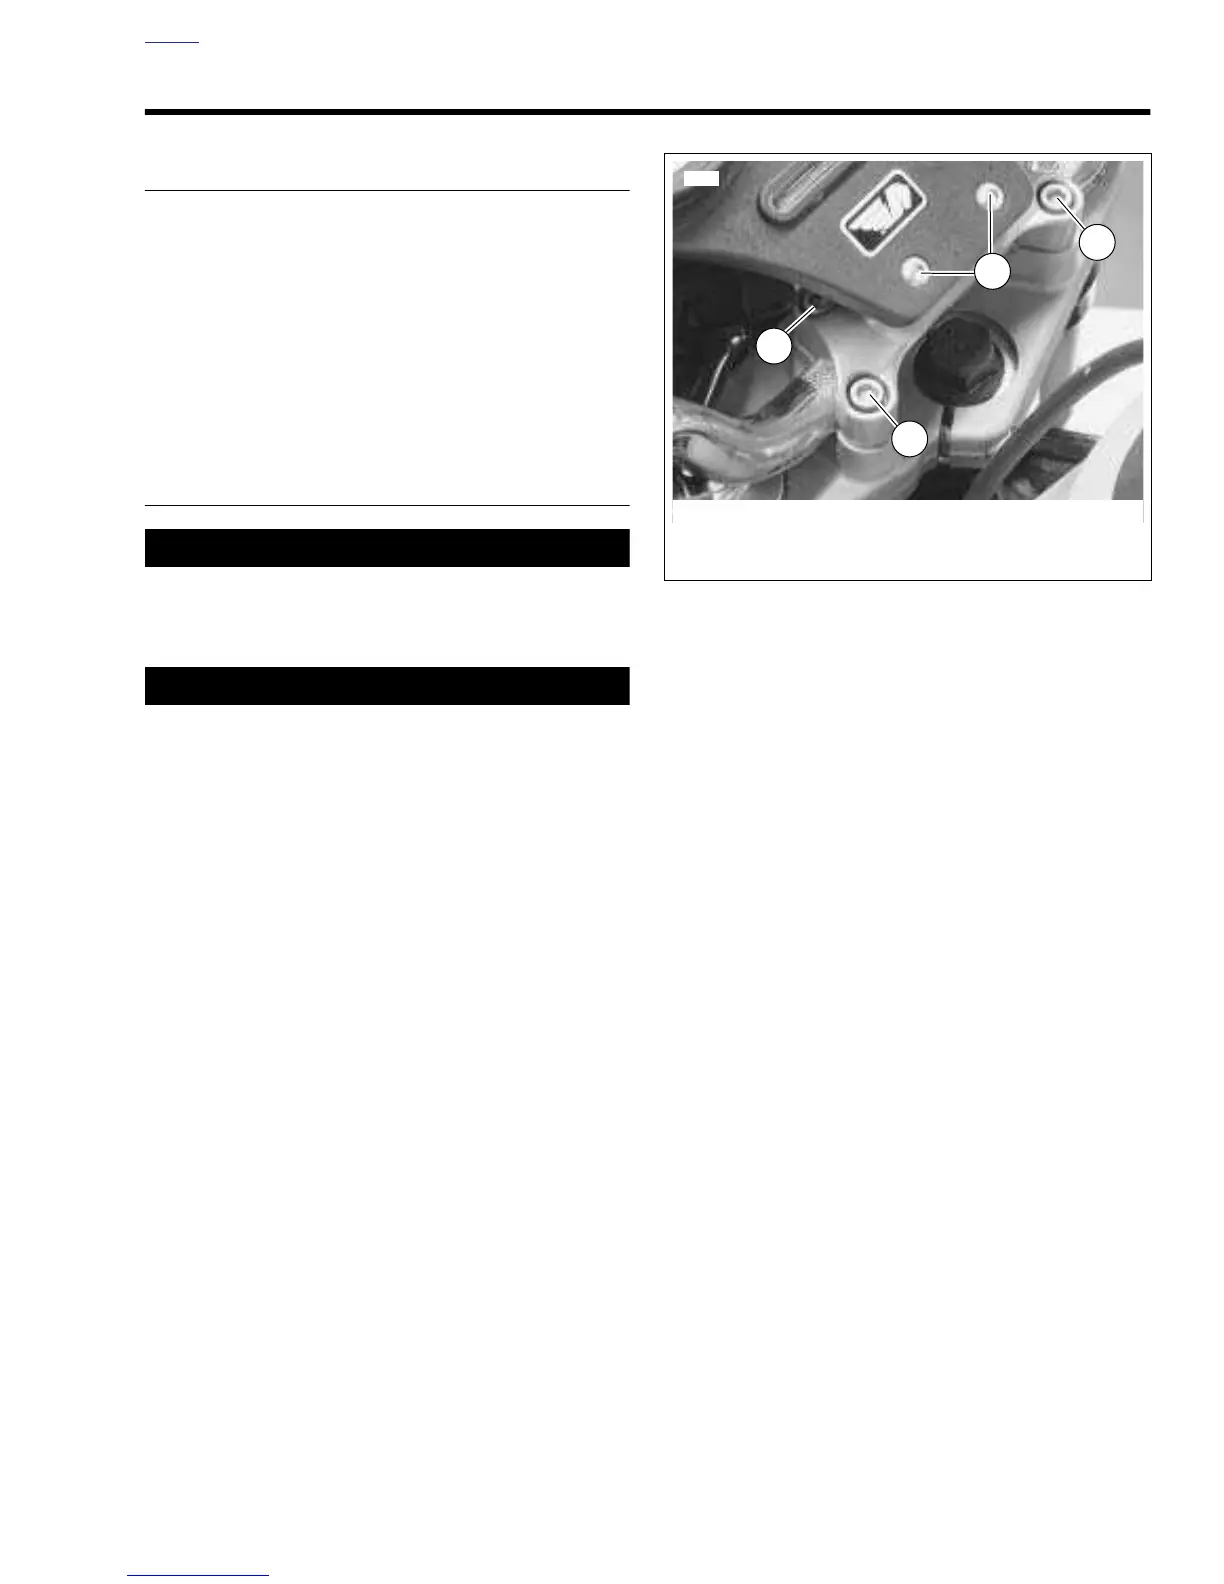
2. See
Figure 1-50. Detach instrument support by removing
both instrument support screws (3).
3. Loosen clamp screws (1, 2).
4. Move handlebar to desired position.
5. Tighten clamp screws to 10-12 ft-lbs (14-16 Nm).
NOTE
First tighten the front clamp screws (1) to 10-12 ft-lbs (14-16
Nm). Once the front clamp screws are tight, tighten the rear
clamp screws to 10-12 ft-lbs (14-16 Nm).
6. Install instrument support and windscreen.
a. Apply LOCTITE THREADLOCKER 243 (blue) to
instrument support screws (3). Tighten to 4-5 ft-lbs
(5-7 Nm).
b. Attach windscreen with four screws and rubber
washers.
7. Check steering motion range to both fork stops. Handle-
bars should not make contact with the front forks or fuel
tank cover. If handlebar needs further adjustment, repeat
adjustment
beginning with Step 1.
Figure 1-50. Adjusting Handlebars