2002 Buell X1: Electrical 7-31
HOME
HEADLAMP 7.11
REMOVAL
Headlamp Bulb
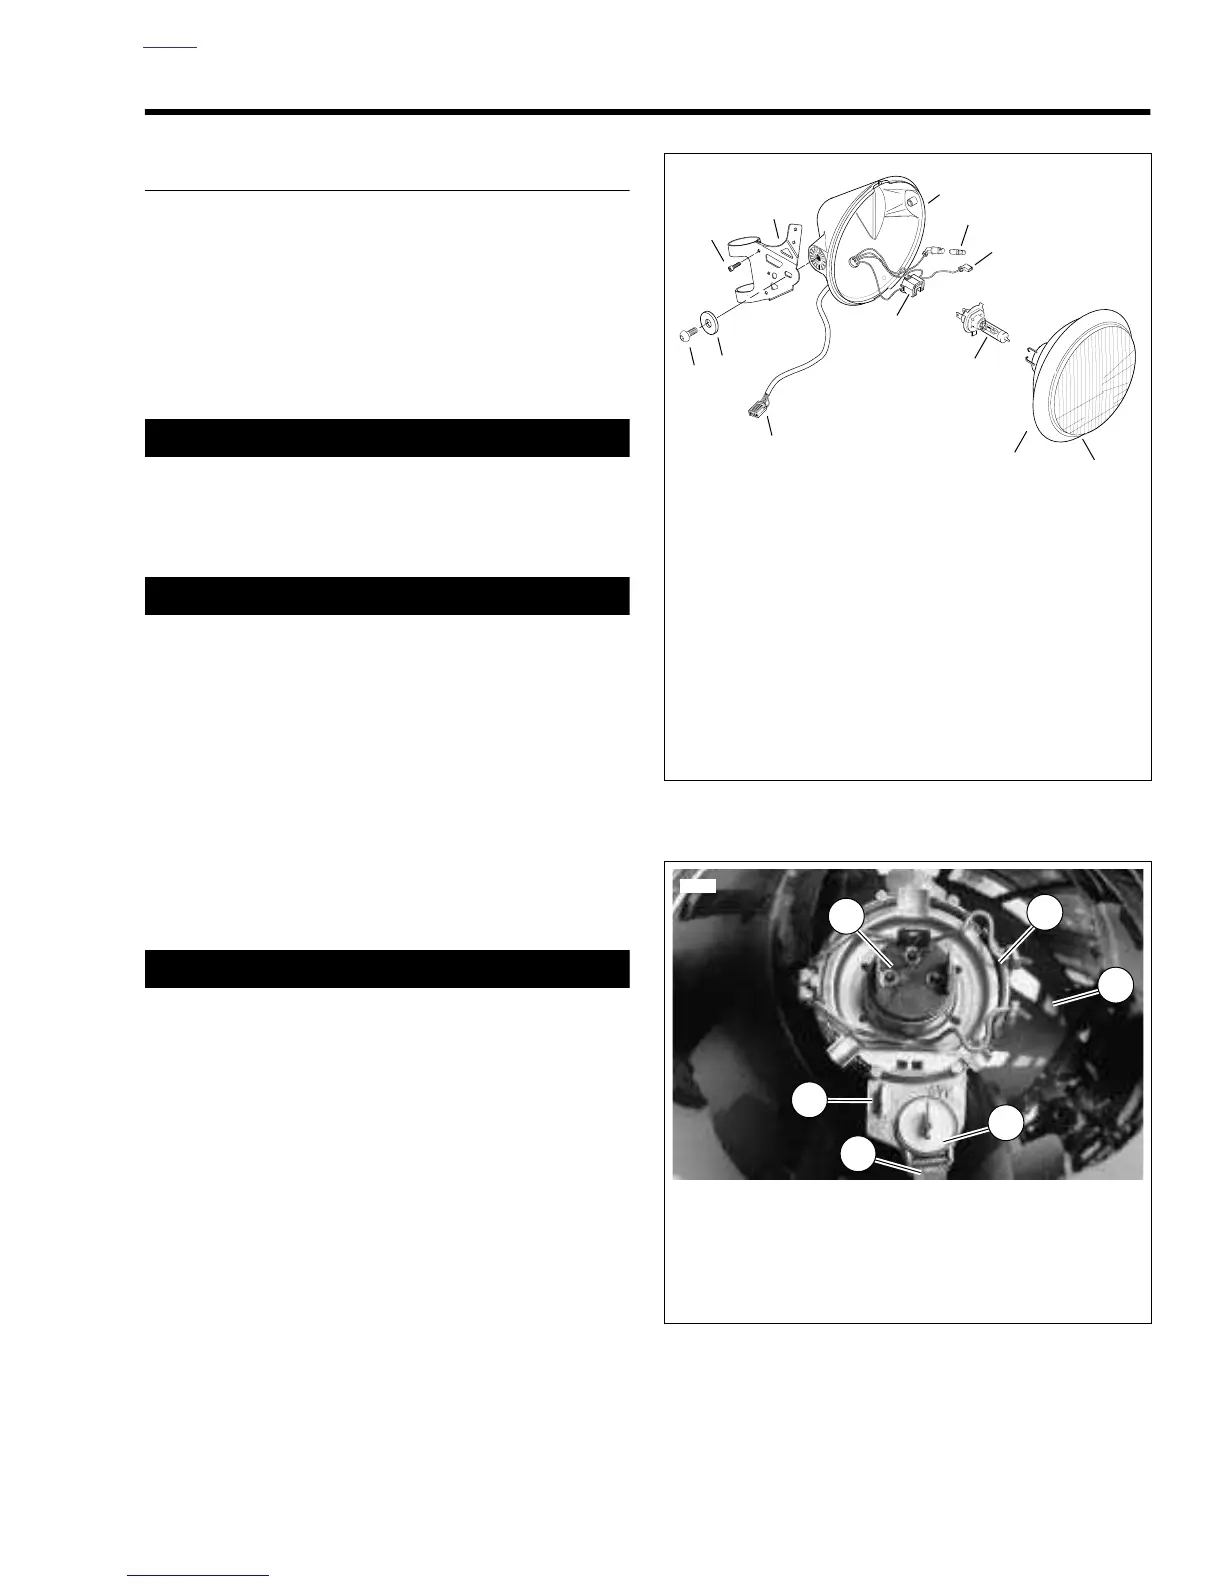
1. See
Figure 7-36. Loosen screw (9) at bottom of head-
lamp.
2. Pry headlamp (8) from headlamp housing (12).
3. See
Figure 7-37. Press retaining clip (4) and remove
position lamp bulb (3) from headlamp. Twist bulb to
remove from harness.
1CAUTION
The bulb contains Halogen gas under pressure. Handle
bulb carefully and wear eye protection. Failure to follow
adequate safety precautions could result in minor or
moderate injury.
CAUTION
Never touch the bulb with your fingers. Fingerprints will
etch the glass and cause the bulb to fail. Always wrap the
bulb in paper or a clean, dry cloth during handling.
4. Remove headlamp bulb (6).
a. Detach headlamp bulb connector.
b. Open wire retaining latch (1).
c. Pull bulb housing from headlamp housing.
5. Disconnect ground wire from headlamp.
Headlamp Housing and Brackets
1. Remove four screws and washers to detach windscreen
from mounting brackets.
1WARNING1WARNING
The gasoline in the fuel supply line downstream of the
fuel pump is under high pressure (49 psi [338 kPa]). To
avoid an uncontrolled discharge or spray of gasoline,
always purge the system of high pressure gas before
attaching fuel pressure gauge. Gasoline is extremely
flammable and highly explosive. Inadequate safety pre-
cautions could result in death or serious injury.
2. Purge fuel line and remove fuel tank. See
4.37 FUEL
TANK.
3. See
Figure 7-38. Cut as many cable straps as necessary
to access headlamp connector [38] along right side
frame tube. Detach connector [38] from wiring harness.
4. See Figure 7-36. Remove screw (1) (metric) and washer
(2) on each side.
5. Remove headlamp housing from vehicle.
6. Remove headlamp brackets.
a. Remove front turn signals. See
7.13 TURN SIG-
NALS.
b. Remove four bolts (3) from weldnuts.
c. Remove front forks and headlamp brackets (4). See
2.16 FRONT FORK.
Figure 7-36. Headlamp Assembly
Figure 7-37. Headlamp Bulbs