2002 Buell X1: Engine 3-51
HOME
DISASSEMBLY
Crankcase Halves
1. Remove cylinder heads. See
3.5 CYLINDER HEAD.
CAUTION
After removing cylinders, install plastic or rubber hose
over cylinder studs. Lifting or moving crankcase by
grasping studs will cause cylinder stud damage.
2. Remove cylinders and pistons. See 3.6 CYLINDER AND
PISTON
.
3. Remove oil pump. See
3.13 OIL PUMP.
4. Remove gearcase components. See 3.16 GEARCASE
COVER AND CAM GEARS
.
5. Remove primary cover and primary drive/clutch compo-
nents. See
PRIMARY CHAIN/DRIVE under 6.5 PRI-
MARY DRIVE/CLUTCH.
6. Remove starter motor. See
5.7 STARTER.
7. Remove transmission. See
6.7 TRANSMISSION CASE.
8. See
Figure 3-76. Remove screws and rear engine mount
bolt securing crankcase halves together.
9. Position crankcase on work bench, gearcase side up.
Ta p crankcase with plastic mallet to loosen top half and
separate the halves.
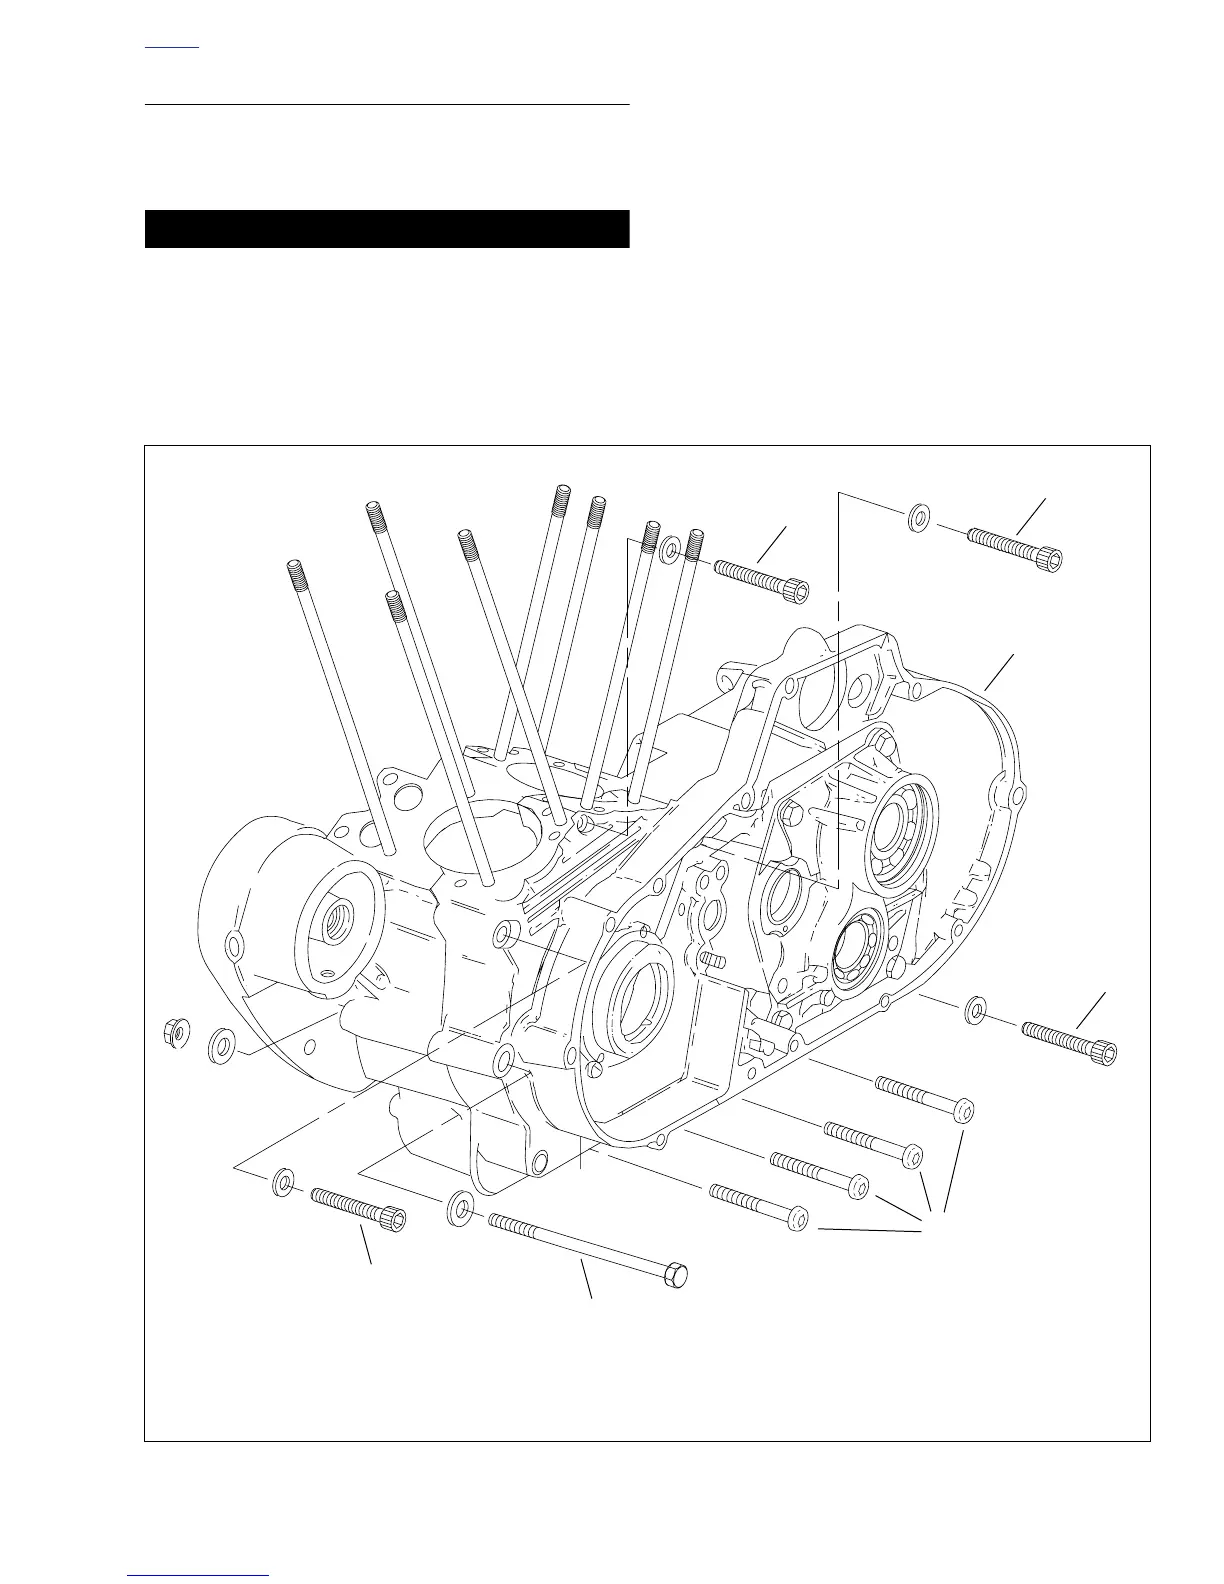
Figure 3-76. Crankcase Hardware (Typical)
1. Crankcase
2. Upper Case Hex Socket Head Screw – 5/16-18 X 2-1/2 in. long (4)
3. Bottom Case T40 TORX Bolt – 5/16-18 X 3/4 in. long (4)
4. Muffler Mount Bolt – 3/8-16 X 5-1/2 in. long (2, with Washers and Locknuts)
b0516x3x
2
2
1
2
2
4
3