2002 Buell X1: Drive/Transmission 6-7
HOME
INSTALLATION
1. Slide a new belt over the sprockets.
CAUTION
● Use caution when installing isolator bolts. Make sure
isolator bolt hole is aligned with threaded hole in
bearing adjusting bolt to avoid cross-threading bolt.
● Observe seam on rubber isolator after isolator bolt
is tightened. If seam twists, apply more LOCTITE
ANTI-SEIZE to underside of isolator bolt heads. Fail-
ure to comply will result in damage to rubber isola-
tors. See Figure 6-9.
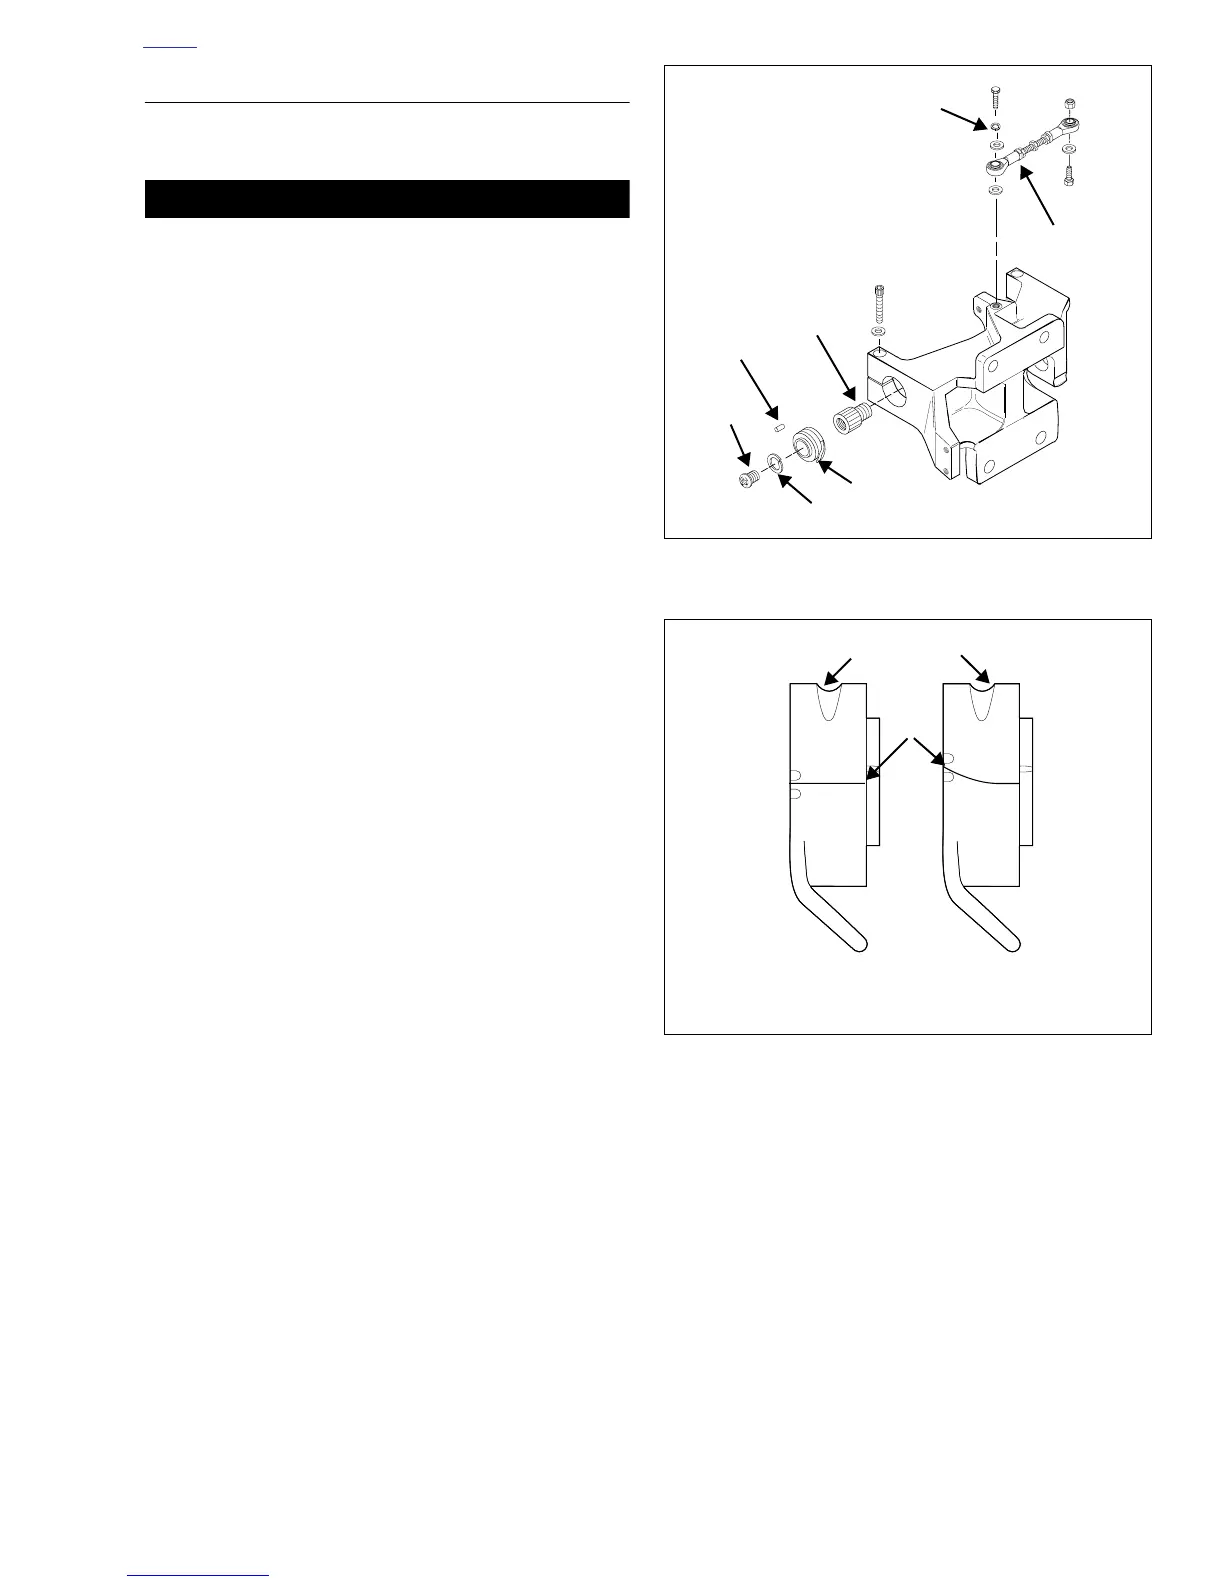
2. See
Figure 6-8. Install right rubber isolator.
a. Apply LOCTITE THREADLOCKER 262 (red) to iso-
lator bolt threads.
b. Apply LOCTITE ANTI-SEIZE to bottom of isolator
bolt head.
c. Align metal pin with frame and hole in isolator.
d. Install isolator TORX bolt and washer through isola-
tors and into the bearing adjusting bolt.
e. Tighten isolator TORX bolt to 63-70 ft-lbs (85-95
Nm).
f. See
Figure 6-9. After tightening TORX isolator bolt,
verify that seam on isolator is perpendicular to swin-
garm mount block.
3. Install rear fender. See
2.32 REAR FENDER.
4. Align the new belt and rear wheel. See 1.11 DRIVE
BELT DEFLECTION
.
5. Install sprocket cover. See 2.30 SPROCKET COVER.
6. See Figure 6-7. Install sideplate and right side passen-
ger footrest mount.
a. Tighten sideplate screws (2) to 19 ft-lbs (26 Nm).
b. Tighten footrest mount bolts (4) to 10-15 ft-lbs (14-
20 Nm).
7. Install chin fairing. See
2.34 CHIN FAIRING.
8. Install stone guard and belt guard. See 2.33 BELT
GUARDS
.
9. Connect the negative battery cable to the battery.
Figure 6-8. Installing Isolators (Typical)
Figure 6-9. Isolator Alignment