2-30 2002 Buell X1: Chassis
HOME
4. See Figure 2-40. Install push rod.
a. Screw push rod into turn buckle.
b. Seat brake pedal height adjustment. See
1.7
BRAKES.
11WARNING1WARNING
Always test motorcycle brakes at low speed after servic-
ing or bleeding system. To prevent death or serious
injury, Buell recommends that all brake repairs be per-
formed by a Buell dealer or other qualified mechanic.
5. Add brake fluid and bleed brake system. See
1.7
BRAKES
.
6. Attach brake reservoir hose to rear brake line with a new
cable strap.
7. Install right side footrest mount. See
2.29 FOOTRESTS.
8. With motorcycle in a level position, check that brake fluid
is between the upper and lower marks on reservoir. Add
D.O.T. 4 BRAKE FLUID if necessary. Be sure gasket
and cap on reservoir fit securely.
11WARNING1WARNING
Check for proper brake lamp operation before riding
motorcycle. Visibility is a major concern for motorcy-
clists. Failure to have proper brake lamp operation could
result in death or serious injury.
9. Turn ignition key switch to IGN. Apply rear brake pedal to
test brake lamp operation. Turn ignition key switch to
LOCK.
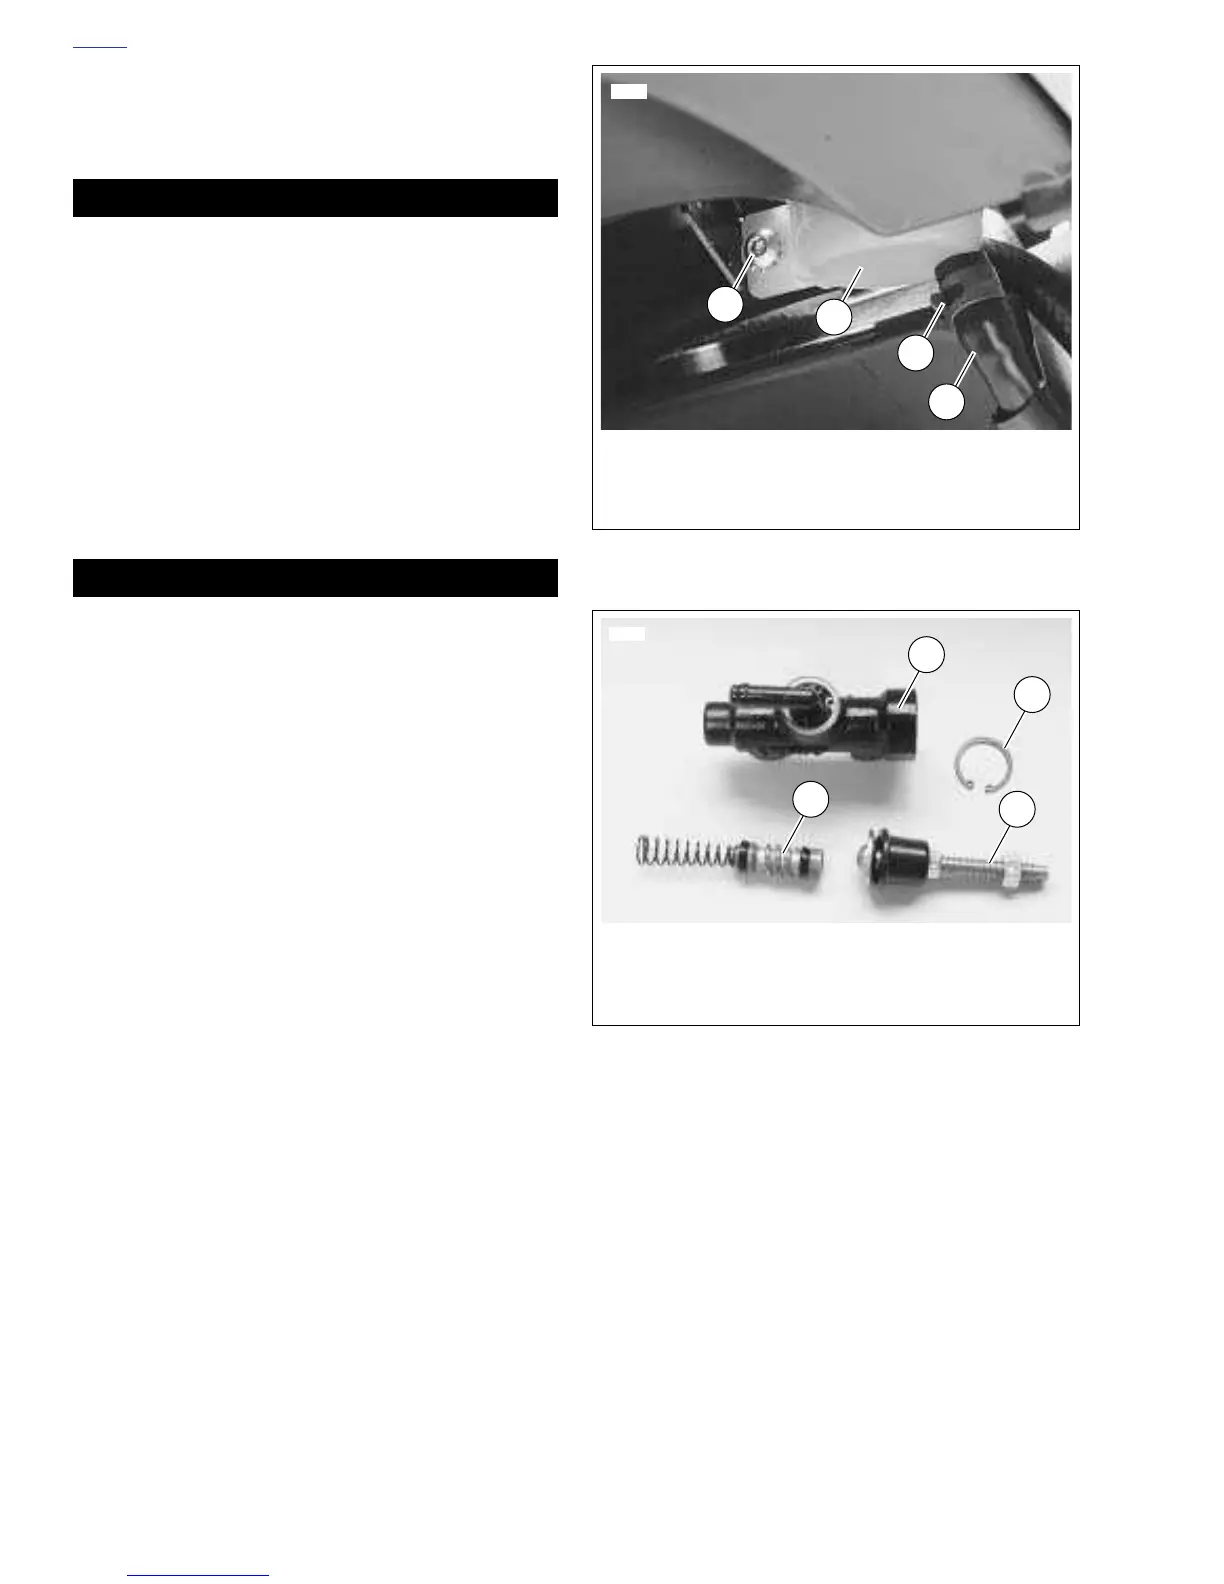
Figure 2-42. Remote Reservoir
Figure 2-43. Master Cylinder Internals
7050
1. Screw and Washer
2. Reservoir
3. Clamp
4. Remote Reservoir Hose
1
2
3
4
6506
1
2
3
4
1. Master Cylinder Body
2. Snap Ring
3. Rod Assembly
4. Piston Assembly